We just love the Bouchon Bakery cookbook, by Thomas Keller and Sebastian Rouxel. It’s full of great recipes that, while they may seem daunting when you first see them, are actually quite achievable by the home baker. And, when you taste some of these creations, you’ll think they’re the best you’ve ever tasted. We’re practicing this particular recipe for a December celebration with family.
You’ll note that we’re splitting this over two days, simply because it takes two days to make the Palet d’Or: it must freeze overnight before applying the glaze coating and decoration. So, today, we’ll cover making the cake and getting it into the freezer, and, tomorrow, we’ll make the glaze and finish the cake. We do list all the instructions in the printable and abbreviated version of the recipe.
So, I’m sure you’re wondering if this is an impossible dessert for you to tackle, and, without knowing your skill level, we can’t answer that; however, with our step-by-step visual guide, you can judge for yourself. We will say that the cake part is simple, the chocolate cream is a bit more involved, the glaze moderately straightforward, and the result is delicious.
Bouchon Bakery’s Palet d’Or — Day 1
Ingredients
For the cake
- Unsalted butter for greasing
- 31 g Dutch-processed cocoa (1/4 cup + 2 Tbs)
- 101 g all-purpose flour (1/2 cup + 3 1/2 Tbs)
- 1/2 tsp baking soda (2.5 g)
- 1/8 tsp baking powder (0.5 g)
- 3/8 tsp kosher salt (1 g)
- 1 large egg (56 g)
- 1/2 tsp vanilla paste or extract (2 g)
- 126 g granulated sugar (1/2 cup + 2 Tbs)
- 86 g mayonnaise (1/2 cup + 2 1/2 Tbs)
- 105 g water, room temperature (1/4 cup + 3 Tbs)
- 25 g Brune Pâte à Glacer or dark chocolate (70% cacao) (0.8 ounce)
For the chocolate cream
- 333 g heavy cream (1 1/4 cups + 3 Tbs)
- 233 g chocolate (64% cacao), chopped (8.2 ounces)
- 1 large egg (50 g)
- 5 egg yolks (100 g)
- 83 g granulated sugar (1/4 cup + 3 Tbs)
For the glaze
- 3 sheets silver leaf gelatin
- 150 g heavy cream (1/2 cup + 2 Tbs)
- 225 g granulated sugar (1 cup + 2 Tbs)
- 180 g water (3/4 cup)
- 75 g Dutch-processed cocoa (3/4 cup + 3 Tbs)
For finishing
- Gold leaf
Instructions
For the cake
- Preheat oven to 325°F. Butter a half-sheet pan, line with parchment, and butter parchment.
- Sift cocoa, flour, baking soda, and baking powder into a small bowl. Add salt and whisk to combine. Set aside.
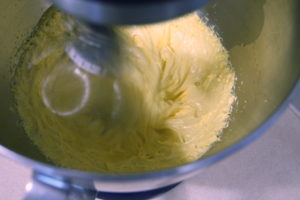
- In the bowl of a stand mixer fitted with the whisk attachment, combine egg, vanilla, and sugar. Mix on medium-low for 1 minute, then increase the speed to medium and whip for 5 minutes. Scrape down sides of bowl and whip on medium-high for another 5 minutes.
- Add mayonnaise and whip in on medium, 1 minute.
- Fold in flour mixture and water in two alternating additions.
- Pour batter into prepared baking sheet and smooth. Bake 10 to 15 minutes, or until the cake springs back when pressed lightly and a skewer inserted into the center comes out clean.
- Let cake cool completely.
- Place a sheet of parchment on the back of a second baking sheet. Run a knife around the edges of the cake and invert onto the second baking sheet. Freeze for about 15-20 minutes.
- Melt the dark chocolate, either in a double boiler over simmering water, or in the microwave using 20-second bursts.
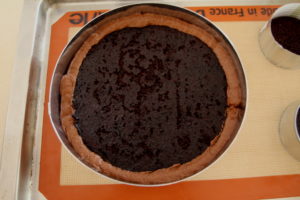
- Cut two 7 1/4 inch disks from the frozen cake and spread each with chocolate. Freeze for 1 hour.
For the chocolate cream
- Freeze the bowl and whisk attachment from a stand mixer.
- Place heavy cream in the stand mixer and whip until it holds soft peaks. Transfer to another bowl and refrigerate.
- Melt the chocolate in a large bowl, either by setting it over simmering water, or by heating it in a microwave in 20-second bursts, stirring between each. Once melted, set aside to cool to 100-120°F.
- Place the egg, egg yolks, and sugar in the bowl of a stand mixer and set over a pan of simmering water. Whisk continuously until the mixture thickens and the temperature reaches 183°F. Immediately place the bowl on the stand mixer fitted with the whisk attachment and whip on high until cool, 7 minutes.
- Stir one-third of the whipped cream into the melted chocolate. Fold in the egg mixture, then fold in the whipped cream. Transfer to a piping bag fitted with a 1/2 inch plain tip.
For assembly
- Place a silicone baking mat on a baking sheet and place an 8-inch by 1 3/8-inch cake ring in the center. Place one cake circle in the center of the ring, coated side down. Pipe chocolate cream around the edge, then, starting at the center, pipe a spiral of chocolate cream to cover the cake evenly. Set the second cake circle on top, pressing down lightly to set it in place, and repeat, using enough chocolate cream to come slightly above the cake ring. Use a straight edge to smooth the cream perfectly flat.
- Freeze for 1 hour, then cover with plastic wrap and freeze overnight.
For the glaze
- Place gelatin sheets in a bowl of ice water.
- In a medium saucepan, combine heavy cream, sugar, and water. Bring to a boil, reduce heat, and cook at a slow boil until reduced by about a third, 15 minutes. You should be able to spoon a bit onto a plate, run your finger through it, and not have the sauce refill the line. Remove from heat.
- Squeeze excess water from gelatin sheets and whisk into the glaze.
For assembly
- Place parchment on a baking sheet, with a rack on top.
- Remove cake from freezer and warm the cake ring with your hands until you can slide it off by pressing the cake through. Set cake on rack.
- Pour glaze through a fine mesh strainer onto the cake, starting about 2 inches from the edge, until completely covered. Tap baking sheet on the counter to smooth the glaze and let set for 5 minutes.
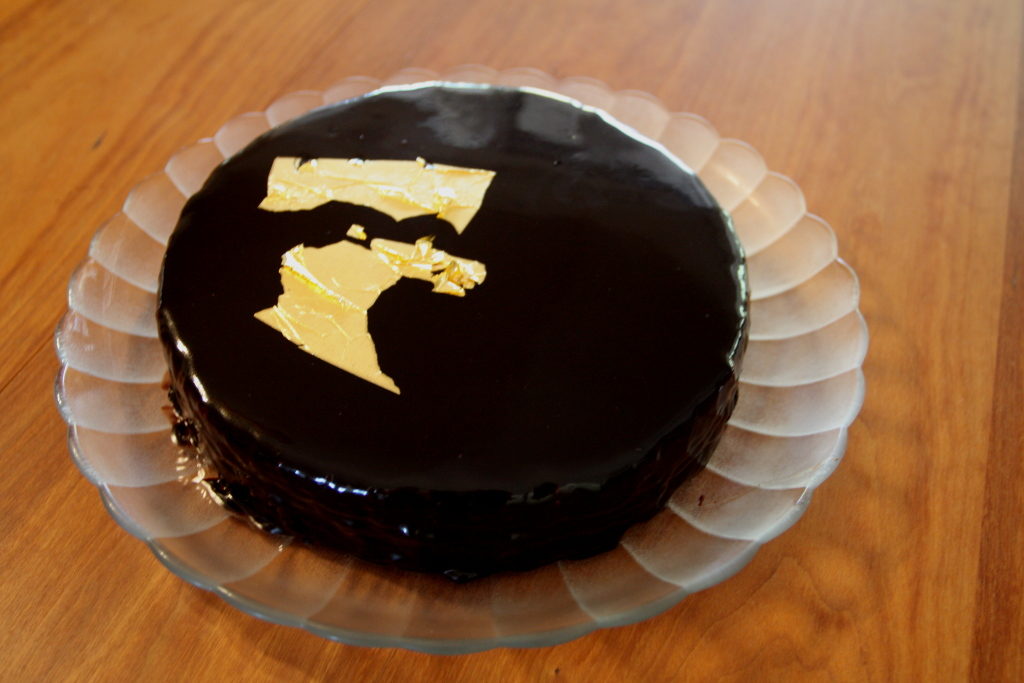
- Using a small paring knife, carefully lift a single gold leaf and place it decoratively on the cake.
- Refrigerate until ready to serve.
Notes
Ingredient discussion:
Well, you have a chocolate cake, with chocolate cream, followed by a chocolate glaze, so, we’re thinking you want a good chocolate. No, scratch that, a great chocolate. We use Valrhona cocoa, which is Dutch-processed or alkalized, so it’s darker — almost black — and less bitter. For the chocolate, we went with Callabaut 70% cacao — we buy it in big — 11 pound — bars. Gelatin sheets: we’ve never used them before, and bought them especially for this cake. We did consider using powdered gelatin or agar-agar, but we went with the original recommendation. Apparently, they come in several strengths, bronze, silver, gold, and perhaps platinum. Choose silver, which is medium strength. You’ll note that all the ingredients are listed in grams and volume; the original recipe suggests that you use only the weights. We measure some by weight and some by volume or count, depending on what works best for us. We list the method we used first.
Procedure in detail:
For the cake:

Preheat oven to 325°F. Butter a half-sheet pan (12×16 inches or thereabouts — ours are 10 1/2×15 1/2 inches), then line with baking parchment. Butter the parchment. This will be a thin cake, so parchment will be vital to get it out of the pan. If you don’t have parchment, waxed paper will work, too.
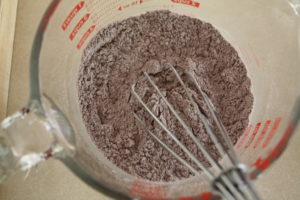
Combine dry ingredients. Sift together the cocoa, flour, baking soda, and baking powder into a small bowl, add the salt and whisk to combine. We know you want to skip the sifting part, but don’t. Cocoa is lumpy and sifting breaks it apart, so find the sifter that’s drifted to the back of the cupboard from lack of use, and get it cranking. Oh, here’s where measuring by weight shines: we simply place the sifter in the bowl, put it all on the scale, hit the tare button to zero the scale, and start adding cocoa to the sifter until we have the correct amount. Then sift. Easy, clean, and quick.
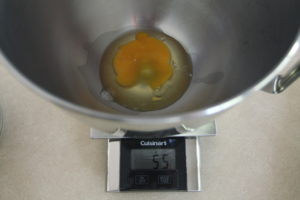
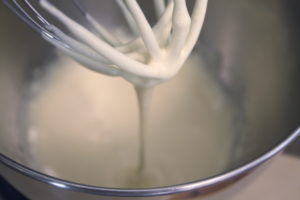
Beat egg, vanilla, and sugar. Set up your stand mixer with the whisk attachment, place the egg (we selected the largest from a dozen), the vanilla, and the sugar in the bowl, and start beating until the sugar is completely incorporated. Once incorporated, increase the speed to medium (right between 4 and 6 of out KitchenAid) and let the mixer run for a full 5 minutes. Be glad you’re not making this cake by hand with a whisk! Stop the mixer, scrape down the sides and bottom of the bowl, then whip on speed 6 for another full 5 minutes. The mixture should be pale, thick, and trail down in ribbons when you lift the whisk attachment.
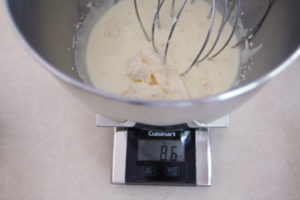
Add mayonnaise. Sure, this might seem odd, but, if you think about what goes into mayonnaise (mainly oil with a bit of egg), then all you’re really doing is adding some emulsified oil. Sure, there’s a bit of vinegar in mayo, too, but often we add a bit of acid — think buttermilk — to make a tender cake. So, it does make sense to add mayonnaise to the mix. Here again, weighing is your best option; just place the bowl on the scale, zero the scale, and add mayo with a spoon until you have what you need. Beat it in on medium for about a minute.
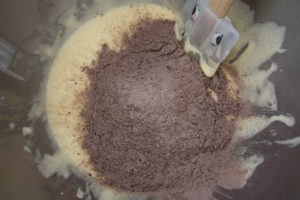
Finish batter. We’ll add the flour mixture and the water, but we want to do it in two additions for each, alternating: half the flour mixture, half the water, remaining flour mixture, remaining water. Use a spatula to fold gently and mix after each addition. Cake batter’s done.
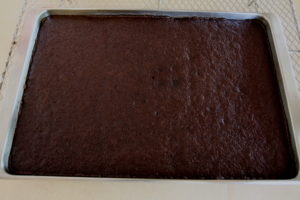
Bake. Pour the cake batter into your prepared pan, spread it evenly, making sure it gets into the corners, and bake for 10 to 15 minutes, or until the cake springs back when lightly pressed in the center, and a skewer inserted into the center comes out clean.
Cool. Place the cake on a rack and allow it to cool completely.
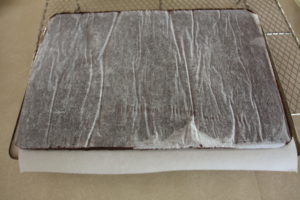
Remove cake. You now know how thin this cake is: about 1/4 of an inch, so you need to use care while removing it. Place a piece of parchment on the back of a second baking pan, run a knife around the edge of the cake, then place the second baking pan on top, with the parchment covering the cake. Lift everything and flip over. The cake should come out in one nice piece on the back of a baking pan. To make it easy to cut, place it in the freezer for 15 to 20 minutes.
Melt chocolate. Place the 25 grams of chocolate in a small bowl and microwave it in 20-second bursts, stirring in between. Once melted, stir until smooth and lump free.
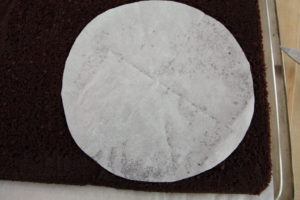
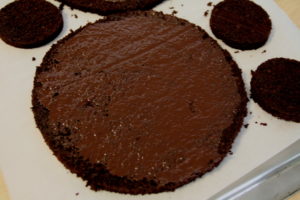
Cut and coat. Take the cake from the freezer and cut two 7 1/4 inch circles. We used a circular template that we cut from parchment to guide us. We placed it on the cake and ran a sharp knife around the edge. The remaining cake is for you to eat to keep up your stamina. Or, if you’re ambitious, cut four smaller circles with a biscuit cutter and try your hand at making a couple of miniature Palet d’Ors (we cut a can in half to use as our mini cake rings). Once cut, spread a thin layer of the melted chocolate on each of the cake circles.
Freeze. Place the coated cake circles in the freezer and let them freeze solid, about an hour. Don’t worry, you’ll be busy making the chocolate cream.
For the chocolate cream:
Freeze bowl. Place the bowl and whisk attachment (of course, clean them after making the cake) into the freezer to chill. This might not be necessary, but we always freeze both before whipping cream. We find that it whips faster and is less likely to turn into butter. But, that’s just us. If you don’t want to freeze the equipment, don’t blame us when you have a small batch of butter.
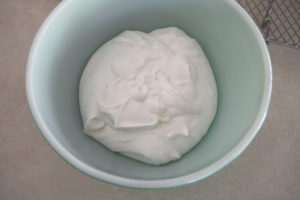
Whip cream. Pour the heavy cream into the chilled bowl and whip on high until it holds soft peaks, about 1-2 minutes. Transfer to another bowl and refrigerate; you’ll be needing the mixer bowl and whisk attachment again, so give it a good wash.
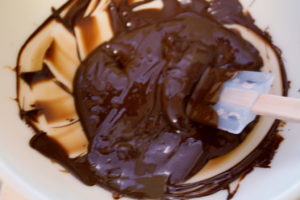
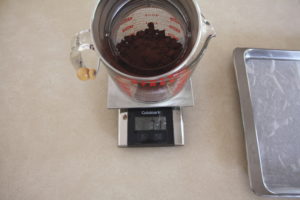
Melt chocolate. Place the chocolate in a large microwave- proof bowl and melt, using the microwave in 20-second bursts and stirring between each. Once melted, stir it until smooth, then let it cool down to 100-120°F. Don’t worry, it won’t solidify.
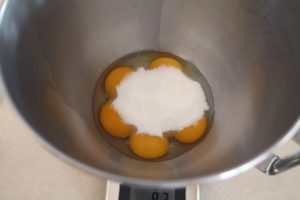
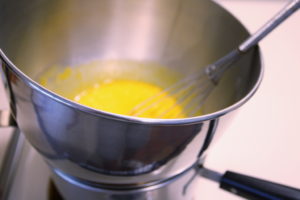
Cook eggs and sugar. Place the egg, the egg yolks, and sugar in the mixer bowl and set it over a pan of simmering water. Whisk continuously until the mixture becomes thick and pale in color, and, if using a thermometer, reaches 183°F. It was troublesome to hold the thermometer, the pan, the bowl, and whisk at the same time, but we weren’t sure how thick the mixture would get, and we didn’t want to cook it so long that the eggs would scramble, leaving bits, so we did it. We know now that the mixture thickens to something resembling a pudding, so, next time, we’ll risk omitting the thermometer. As soon as the mixture hits 183°F, transfer the bowl to the stand mixer and whip on high for 7 minutes, or until the mixture is completely cool.
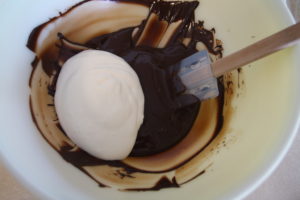
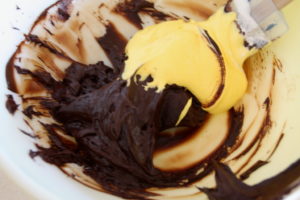
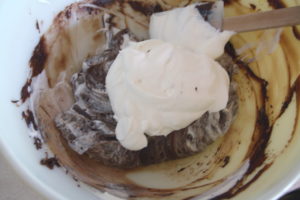
Finish cream. All the components for the cream are ready; now we need to fold them together. Stir about a third of the whipped cream into the chocolate, fold in the egg mixture, then fold in the remaining whipped cream. Taste and declare it delicious. Transfer to a piping bag fitted with a 1/2-inch plain tip.
For assembly:
Surround with cream. Line a baking sheet with a silicone baking mat and center the cake ring. Place one of the cake circles in the center, with the coated side on the bottom, leaving a gap all around the edge. Using the piping bag, fill this gap with chocolate cream.
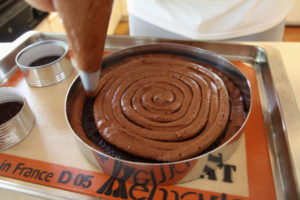
Cover with cream. Starting at the center of the cake, pipe a spiral of chocolate cream over the cake in an even layer.
Add second layer. Place the second cake on top, lightly pressing it into the cream, and repeat, piping the cream to encase it in chocolate goodness. On this second round, pipe enough cream so that it stands just slightly above the cake ring.
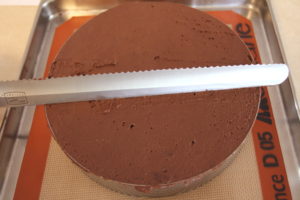
Smooth. Use a straightedge to smooth the chocolate cream across the top. We used the back of a large serrated bread knife, but, if you have a long icing spatula, that should work just fine. If you need to do so, pipe a bit more cream to fill in the low spots and smooth again. Try for a very smooth surface, as it’ll be covered with a shiny glaze. Refrigerate the excess chocolate cream.
Freeze. Place the cake in the freezer and let it freeze for about an hour. Check to see if the center has sunk in, and, if so, fill with the reserved chocolate cream and smooth again. Once the chocolate cream hardens a bit, cover with plastic wrap and let the cake freeze overnight.
All right, we’re finished with day one. Making this cake is great because it shows off the second-most used piece of equipment of the pastry chef: the freezer. Once frozen, we’ll slide the ring off, and drizzle with the glaze, but that all comes tomorrow. So, for the rest of the day, relax, enjoy and adult beverage, and be proud of the great job you did!
