
No, not from cats. No, not for cats either. But shaped to look, vaguely, like the tongue of a cat. We wanted a less sweet, little treat one day, so we decided that we’d try these little cookies. Sure, you can eat them plain, but you can also make sandwich cookies, by spreading a small amount of jam between the layers, and even, if you’re so inclined, dipping one end in chocolate. We were up for that!
This is a modification of a recipe that we found at Cats’ Tongues Cookies; we changed it just a bit, and gave it some weight measurements. It originally had the vague instruction: “If dough seems too soft, add a bit more flour.” Now, we don’t know about you, but we work with doughs that range from semi-liquid and unable to hold a shape, to doughs to which you really need to apply some pressure to shape. So, what is “too soft?” Don’t worry, we won’t be having any of that here; we don’t think the Editor-in-Chief would allow it to pass without some scrutiny.
Now, if you have a scale, use it; if not, do the best you can. Either way, let’s scratch out some cats’ tongues.

Cats’ Tongues Cookies
Ingredients
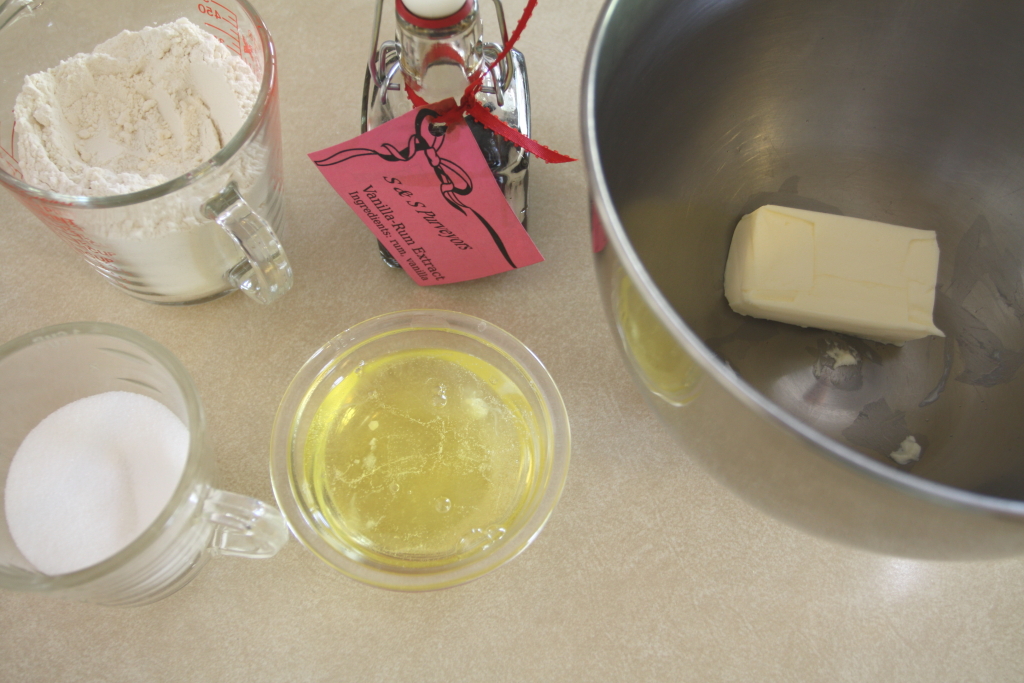
- 100 g unsalted butter, room temperature (7 Tbs)
- 100 g granulated sugar (1/2 cup)
- 3 egg whites ideally 100 g
- 200 g all-purpose flour (scant 1 1/2 cups)
- 1 1/2 tsp vanilla extract
- 1/3 cup raspberry jam optional
- 4 ounces dark chocolate optional
Instructions
- Preheat oven to 400°F. Line baking sheets with parchment or silicone baking mats.
- In the bowl of a stand mixer fitted with the paddle attachment, cream butter on medium until smooth and glossy. Slowly add sugar and cream until light and fluffy, about 5 minutes.
- Add egg whites in 3 additions, beating on medium until completely incorporated before adding the next bit.
- Turn off mixer, add about a third of the flour, then beat on low until just incorporated. Repeat adding thirds of the flour, twice more.
- Add vanilla and mix on low until incorporated.
- Transfer batter to a piping bag fitted with a 1/4-inch round tip.
- Pipe out 2-inch long strips onto baking sheets, leaving an inch of space in between.
- Bake 11-12 minutes, or until lightly golden. Remove from sheets and cool completely on racks.
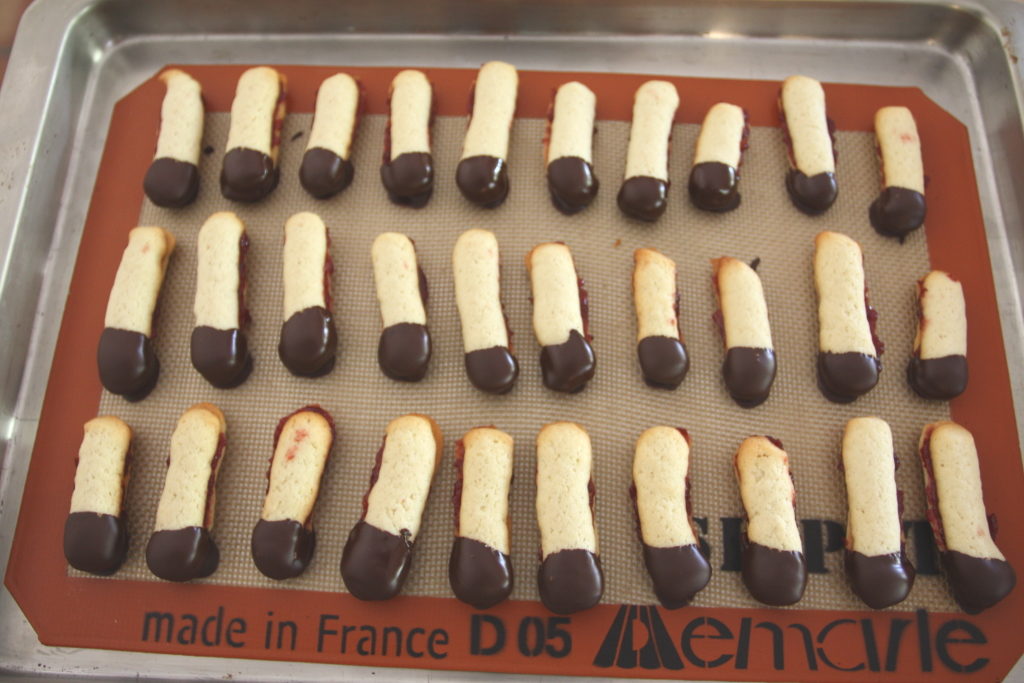
- If desired, melt chocolate in a double boiler set over -- not in -- simmering water. Then spread jam on the bottom of a cookie, press another cookie onto the jam, and dip in chocolate. Set on lined baking sheets, and refrigerate until chocolate is hardened.
Ingredient discussion:
For the raspberry jam, we used our own Raspberry Lambic Jam, wonderfully tart and loaded with raspberry flavor. If you need to buy some, look for seedless jam, as it’ll be easier to spread on the cookies. For the chocolate, we never skimp, so we get the best we can. For us, that’s Callabaut 70% cacao in the 5 kg (11 pound) bar. And, imitation vanilla doesn’t hold a candle to the real deal. Finally, egg whites. Use good eggs and separate the eggs when cold, but let the whites warm to room temperature (save the yolks for something else: we made Lemon Pepper Fettuccine) .
Note that the ingredients are listed by weight: 100g butter, 100g sugar, 100g egg whites, 200g flour. It’s like chemistry class all over again. But, baking is just applied chemistry, so it shouldn’t be surprising. The most important thing to remember is that, if you keep these ratios, your cookies will have the same consistency from batch to batch. So, you could weigh the egg whites, then scale everything else around that value, and you’ll avoid that “If dough seems too soft, add a bit more flour.”
Procedure in detail:
Preheat oven to 400°F. Line two baking sheets with silicone baking mats, parchment, or apply a light coating of shortening.
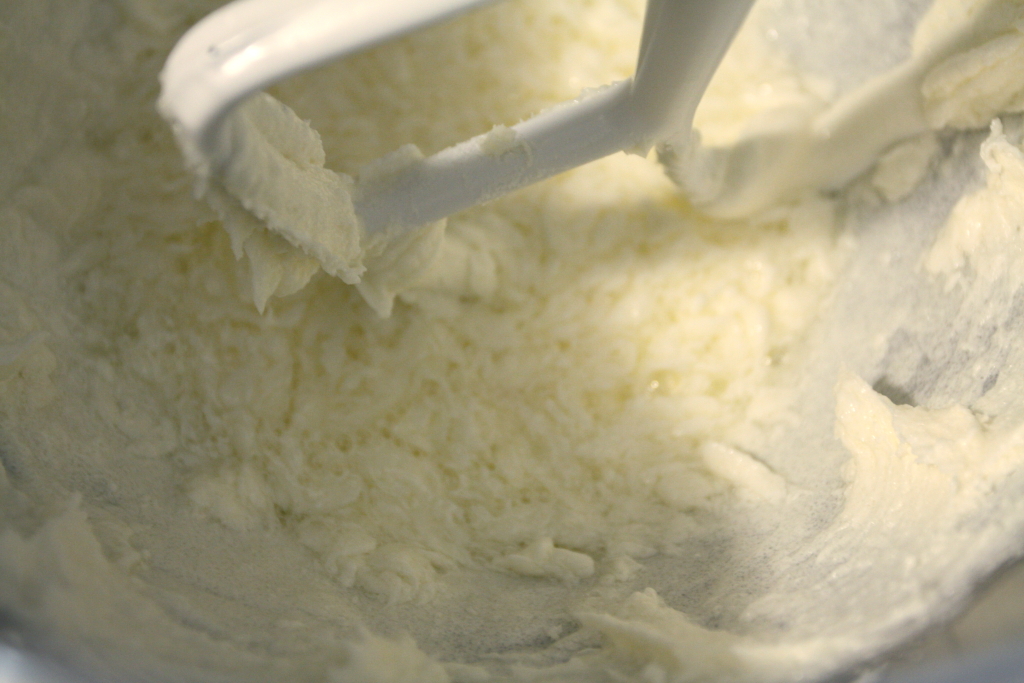
Cream butter. Place the butter in the bowl of a stand mixer and beat on medium speed until smooth and glossy. If your butter is room temperature, this should take under a minute. Otherwise, let your butter warm some more and try again.

Add sugar. With the mixer running on medium, slowly add sugar to the butter. The sugar crystals will start to behave like small whisks, folding air into the butter: it’ll become light and fluffy. Let the mixer run until the butter sugar mixture is pale and fluffy. This can be as long as 5 to 7 minutes.
Add egg whites. With the mixer still on medium, add the egg whites in thirds, or about one white at a time. Don’t fret over the exact amount, but do make sure that each addition is fully incorporated before adding the next. The batter will look like it’s curdled while the egg whites are being incorporated. This is normal.
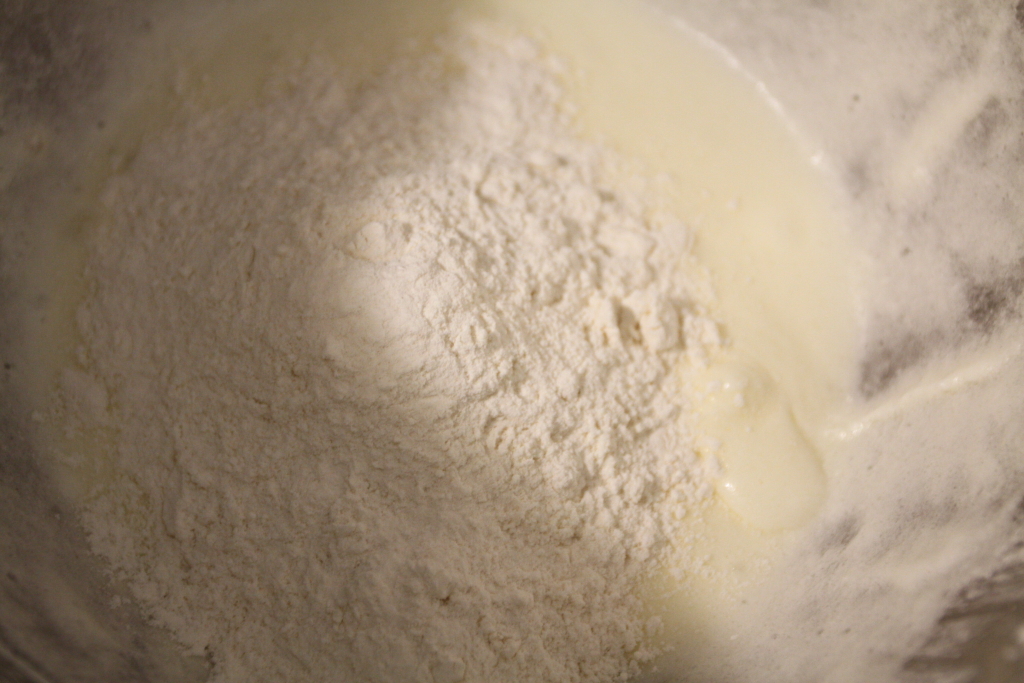
Add flour. We’ll add the flour in three equal additions, too, mainly to prevent the flour from puffing out all over the counter. So, turn off the mixer, add the flour, then run the mixer on low until the flour is just incorporated. Then repeat twice more with the remaining flour. In between additions, scrape down the sides of the bowl with a spatula.

Add vanilla. Add the vanilla, run the mixer on low, and mix until just incorporated. There, the batter is done, and is the right consistency, because we used the correct amount of ingredients.
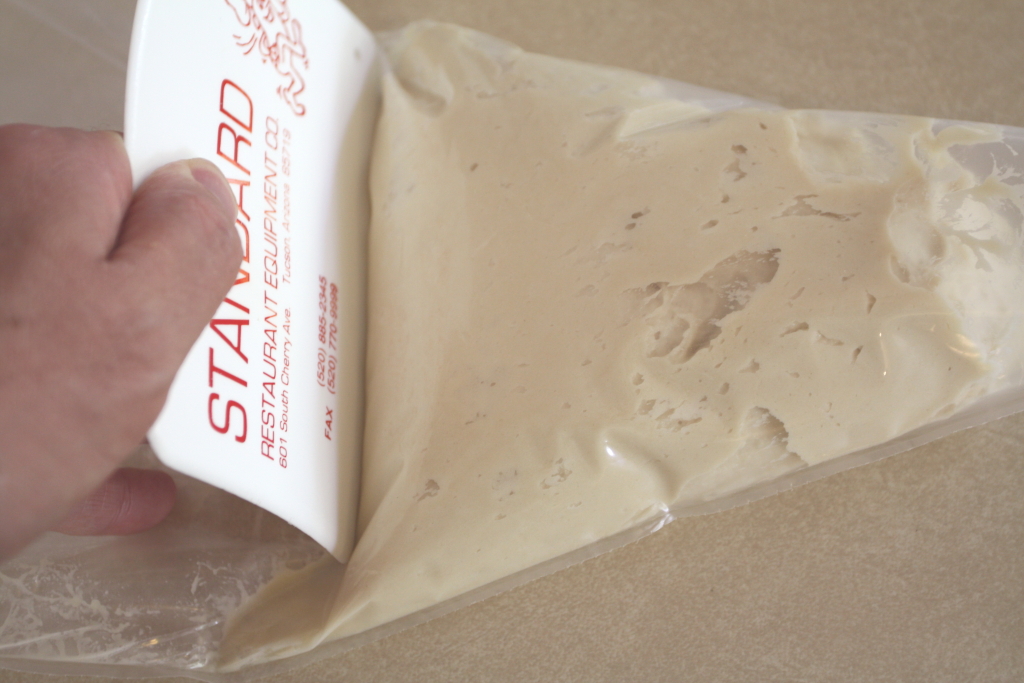
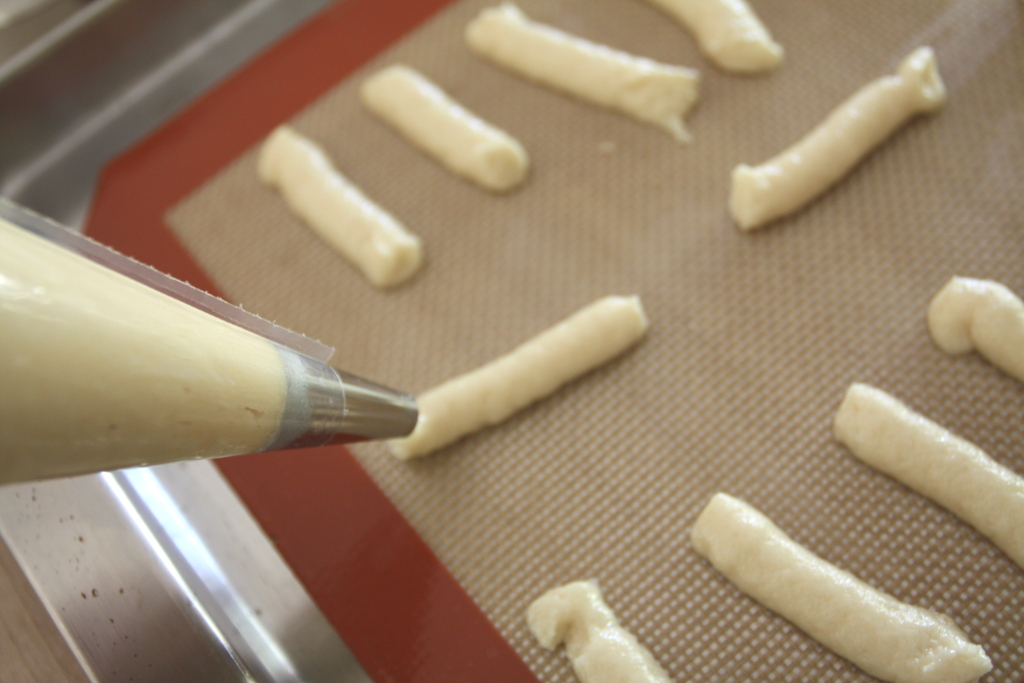
Pipe. Fit a pastry bag with a 1/4-inch smooth tip (or just snip off the tip of a disposable pastry bag — a disposable bag is a really nice way to avoid some serious cleaning — or even a ziplock freezer bag), and scrape in all the batter. Now, pipe out 2-inch long cookies, spacing them about an inch apart. They’ll spread, but not too much, they should end up the width of a cats’ tongue. Hmm. How’d that happen?
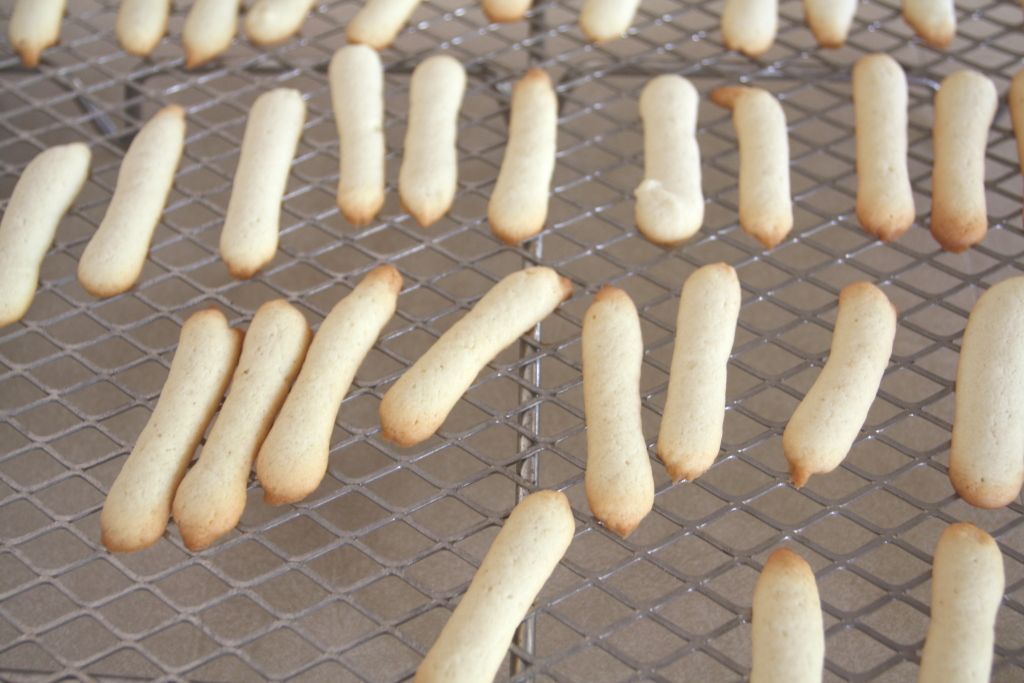
Bake. Slide into the oven and bake 11 to 12 minutes, rotating the sheets from top to bottom and front to back halfway through, or until light golden brown. Immediately remove to a rack to cool completely.

Sandwich (optional). Rapidly stir the jam to make it smooth and spreadable. Then, using a knife or small spatula, spread a bit of jam on the bottom of one cookie, and press another on top, forming a cookie sandwich.
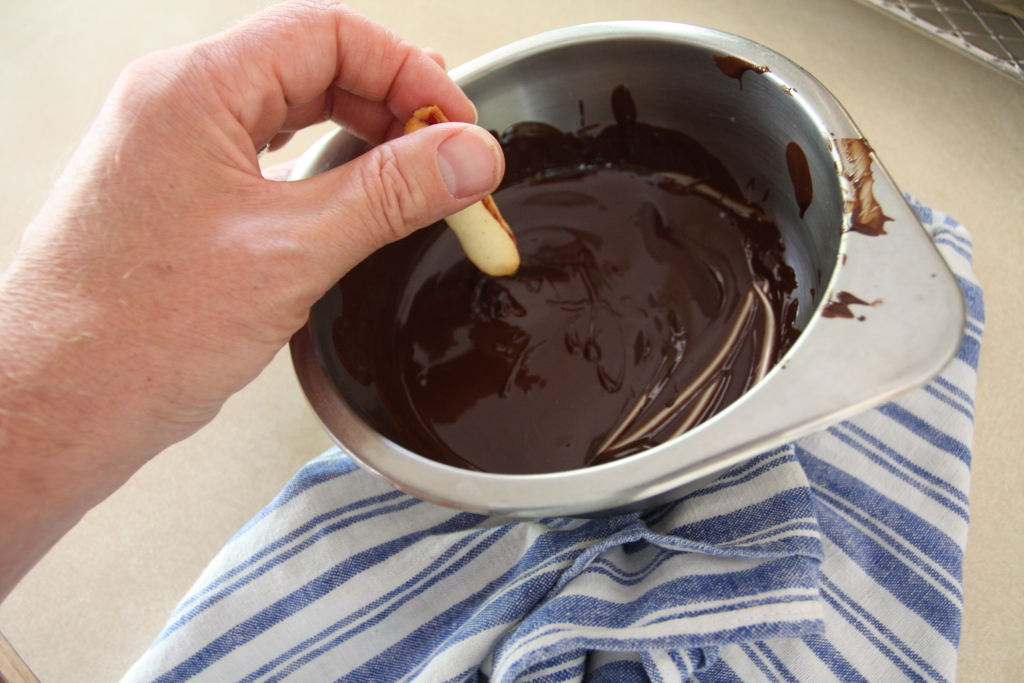
Dip (optional). Once all the cookies are sandwiched (or not), melt the chocolate in a double boiler set over simmering water. Make sure the bottom of the double boiler doesn’t touch the simmering water. Once melted and smooth, simply dip one end of the sandwich cookie into the chocolate and set the cookie back on the lined baking sheets.
Chill (optional). Place the cookies in the refrigerator until the chocolate hardens, then enjoy.
These are good cookies. The dough is easy to put together, but it’s a bit more trouble to pipe the tongues. Not too much trouble, mind you, but a bit more trouble than, say, scooping out dough and putting it on a cookie sheet. We think it’s worth it, though. One of the reasons we don’t make cookies all that often is that we don’t think they look that great, and even cookies should be a little delight to the eye. So, when we see a recipe for a cookie that looks nice, then we might try it. Flavor-wise these are good; not real sweet, and with a nice crisp crunch, but not outstanding. Next time we make them, we’ll probably add just a touch more flavor to compliment the filling: vanilla, maybe almond, or even a drop of raspberry. Or perhaps some orange zest. Four stars.

