
Right before Christmas, we were perusing books in one of those chain bookstores (when we buy books, we get them from our local independent bookseller) and happened to look through the book flour + water : pasta, by Thomas McNaughton, and spied some pastas that looked like little witches’ hats: cappelletti. They looked pretty easy, so we thought that we’d try to make some.
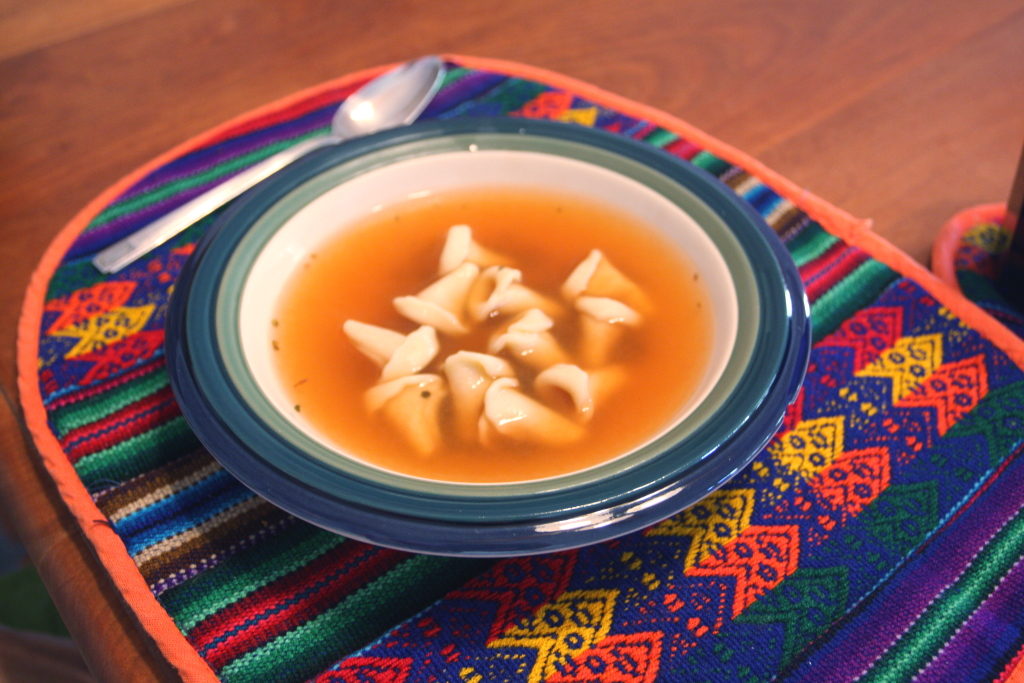
As it turns out, they really aren’t difficult to make at all, and they were perfect in a light broth (technically, Cappelletti en Brodo) which is no surprise, as that’s where cappelletti is normally used. So, want to try your hand at shaping these, too? Just follow along with a batch of pasta dough. We made half a batch of pasta with a leftover egg white, which produced 39 cappelletti, so we think a full batch of dough should make about 6 dozen.
Roll dough. It’s certainly possible to roll out the dough using a rolling pin. People have done that for years, but, if you’re going to be making pasta on a regular basis, pick up a hand-cranked roller. We found ours at a thrift shop for a little over $5, and we think it’s the best $5 we’ve ever spent on a kitchen item. Try to get the pasta dough pretty thin; we rolled ours until it was about 1/16 of an inch thick.

Cut circles. Use a round cookie cutter (or biscuit cutter) about 1 1/2 inches in diameter and cut circles of pasta dough. Our cutter is fluted around the edge, which we think give the finished pasta a nice look. If you have a plain cutter, that’s going to be perfect, too.

Roll around cones. Once you have the circles, roll them around a small cone. This could be a piping tip if you have one, or, if you happen to have cornet (or cream horn) molds, you can try that. You really will need something cone-shaped, though. If the pasta doesn’t stick and seal, moisten the little part that overlaps and seal it closed (plain water works just fine here). Already looking like a little hat, right?

Fold up brim. With the pasta still in place on the cone, fold up the bottom half to make the brim of the hat. Ta da! Cappelletti. Slide it off the cone and start on the next one.

Dry. A lot of books suggest drying on a baking sheet dusted with semolina flour, but we just set our pasta on a cooling rack covered with a clean towel.
Okay, these look like they’re a lot of trouble, but it’s pretty easy. It took us about 10 minutes to roll and shape three dozen, so we thought it was worth it to have another pasta shape from which to choose. Plus, we’ve never seen cappelletti in the store. They took about 4 minutes to cook up right in the boiling broth, making a fast and easy lunch. Oh, as with all scratched pasta: five.
