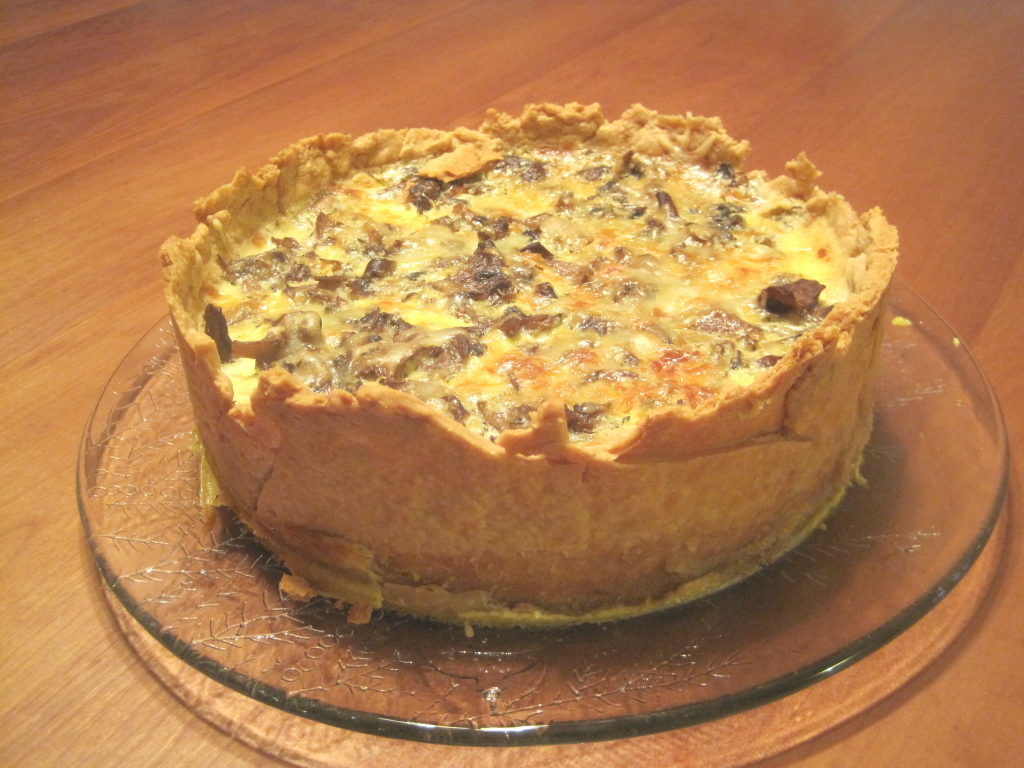

Every once in a while, we need to try something that will test (and improve) our culinary skills. You know, make something that will take concentration, stamina (bet you didn’t think about stamina being required for cooking, but it is), dexterity, and finesse. We went with Thomas Keller’s Over-the-Top Mushroom quiche. And, just to put the pressure on, we decided to make it for a dinner meeting.
(Well, to be honest, reading the recipe made it sound easy).
We will tell you that, while we based our quiche on the recipe to which we linked above, we did make some changes, notably cutting back a bit on the salt in the custard and using leeks instead of shallots, and we give you a couple of tips that should have been in the original version. Trust us, you’ll want those tips.
Over-the-Top Mushroom Quiche
Ingredients
- Double batch pâte brisée shaped into a single 8-inch disk, chilled and ready to roll
- 1 Tbs vegetable oil
- 1 pound oyster mushrooms trimmed and chopped into bite-size pieces
- 1 pound white mushrooms thinly sliced
- Kosher salt
- Freshly ground black pepper
- 1 Tbs unsalted butter
- 1 leek minced finely
- 1/2 Tbs dried thyme
- 4-5 ounces Emmental cheese grated
- 2 cups heavy cream
- 2 cups milk
- 6 eggs
- Freshly grated nutmeg
Instructions
- Lightly oil a 9-inch springform pan. Place on a rimmed baking sheet lined with parchment.
- Roll pâte brisée to a 16-inch circle. Roll up on rolling pin and transfer to springform pan.Carefully press into place, leaving dough overhanging the edge. Trim overhanging edge to an inch, reserving excess dough, and press into the sides. Refrigerate 20 minutes.
- Preheat oven to 375°F.
- Line interior of crust with parchment and place several cups of rice inside to hold down crust and parchment.
- Bake 40 minutes, or until edges of crust are golden. Remove rice and parchment and bake an additional 15 minutes, or until bottom of crust is golden brown. Remove and let cool.
- If possible, carefully patch any cracks in the crust with reserved dough.
- Heat oil in a large skillet over high heat. Add mushrooms, season with salt and pepper, and cook on high, stirring often, until they start to become tender, about 5 minutes.
- Add butter, leeks, and thyme, reduce heat to medium and cook until mushrooms are completely tender, about 12 minutes. Remove from heat and let cool.
- Preheat oven to 325°F.
- Place about 1/3 of the cheese on the bottom of the crust, followed by half the mushrooms.
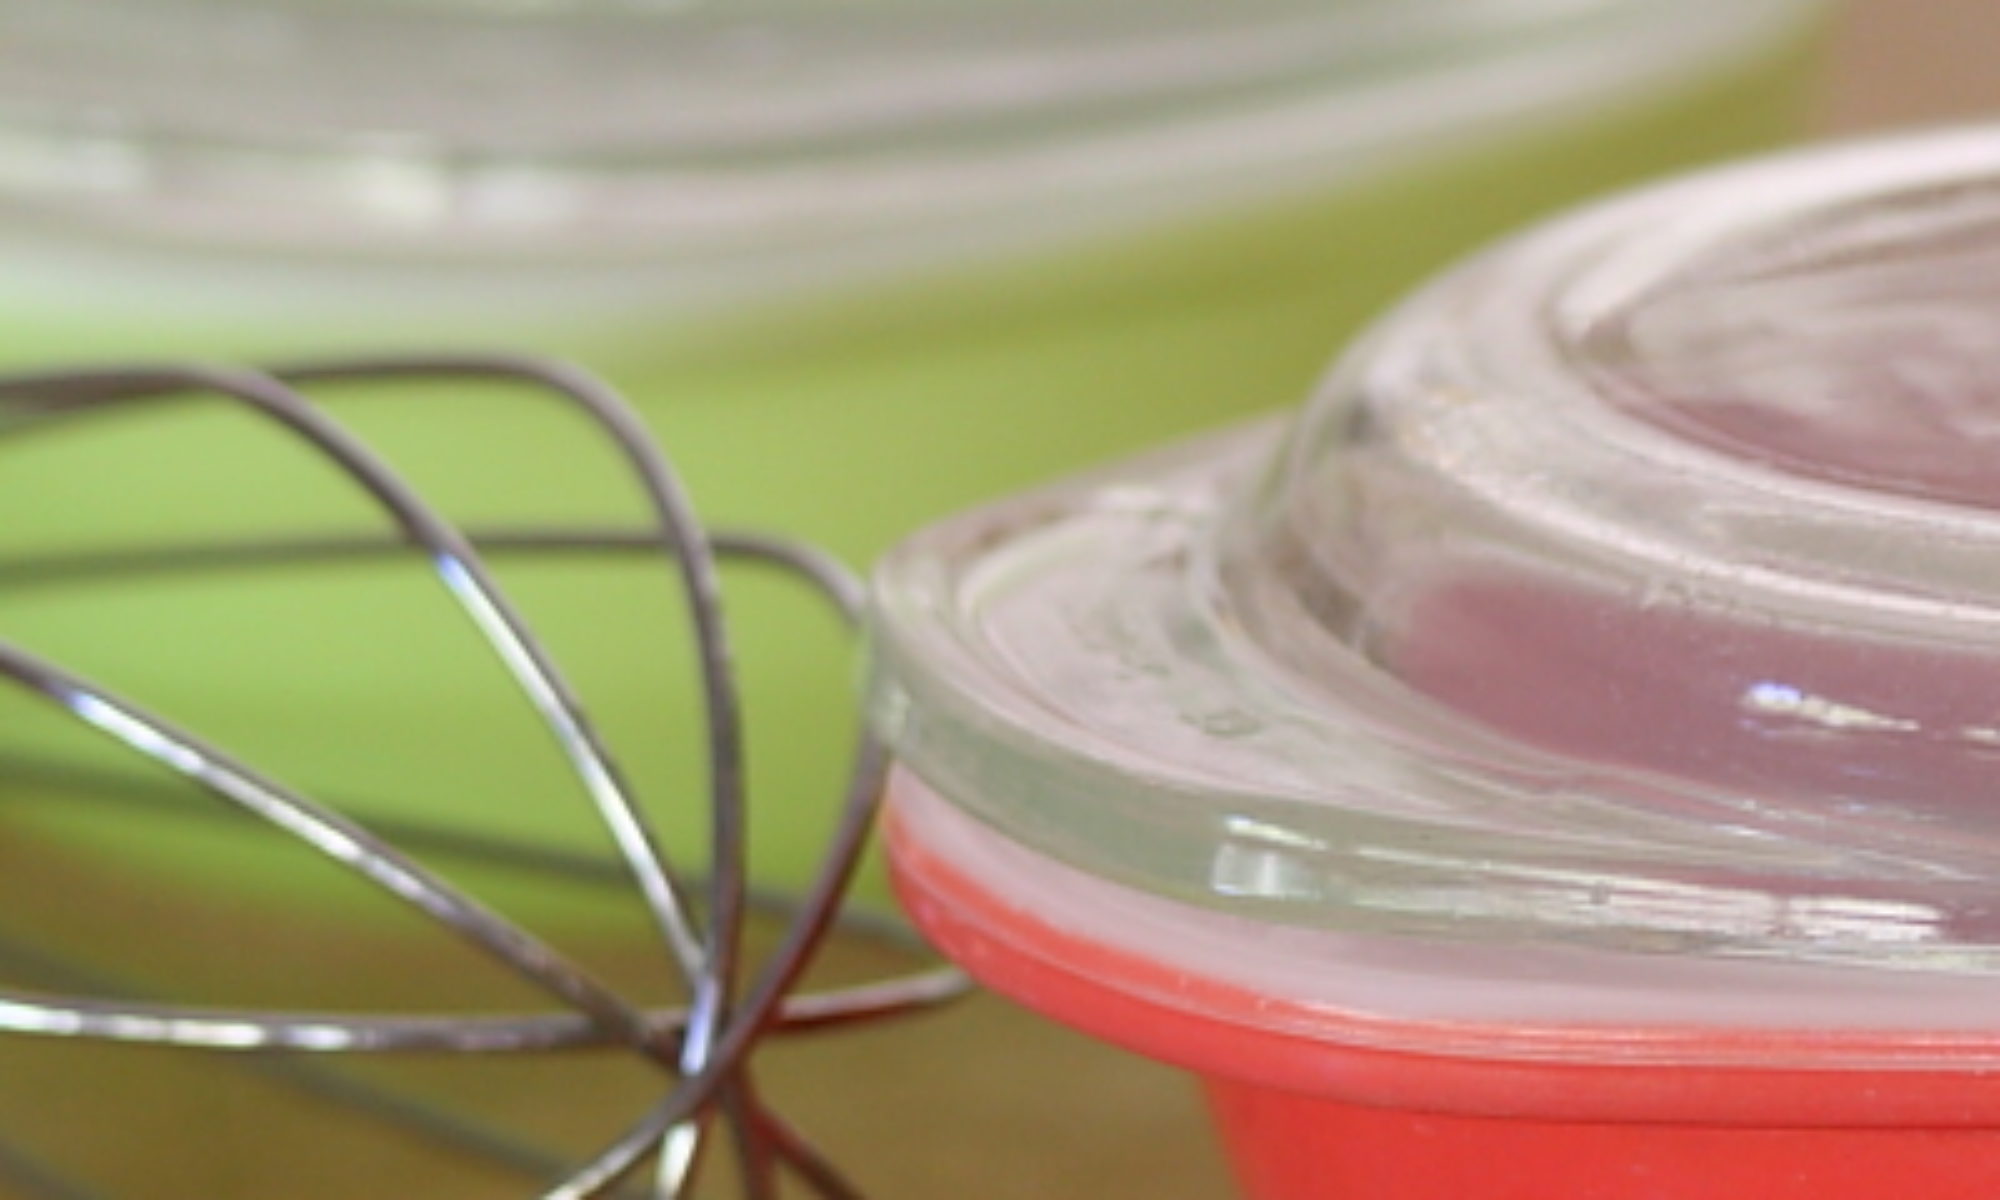
- In the bowl of a mixer fitted with the whisk attachment, beat on high until frothy 3 eggs, 1 cup milk, 1 cup cream, 1 tsp kosher salt, 1/8 tsp pepper, and a pinch of nutmeg, about 1 minute.
- Pour custard over mushrooms.
- Repeat a layer of cheese, and the remaining mushrooms. Again, make half the custard as before and pour over mushrooms. Top with remaining cheese.
- Bake for about 90 minutes, until the custard is set. You can check if it's done by inserting an instant read thermometer into the center. It should read between 165° and 185°F. Alternatively, insert a sharp knife in the center. If the knife comes out clean, the quiche is done.
- Remove from oven, and, using a sharp serrated knife, trim crust so it's level with the top of the pan.
- Slice and serve.
Ingredient discussion:
We use the Bouchon Bakery’s Pâte Brisée because it’s easy to make and one of most reliable crusts we’ve used. Plus, it’s the one that Chef Keller uses for this quiche. Fresh oyster mushrooms can be troublesome to find in the store, so we used dried oysters that we rehydrated. Emmantal cheese is just a specific type of Swiss; you could also use Comté cheese. For the heavy cream, we like to use the stuff without diglycerides and other additives. We buy organic. The eggs should be from free-range hens. This time, we had to go half organic and half free-range, and the organic eggs looked rather sad by comparison.
Procedure in detail:
Prep pan. Lightly oil a 9-inch springform pan and place it on a rimmed baking sheet lined with parchment. We will say that the original recipe called for using just the ring part of a springform pan. We don’t know why, and we did try it that way, but we had a lot of custard leak out — not good. Our tips: we are recommending that you leave the bottom of the pan in place to minimize leakage. If you want to try it without the bottom, then we suggest turning the ring over, so the smooth part of the ring is near the bottom. It’ll be easier to slide off (and clean) later.

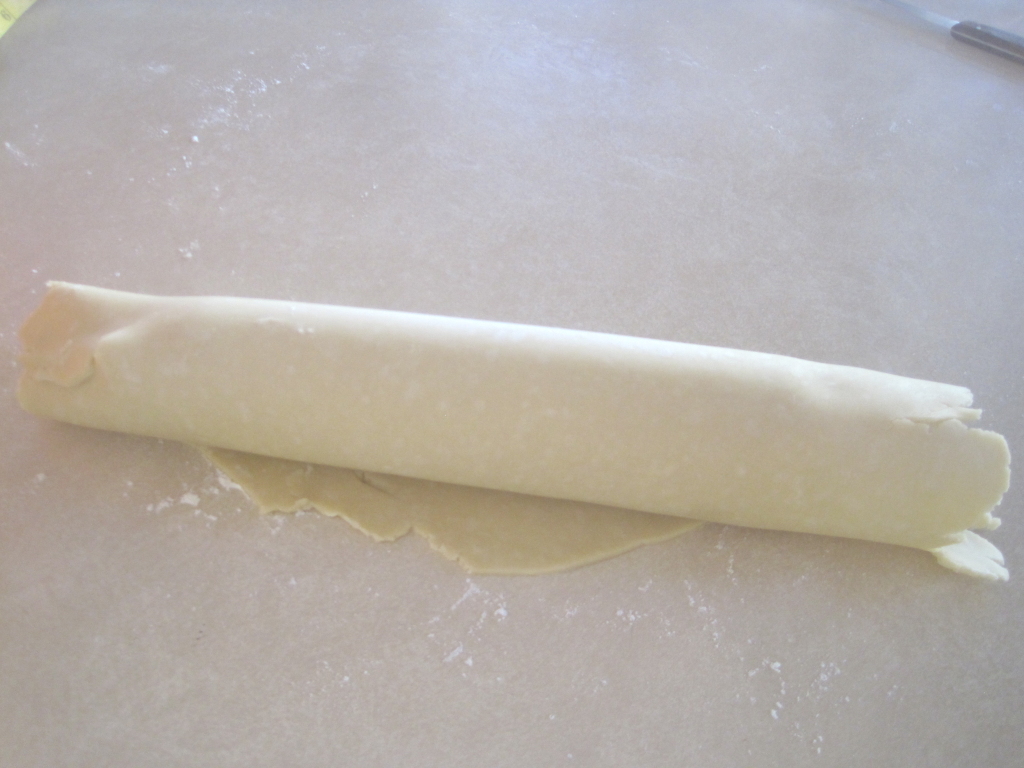
Roll dough. Place the dough on a lightly- floured surface and roll into a 16-inch circle. You can trim and patch the dough here and there, which won’t matter, but try to work quickly and not let the crust warm up too much. Once rolled out, carefully roll the dough around the rolling pin to transfer to the springform pan.

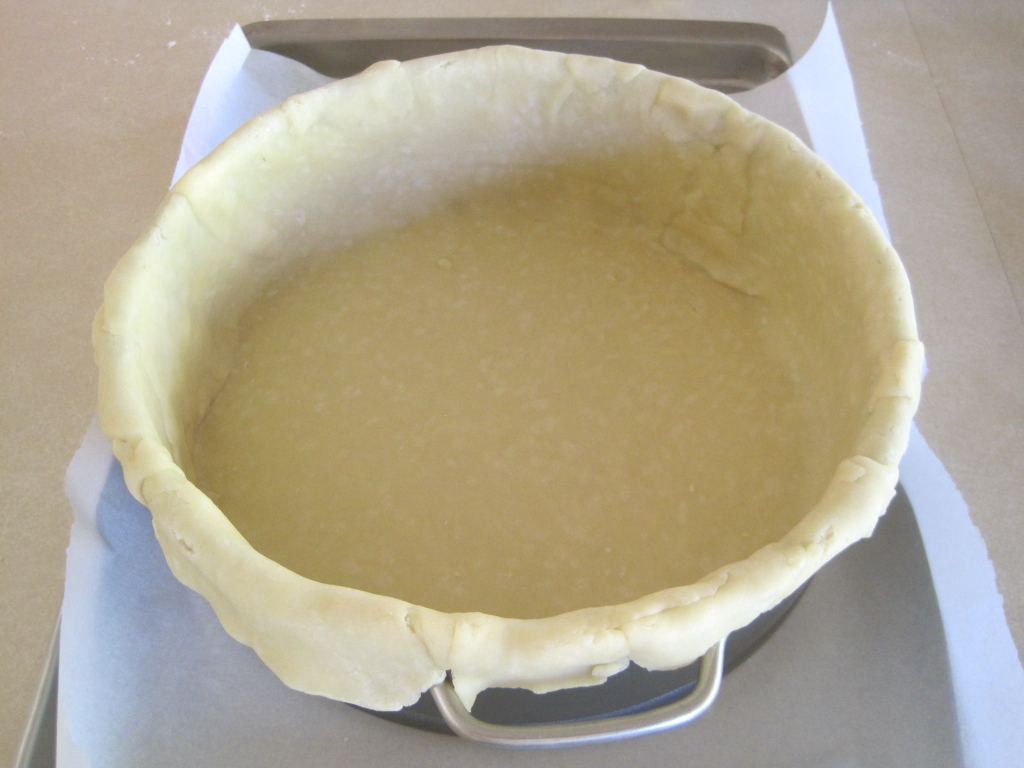
Fit to pan. We found this to be a bit tricky, but carefully and lightly push the dough down into the pan, pressing it into the edges and leaving an overhanging edge of dough. Try not to stretch the dough as you press it into place — we know, that’s difficult; we had trouble, too. Once in place, trim the overhanging dough to about an inch and press the edge tightly to the side of the pan. Our tips: try not to press on the top edge of the dough, as it needs to be sturdy to hold together. Wrap the excess dough in plastic and keep on the counter to warm — you’ll use this for sealing any cracks later.
Refrigerate. Place the prepared pan in the refrigerator to chill and relax for about 20 minutes.
Preheat oven to 375°F.
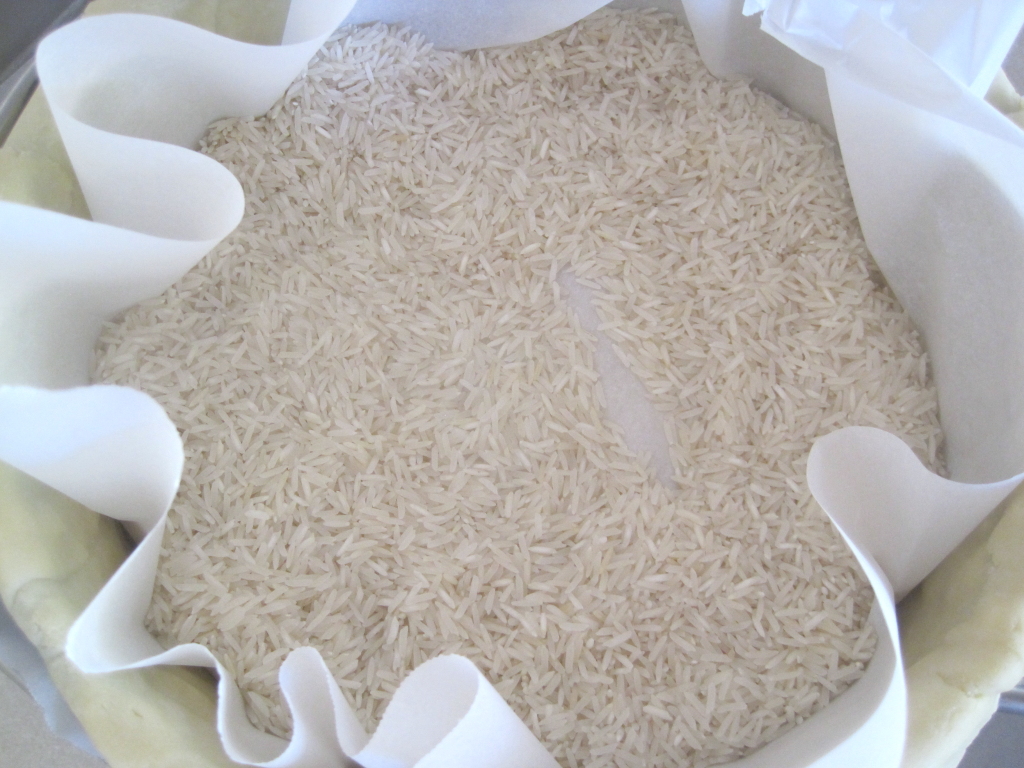
Blind bake. Take the pan from the refrigerator, line the crust with a piece of baking parchment or foil, then place several cups of rice on the bottom and push it up around the sides. We used about 2 cups of rice, but we actually think we should have used more. Once filled, place in the oven and bake until the top edges of the crust are golden brown, about 35 to 40 minutes.
Remove rice. Once the top edges are brown, remove the rice and parchment, returning the crust to the oven.
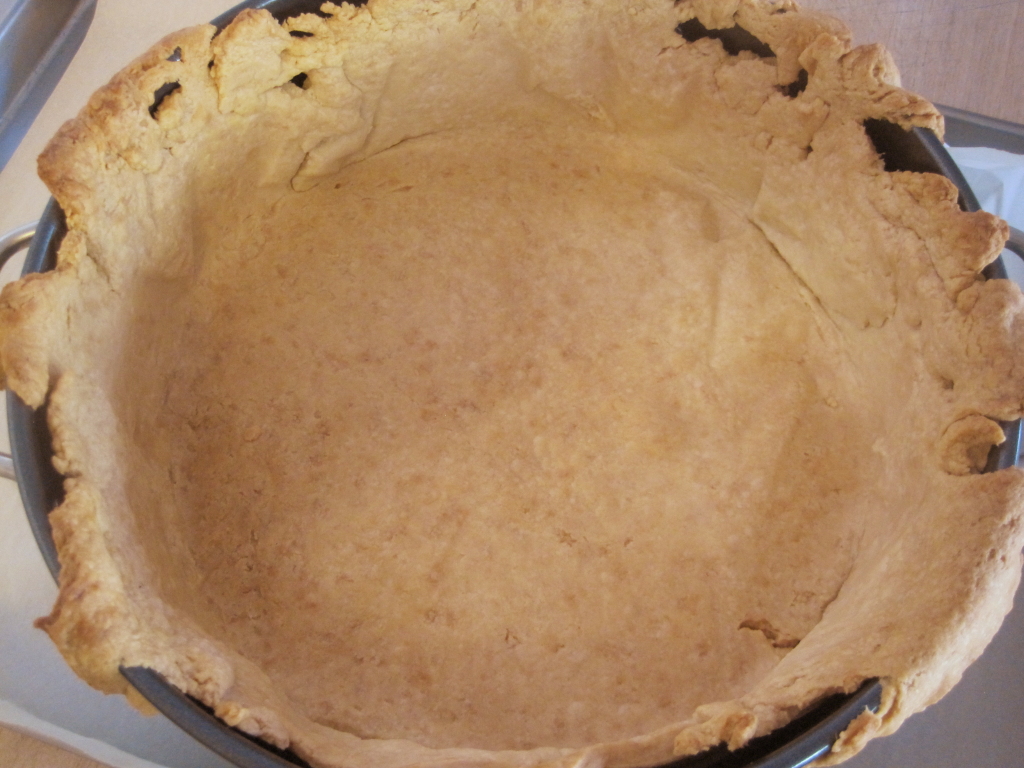
Bake bottom. Continue to bake the crust until the bottom is a nice golden brown, about 15 minutes more. Remove the crust and let cool completely. You can turn off the oven once the crust is removed — we’ll turn it back on later.
Seal. If you can, carefully press some of the reserved dough into any cracks that have formed in the crust. We had trouble with this, as the crust cracked more when we tried to seal it, but we were able to fill in some of the holes a bit.
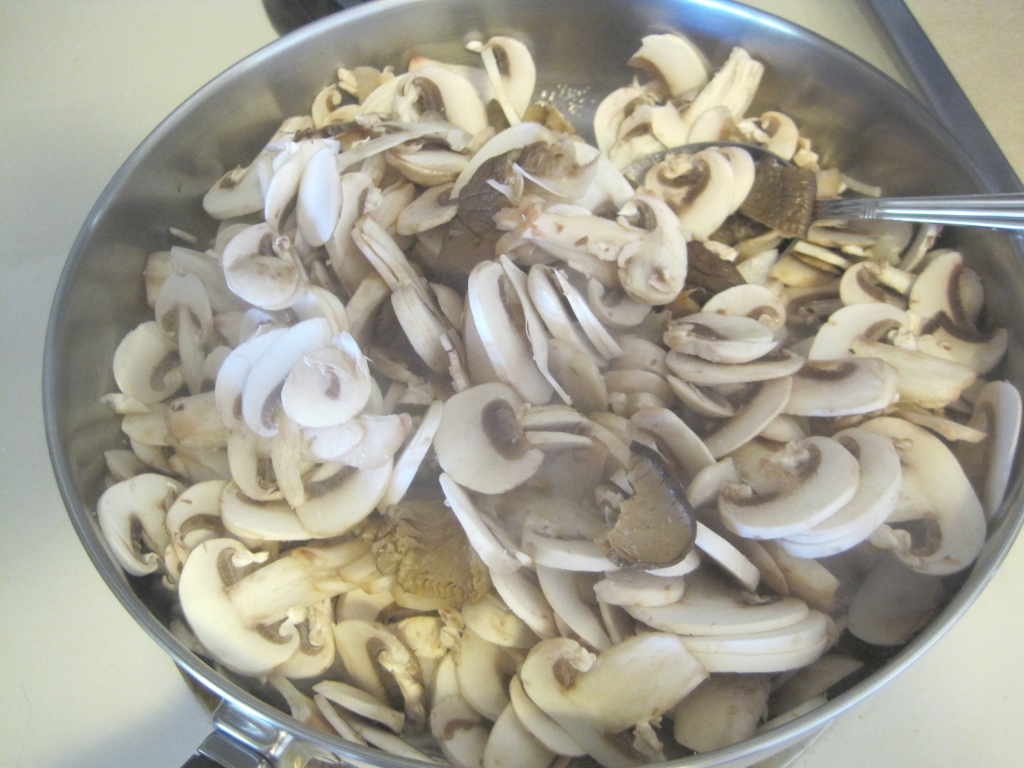
Cook mushrooms. Heat the oil in a large skillet on high. Add the mushrooms, sprinkle with salt and pepper, and cook, stirring, until they start to become tender and release their juices, about 5 minutes.

Add butter, leeks, and thyme. Reduce the heat to medium, add the butter, leeks, and thyme, and continue to cook, stirring all the while, until the mushrooms are tender, about 12-15 minutes more.
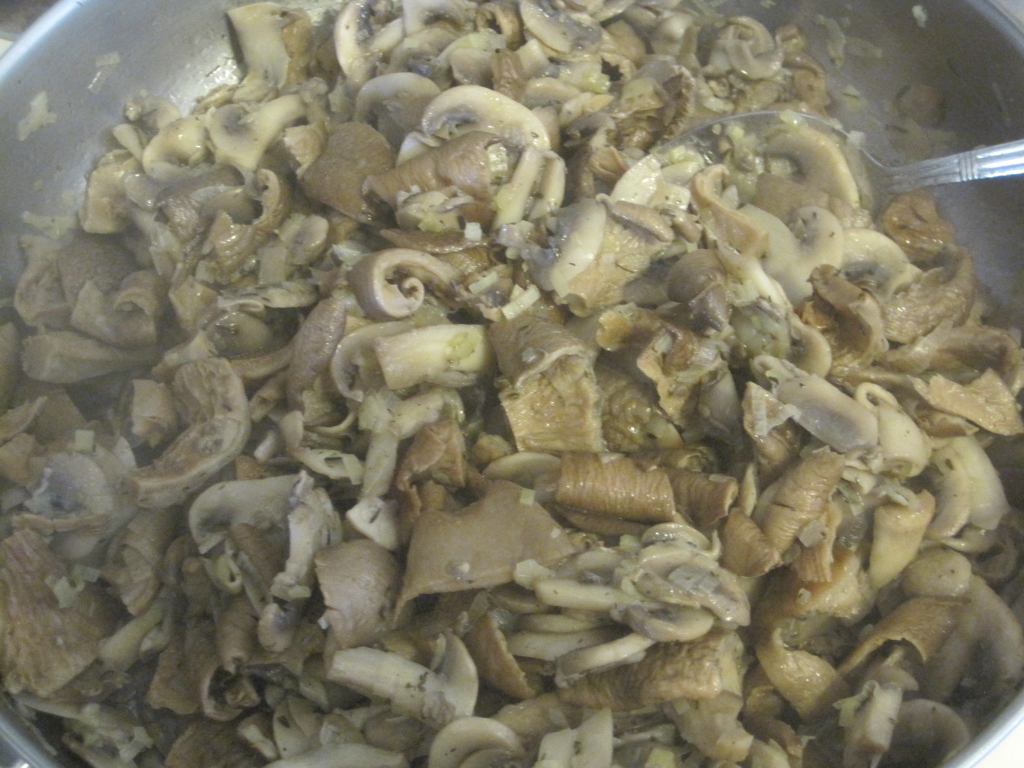
Season and cool. Taste and add salt and pepper as needed. Now let the mushroom mixture cool.
Preheat oven to 325°F.
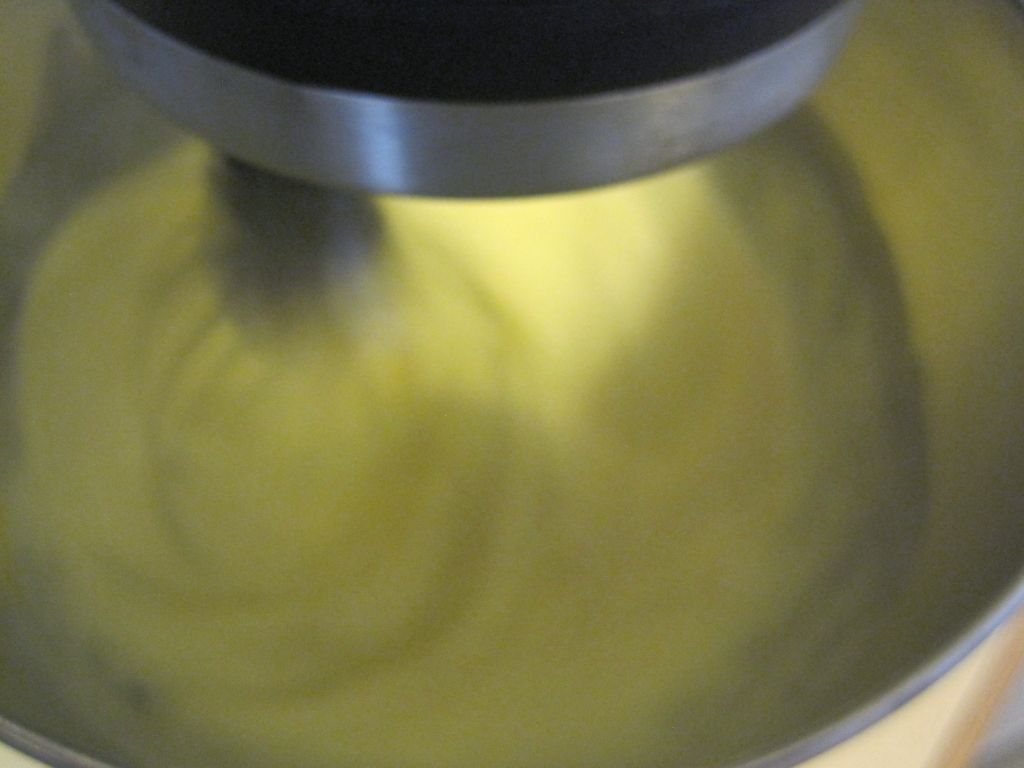
Make half the custard. We made the custard in two batches. The original recipe called for blending, but we just used our stand mixer. In the bowl, combine three eggs, 1 cup of milk, and 1 cup heavy cream. Add 1 teaspoon of kosher salt and 1/8 teaspoon of black pepper along with a pinch of nutmeg. Attach the whisk to the mixer and beat on high until frothy, about a minute.

Layer. Place about a third of the grated cheese on the bottom of the crust, followed by half the mushrooms and then the custard you just made. Our tip: If you have leakage of custard, prop up the edges of the baking parchment as best as possible to hold it in.
Make remaining custard. Make the second half of custard just like before.
Layer. Place another third of the cheese on top of the quiche, followed by the remaining mushrooms and the remaining custard.
Top. Sprinkle the remaining cheese on top.
Bake. Carefully slide into the oven and bake for 90 to 100 minutes, or until the custard is set and the top is brown. Our tip: to test if the custard is completely done, insert an instant-read thermometer into the center — it should read between 165-185°F. If you don’t have a thermometer, insert a sharp knife into the center of the quiche — it should come out clean.
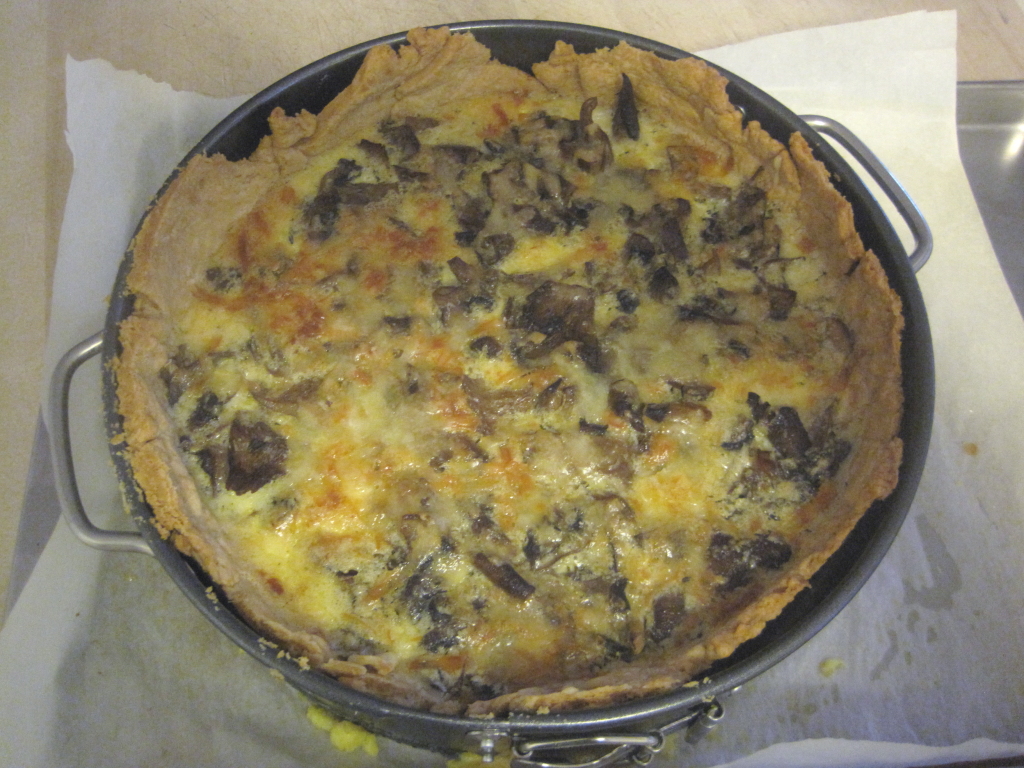
Trim. Remove the quiche from the oven and, using a sharp serrated knife, trim the crust level with the top of the pan.
Rest. Let the quiche rest for a few minutes, then carefully remove the sides of the springform pan to slice and serve.
This quiche was delicious, probably one of the tastiest that we’ve made (or eaten), but it did come at a price. It was time-consuming to make, taking most of the afternoon. Plus, we did have difficulty with fitting the crust, leaking, and under-baking — we provided our tips to help minimize these problems, we wish the original recipe had done so. But even so, we can’t wait to try this one again. Next time, we think we’ll cook up the mushrooms the day before and refrigerate them, breaking this into a two-day process. We will note that we had to cut back a bit on the salt in the custard in the instructions above — ours was too salty for our tastes. Because of the time, troubles, and difficulty, we’ll give this four stars on the “worth it scale.”

