
This is the shape of the pasta that we had at Roma Antica in San Francisco a few weeks back. We tried to make them when we made our Pear and Cheese filling for pasta, but we had problems. First, we tried filling round pieces of pasta, but, our pasta sheets were too thick, resulting in a lot of bunched up pasta at the top. Fortunately for you, and us, we’ve figured out the kinks and are ready to show you how to make these cute little bags of filled pasta.
Two things to keep in mind: one, roll your pasta sheets thin, very thin, and, two, work with care, or you’ll tear through the pasta sheets. The third thing is, remember that every one of these is going to look a little different\; after all, these are handmade sacchetti. Yes, we know we listed three things instead of two. Consider it as similar to buying two, and getting one tip free.
So, let’s get scratchin’.
You’ll need about 8 ounces of pasta dough. We recommend our Basic Pasta Dough recipe, which happens to make about 8 ounces. Then, you’ll need about 8 ounces of pasta filling, ideally in a piping bag or in a zip-lock style bag with the corner cut off so you can squeeze out the filling with precision. If you have a filling in mind, make that; otherwise, feel free to look at the ones we’ve made. This search will get you started.
Make pasta sheet. Cut off a piece of pasta dough and roll it very thin. Very thin. You can try this with a rolling pin, but we think it’ll be really difficult, and there are a bunch of other pasta shapes that are better for hand-rolled pasta. Take a look through our shaping pasta tutorials for ideas. We used the pasta machine that we picked up at a thrift store for all of $5.43. It was the best buy we’ve made. On our machine, we rolled to the 5th setting, which is the second to the last setting. It makes sheets that are almost translucent.
Cut squares. Use a chef’s knife or a bench scraper to cut out squares about 3 inches on a side. You don’t have to measure, although we did for the first couple of times; just get them close to that size. All the scraps can be combined with the next piece of dough and re-rolled.
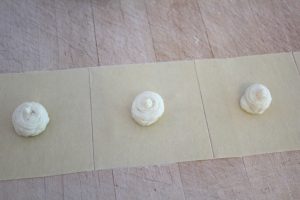
Pipe filling. Squirt about a teaspoon — maybe a little less — of filling into the center of each square. You need a lot of pasta around the edges, since that’ll be pulled up and around the filling. If you’re worried, consider making a test sacchetti or two by placing a small nugget of pasta dough in the center of a square and wrapping the pasta around it. When you’ve finished testing, re-roll the dough in with the next batch.
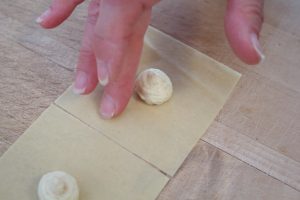
Moisten. Dip your finger into a small bowl of water and dampen a circle around the filling. Leave enough space between the filling and your finger so that, when you fold the dough up and around the filling, the dampened portion will touch. Moistening the pasta releases a bit of the starch and forms the glue that will hold the pasta together and the filling inside.
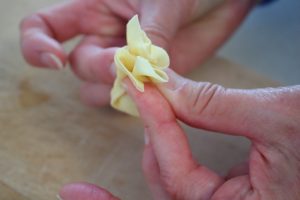
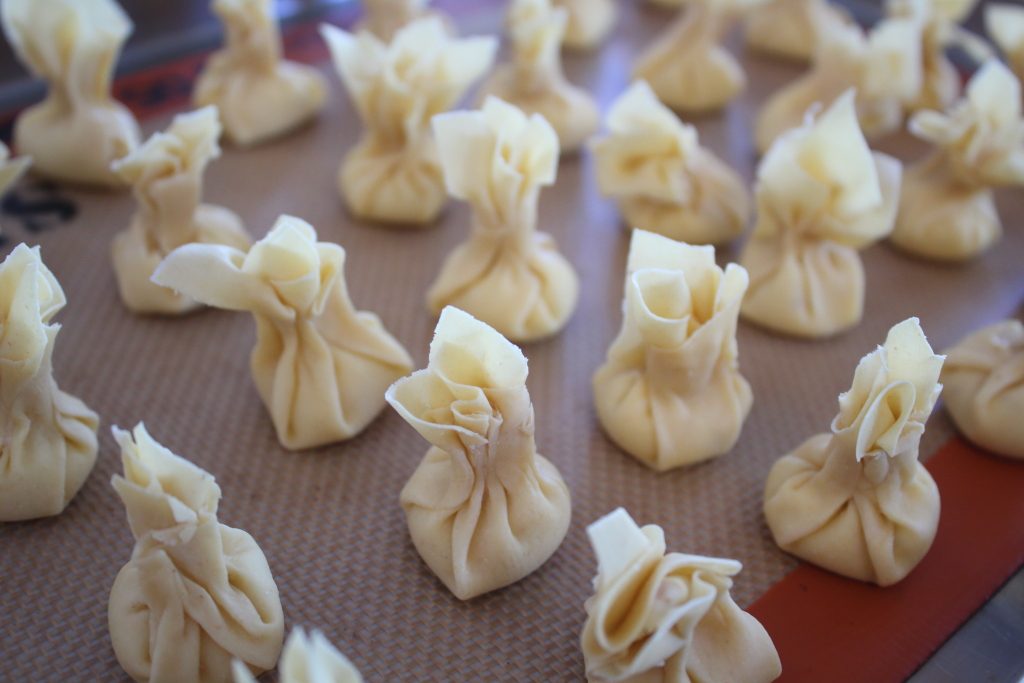
Shape. Here it is, the moment of truth: pull the dough up and around the filling and crimp off the neck, leaving some pasta sheet overhanging. Your first few probably won’t look great, but, don’t worry, they’ll taste great, no matter how they look. As you make sacchetti, place them on a baking sheet lined with a silicone baking mat or parchment paper. You can even dust each sacchetti with a bit of flour, too.
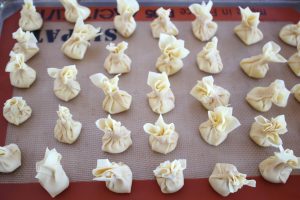
Freeze. Once you have a tray full of sacchetti, place it in the freezer to freeze solid. It’ll make them easier to handle, plus, you can cook them directly from the freezer. Once frozen, gently transfer to a freezer bag for longer storage. We advise cooking them within a week, since the pasta will dry out and crack.
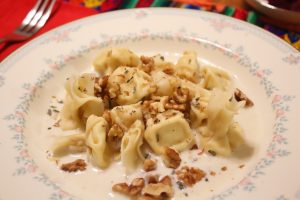
Simmer. These are really delicate, so, when cooking, just add them to simmering water and simmer until they’re done. The length of time needed will depend on how dry your pasta is and how thick the sheets are. It could take under 2 minutes, or longer than 5 minutes.
Yes, these are probably the most difficult pasta shapes we’ve made. From 8 ounces of dough and an equal amount of filling, the two of us made about 60 sacchetti in roughly an hour. While we expected to learn a trick or two along the way to make the shaping easier, we really didn’t. It was basically fold that dough up and around the filling the best you can. And, while we love the shape, we have to give these four stars because of the difficulty.
Can you steam them?
Since this is fresh pasta, it might be possible to steam them. I would expect that they might be chewier than if you cook them in simmering water. If you try it, let us know how they turn out because filled pasta has a tendency to break open in simmering water and steaming would avoid that.
All the best,
Shawn