
A lot of people, ourselves included, think that baguettes are about the very best type of bread going. And we’d tried making baguettes in the past, but they never came out right. They just didn’t have the right texture — a crispy crust, with a chewy crumb. So, for a long time, we didn’t bother trying. What was the point when we could make great bread that we did like using our Basic Bread Dough?
Then, the other week, while we were at the library chatting with one of the librarians about baking, she asked if we could make small baguettes using the same technique that we use for baking boules (basically, bake it in a hot cast-iron Dutch oven, in the oven), and that got us thinking. We didn’t think the Dutch oven would work, as we couldn’t load enough dough in the shape of baguettes into it at one time (the Dutch oven traps escaping steam), but, perhaps, if we loaded a bunch of baguettes into our oven all at once…. Hmm.
Next bake day, we thought we’d try it, but first we needed a recipe. Well, we’ve chatted with Don, of Barrio Bread (the best bread in Tucson), enough that we had some idea of what we needed: a softer wheat, commercial yeast for extra rising, and a high level of hydration. With these things in mind, we set about modifying the Basis Bread Dough and this is what we came up with.

Basic French Bread (Baguettes)
Ingredients
- 720 g water
- 50 g whole-wheat flour
- 360 g freshly-fed starter levain
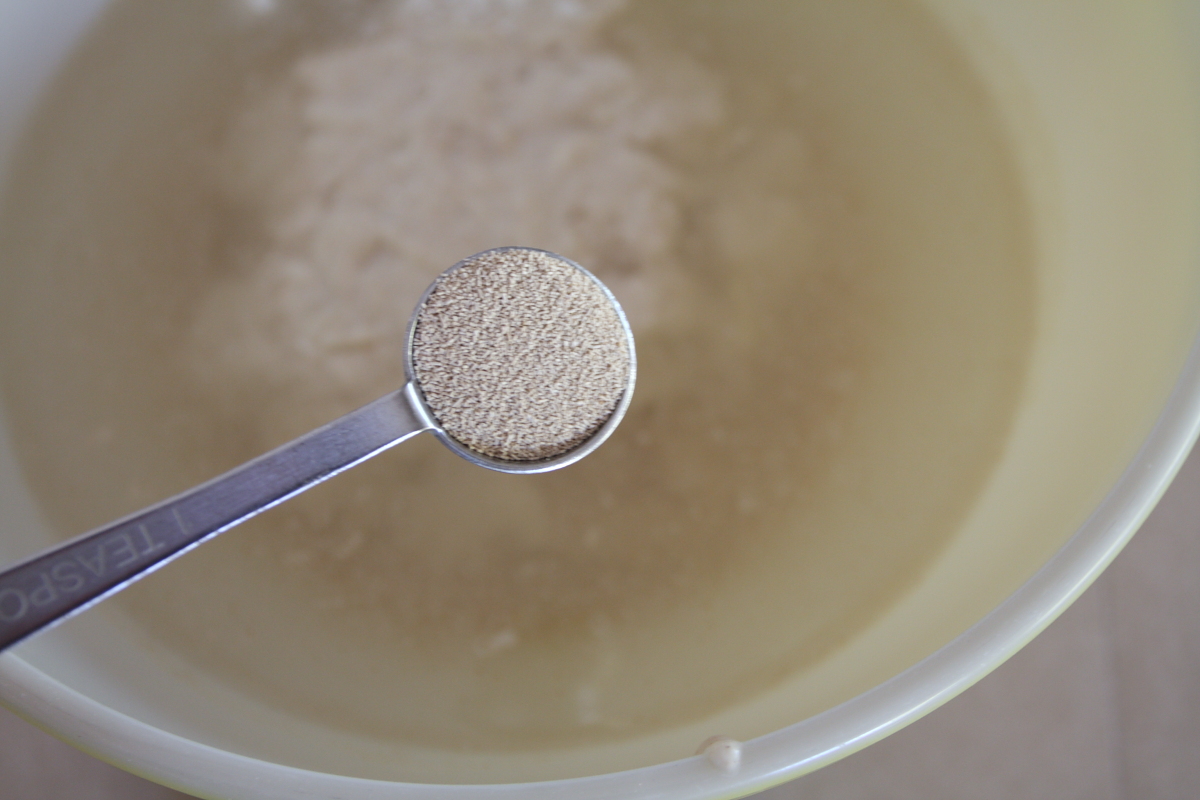
- 1 tsp dried yeast
- 300 g all-purpose flour
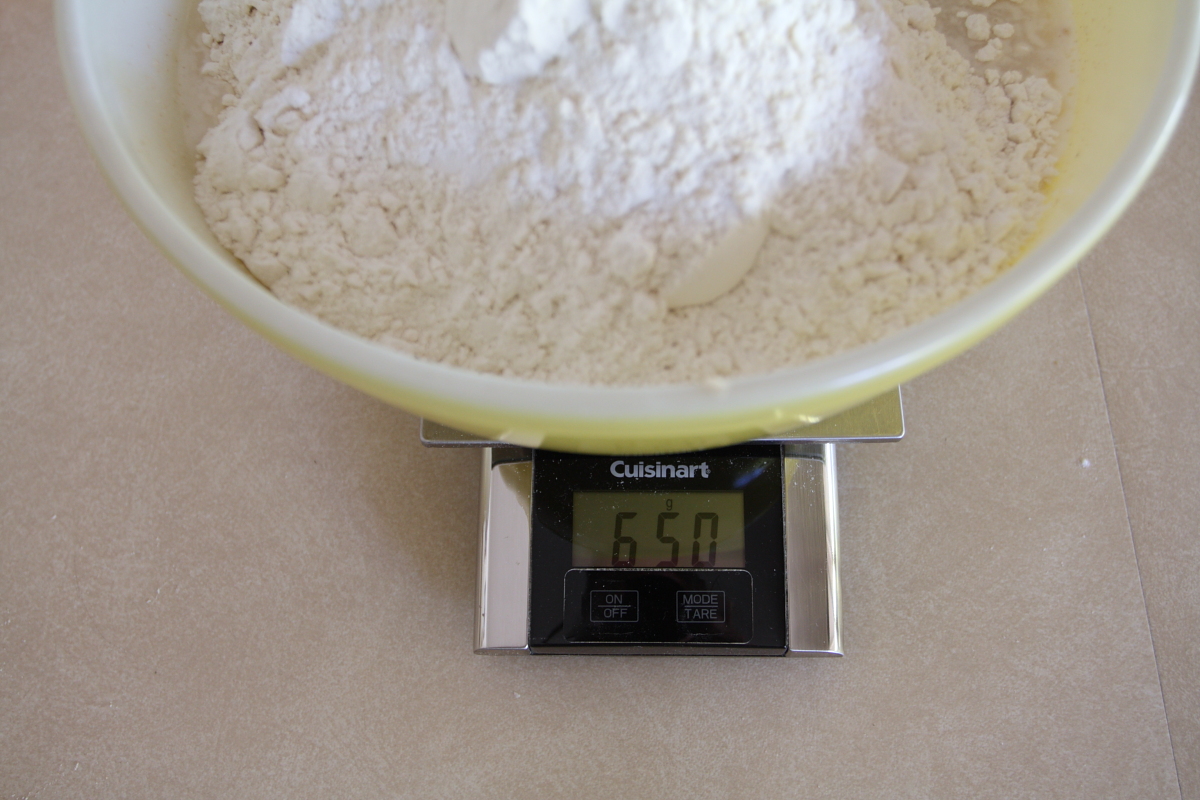
- 650 g bread flour plus more for kneading
- 22 g salt
- 1/4 tsp vitamin C powder optional
Instructions
- Measure water into a large (4-quart) bowl. Add whole-wheat flour, cover, and let stand about an hour.
- Add freshly-fed starter and yeast, stir until thoroughly mixed.
- Add all-purpose and bread flours and mix into a dough. Cover and let stand about 1 hour.
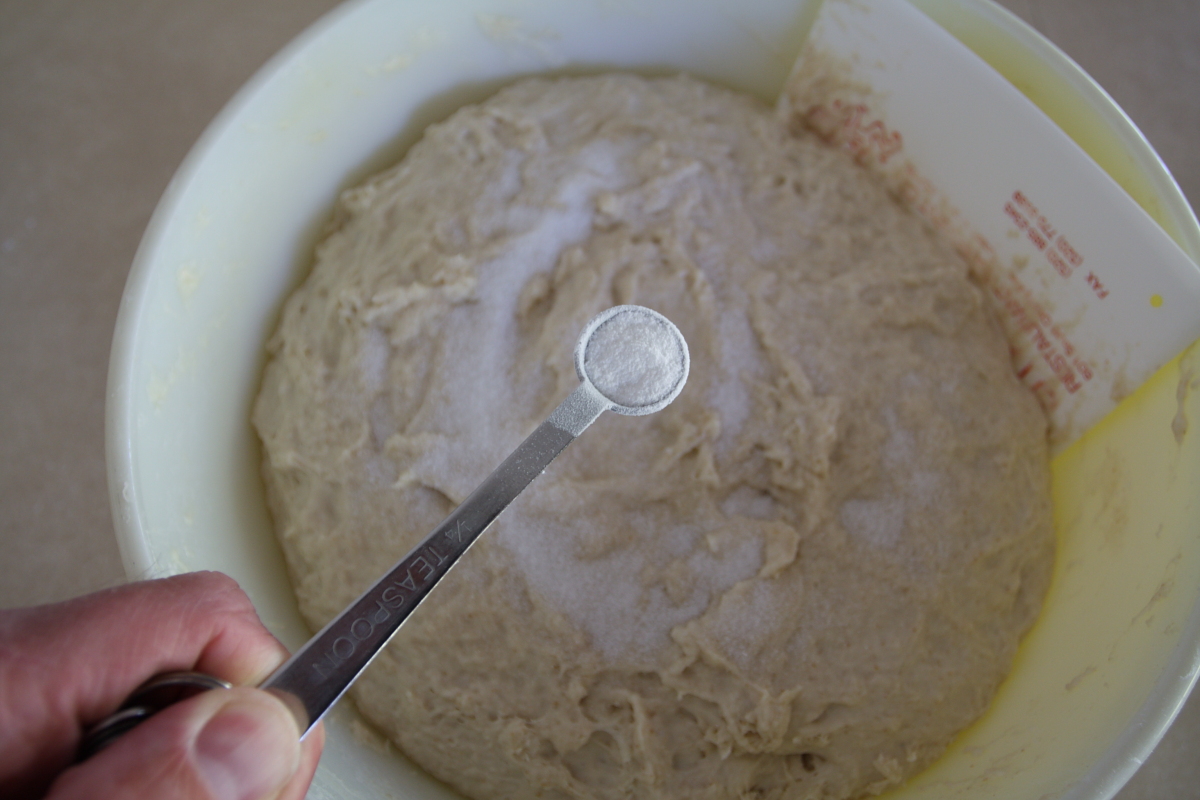
- Sprinkle salt and vitamin C, if using, onto dough and fold in.
- Turn out dough onto a floured work surface and knead for 5 minutes. Let dough rest for 5 minutes.
- Repeat the kneading and resting cycle 3 more times, then transfer to a large bowl, cover, and let rise until doubled, about 90 minutes.
- Gently turn out dough onto a floured surface and cut strips of dough that weigh about 200 g (about 6 inches long and 2 inches wide). While folding up cut edges, stretch and shape dough into a baguette about 16 inches long. Place seam side down on baking sheet lined with a silicone baking mat or parchment. Fit 3 baguettes on each baking sheet.
- Cover with a clean towel and let rise until doubled, about 45 minutes.
- Preheat oven to 450°F.
- Using a razor, make 4 to 5 long diagonal slashes down each baguette and bake for 22 to 25 minutes, rotating pans from top to bottom and front to back after 15 minutes, or until golden brown
- Remove to a rack and let cool completely.
Ingredient discussion:
We use King Arthur bread flour as it’s the best national brand. Period. Yes, it’s more expensive than the others, but it’s the easiest to work with, most consistent, and provides the best results. The brands of the other flours don’t matter as much in this recipe, so use what you like. If you don’t have starter, you can try this: mix 180 grams of water with 180 grams of flour and a pinch of dried yeast, and let stand until doubled and bubbly (this is a poolish), or, if you bake regularly, think about getting or starting a starter; check out Chad Robertson’s book, Tartine, for detailed instructions. Salt, it doesn’t matter; we use ordinary table salt. Water is just tap water.
Procedure in detail:
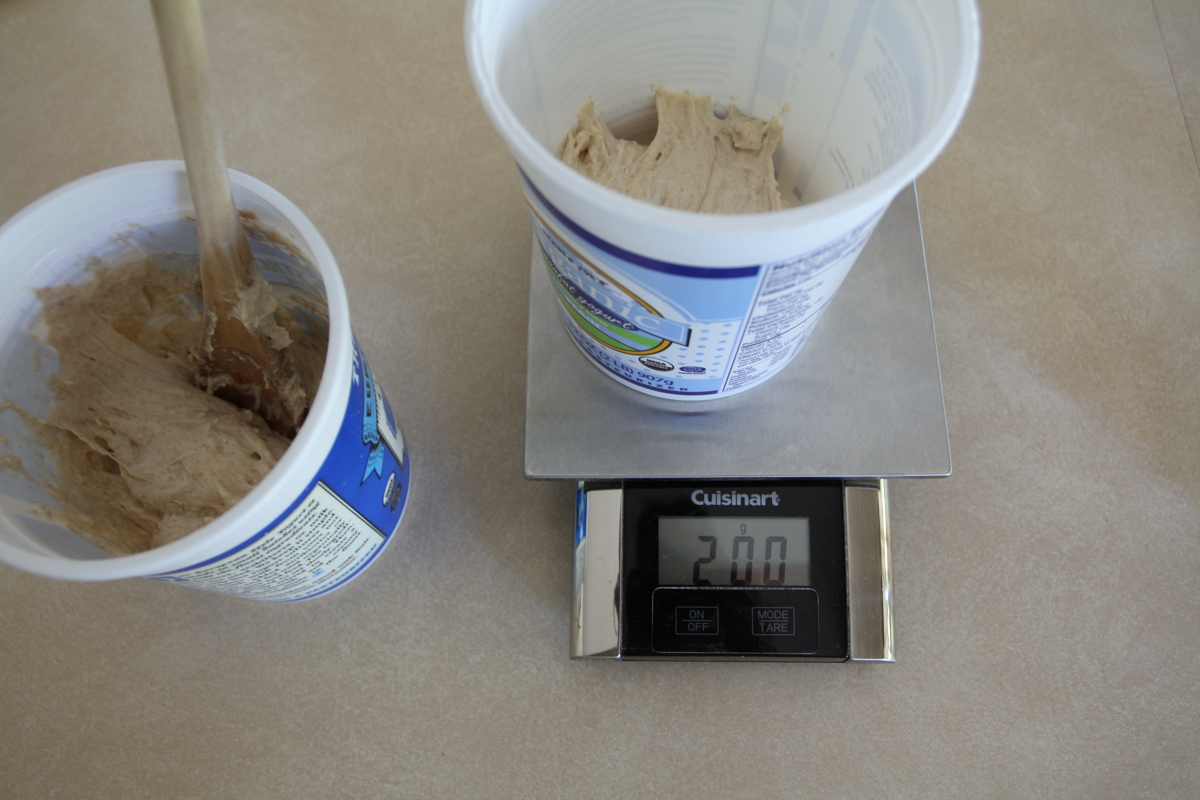
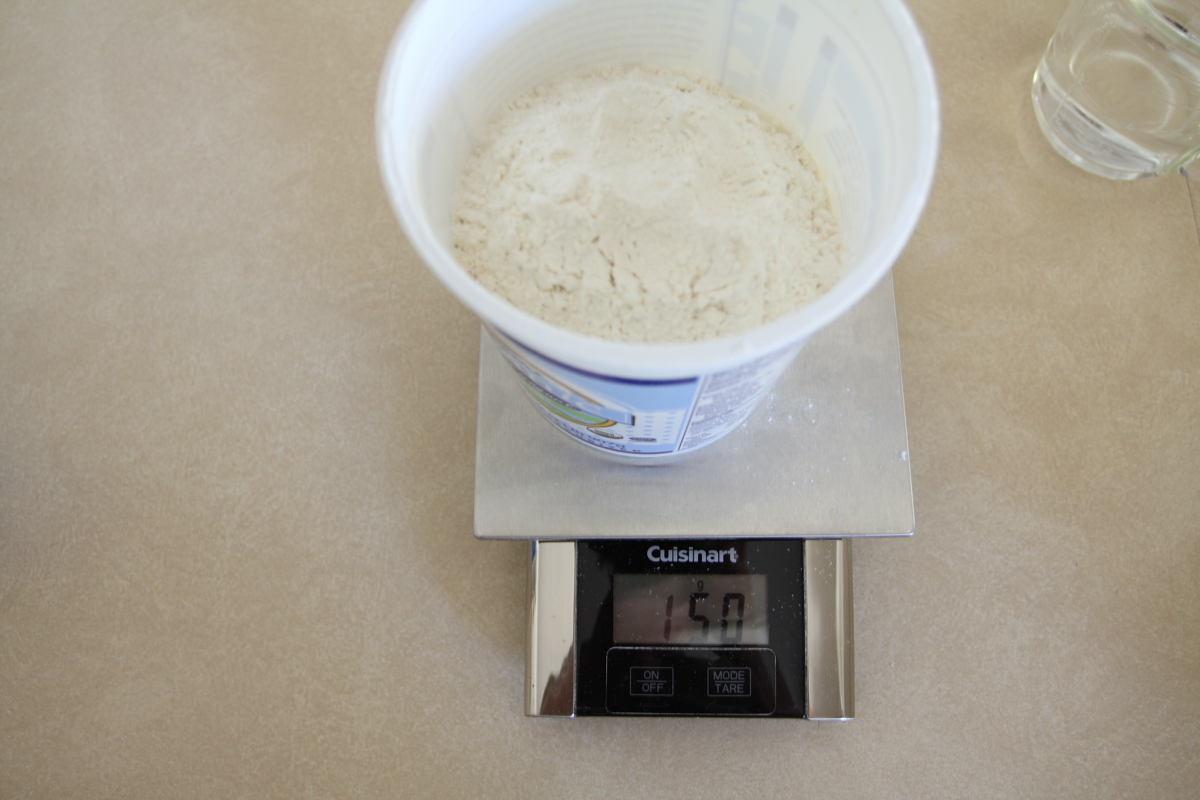
Feed starter. If you have a starter that you use, this will be old news to you, but, if you’re thinking, “What does it take to bake from a sourdough starter?”, read on. Place 200 grams of starter in a clean container. Add 150 grams of water and 150 grams of bread flour and stir. You now have 500 grams of freshly-fed starter. Let stand, covered, for about an hour until doubled in size before using. This is also how you’d keep your starter going for the next week; so, with 500 grams of starter from the previous week, you’d make two batches of freshly- fed starter. Use one for baking, and place the other in the refrigerator for your next bread baking.

Measure water. Measure out the 720 grams of water into a large (4-quart) bowl. Tap water is fine; it should be around room temperature.
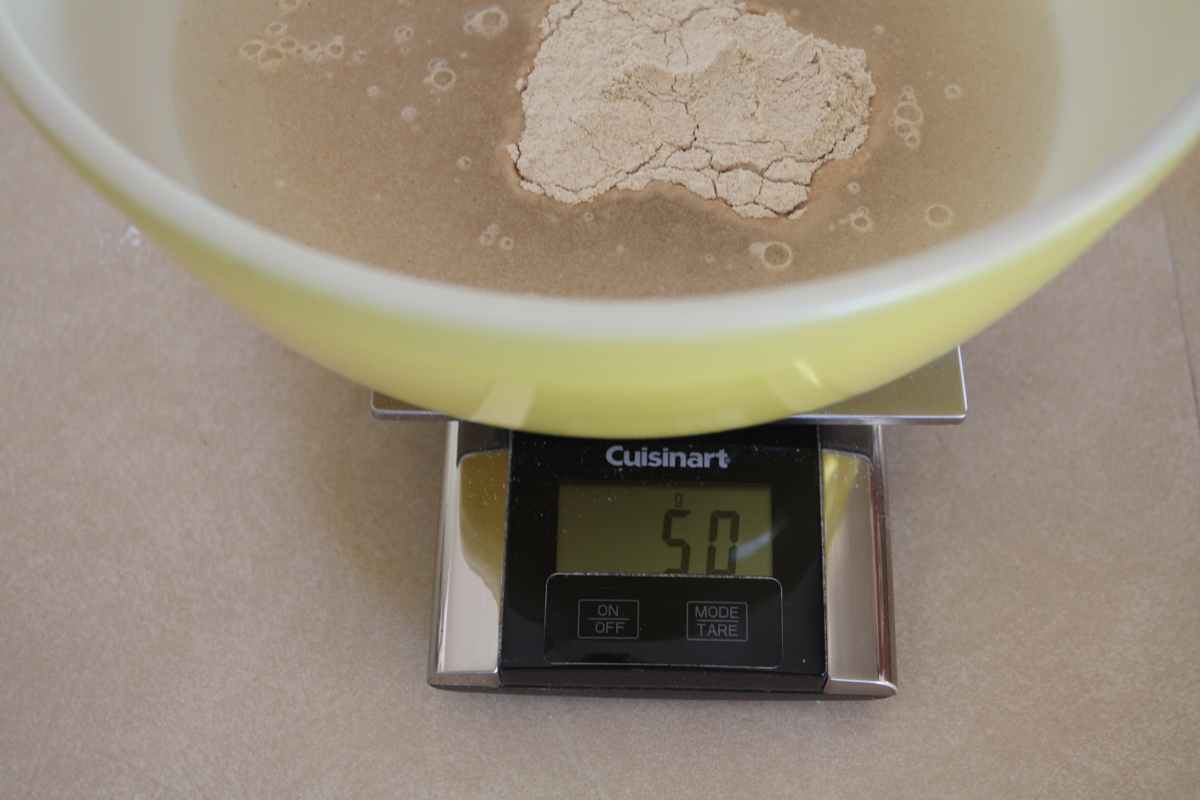
Add whole-wheat flour. Add the 50 grams of whole-wheat flour to the water. No need to stir; just sprinkle it across the surface of the water and it’ll soak right in. We added this small amount of whole-wheat mainly for the look of flakes of bran in the finished bread, so, if you don’t have whole-wheat, you could use all-purpose flour, instead. You just won’t have those tiny brown flecks in the bread.
Stand. Cover the water and flour mixture and let stand for about an hour. Note that this is the same amount of time that’s needed for your levain (freshly-fed starter to double); convenient, huh? The reason we have the whole-wheat flour soak is that we want the bran to absorb water and soften. When dry, bran is sharp, and will cut through the gluten strands which give the bread structure. Soaking makes the bran soggy and dull, making it easier build the gluten structure in the bread.
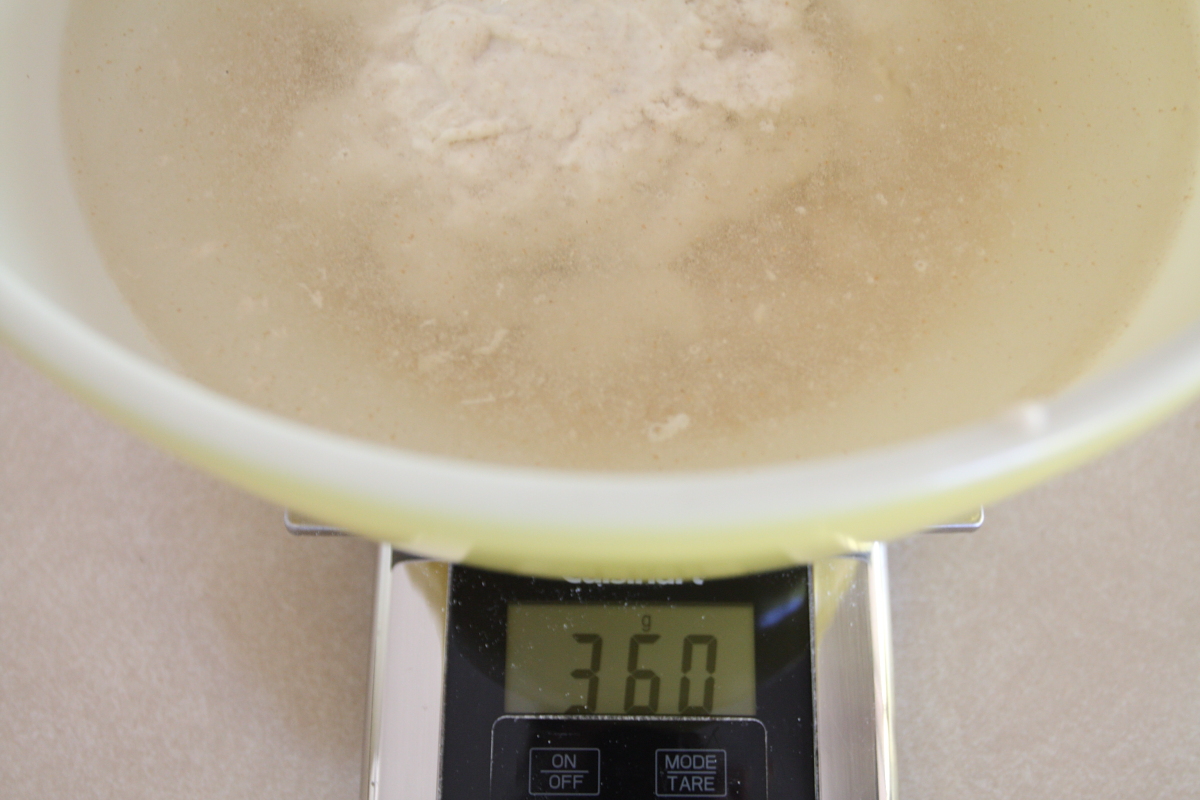
Add starter and yeast. Now that your levain is doubled, add 360 grams of it to the flour-water mixture along with the dried yeast. Stir everything until it looks like a slurry with only a few clumps of levain remaining. As an aside, what to do with all that leftover starter? After all, you have some left from feeding the starter earlier, and now there’s more left. It seems wasteful just to toss it in the trash. Try making sourdough pancakes; that’s what we do.
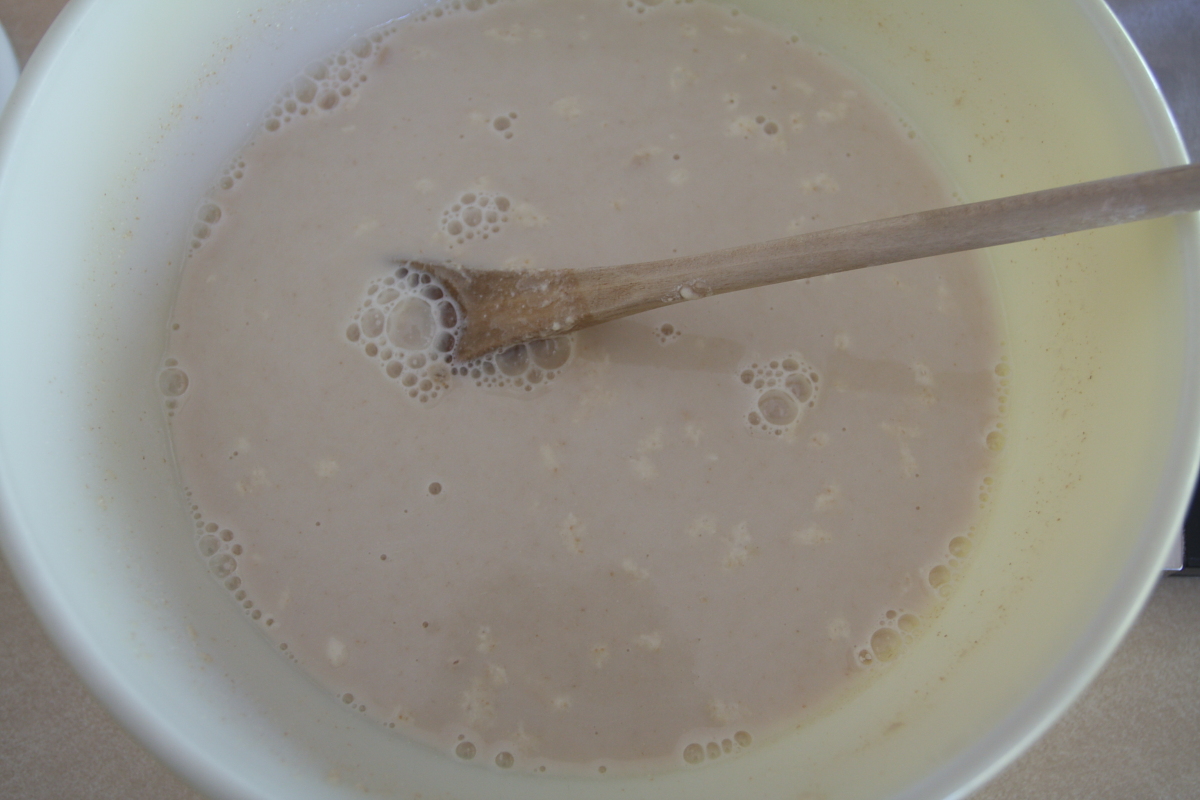

Add flours. Add the all-purpose and bread flours and stir until a dough forms. We find this the most difficult part, getting all that flour incorporated into the water, so, part way through, we’ll often switch to a flexible bowl scraper to fold in all the flour. The reason that we have both bread and all-purpose flours is we wanted to use a softer flour (lower protein content). We didn’t want to use only all-purpose, because that might be hard to handle and knead, so we kept some of that; however, using only bread flour would result in a very chewy bread. This mix is a good compromise.
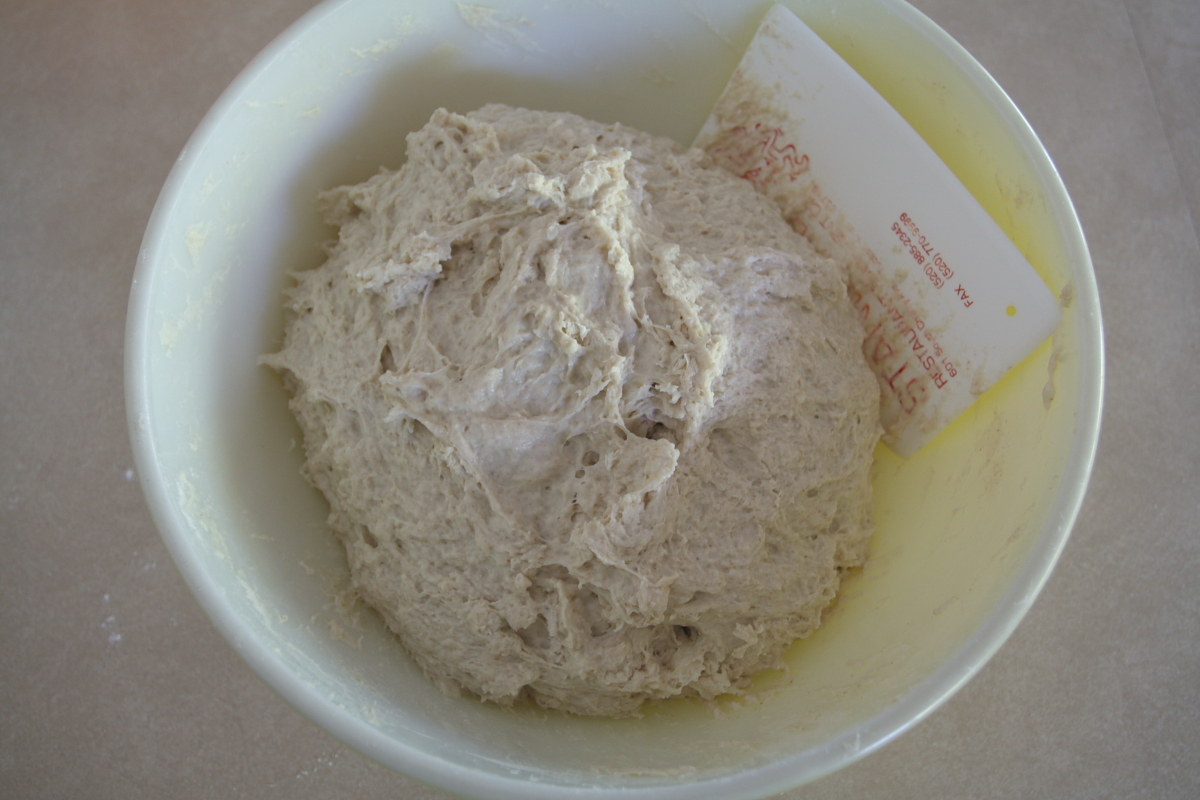
Stand. Cover the dough with a plate or plastic wrap and let it stand for about an hour. This will help the yeast to start digesting the starches, get the flour properly hydrated, and start the gluten development, making kneading a lot easier.

Add salt and vitamin C. Sprinkle the salt and vitamin C, if using, over the dough, and, using a bowl scraper, fold it in so it’s covered by dough and won’t fall off when you start kneading. The salt is there so your bread doesn’t taste like wallpaper paste; it also slows down the yeast. The vitamin C acts as a dough conditioner, making your dough easier to handle. Plus, it’ll help keep your bread fresh longer. But, it’s optional; we’ve made bread with and without vitamin C, and both versions are tasty, so don’t think that it’s necessary.
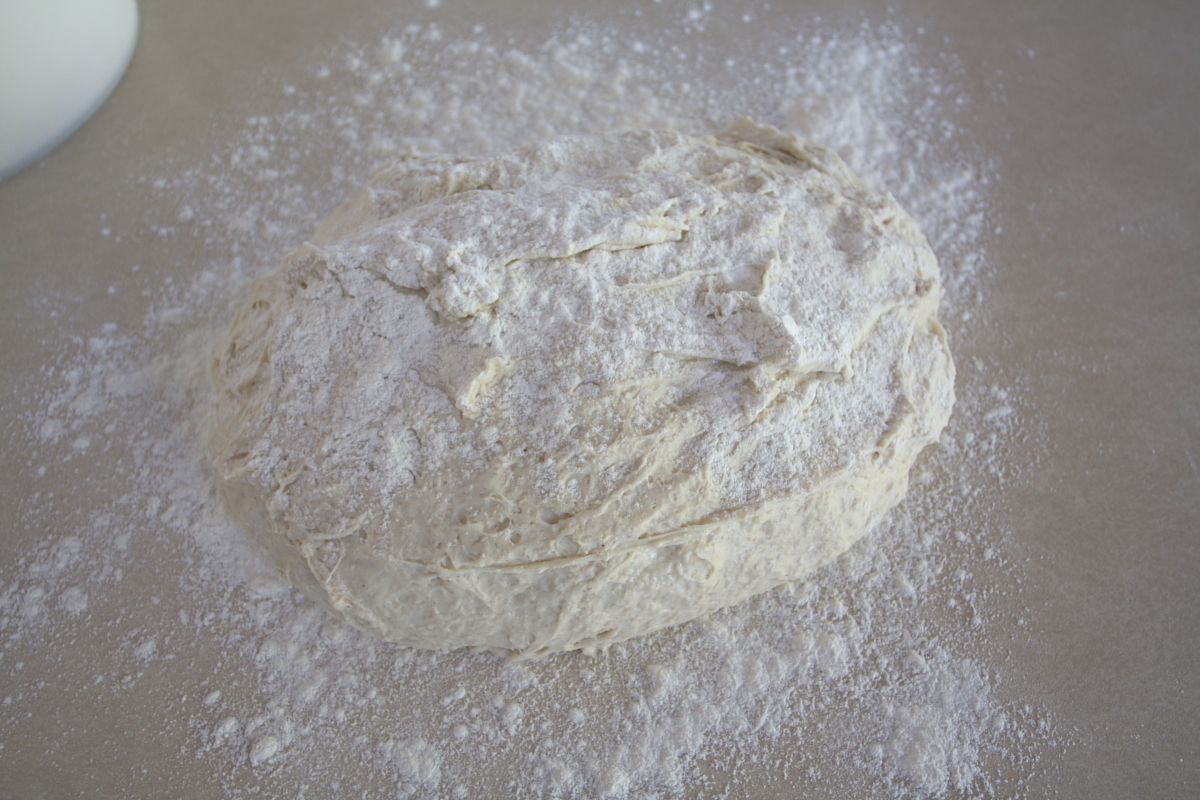
Knead. Turn out the dough onto a floured work surface and knead, dusting with flour as needed to keep it from sticking, for 5 minutes. We find the easiest way to keep track is to count the number of strokes as we knead. For us, 300 strokes takes about 5 minutes.

Rest. Shape the dough into a ball, and just let it sit on your work surface for 5 minutes. We use this time to wash the large mixing bowl and our hands.
Repeat. Repeat. Repeat. Repeat the cycle of 5 minutes of kneading and 5 minutes of resting 3 more times. Notice how the dough changes over time, becoming easier to knead and less sticky as the gluten develops. You should note that those 5-minute rest periods really make a difference, too.
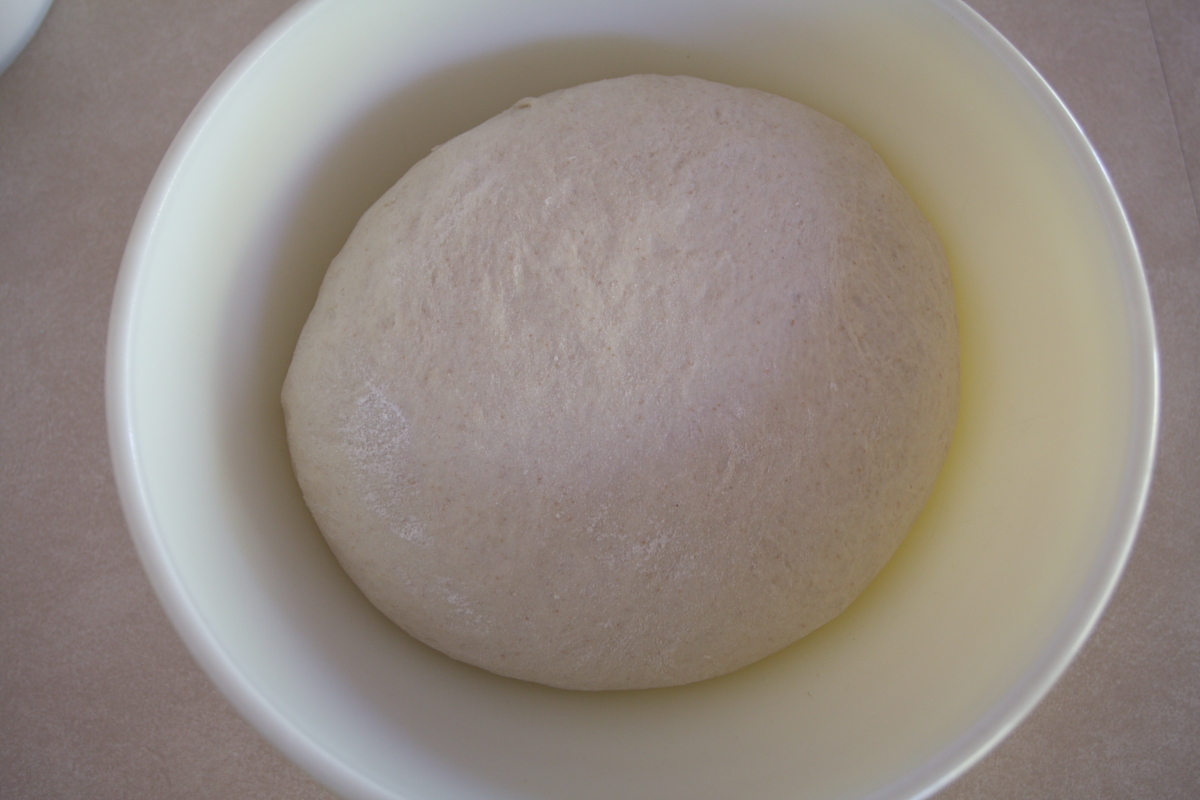
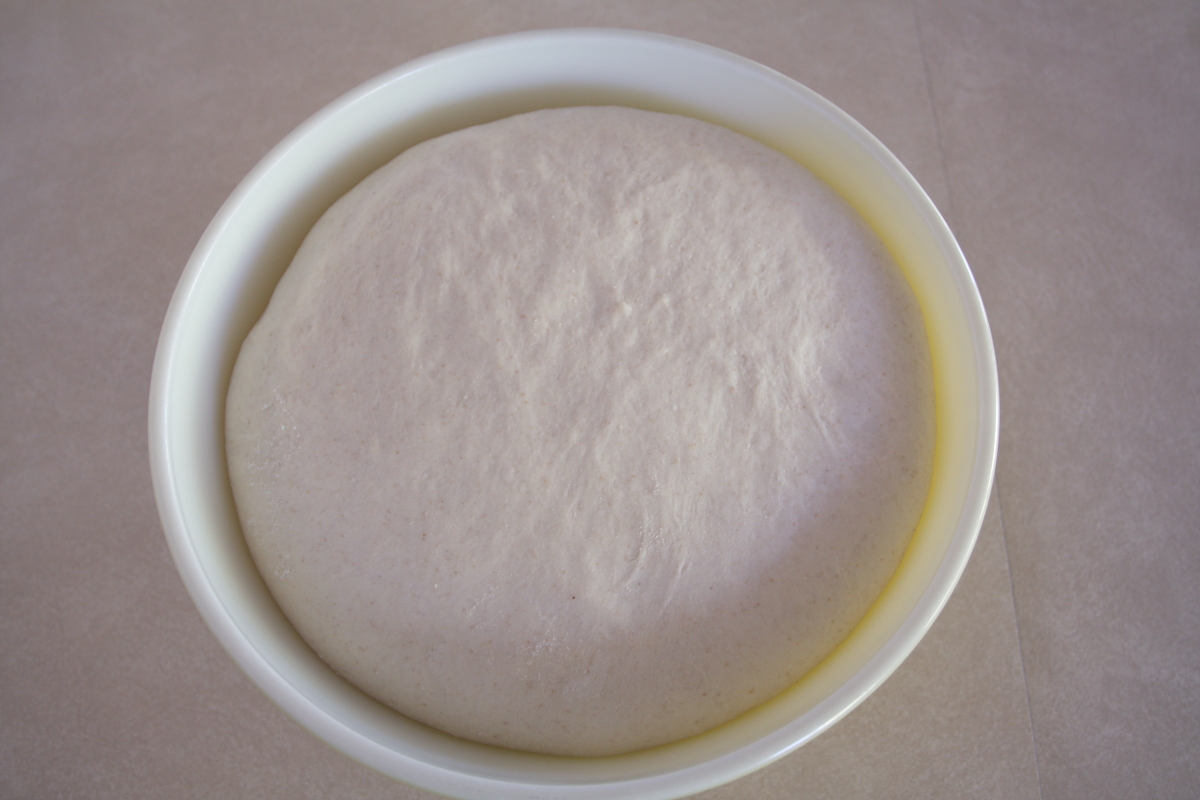
Rise. Shape into a ball, and place it seam side down in your (now clean) large bowl. Cover with a plate or plastic wrap and let rise undisturbed until doubled, about 90 minutes.
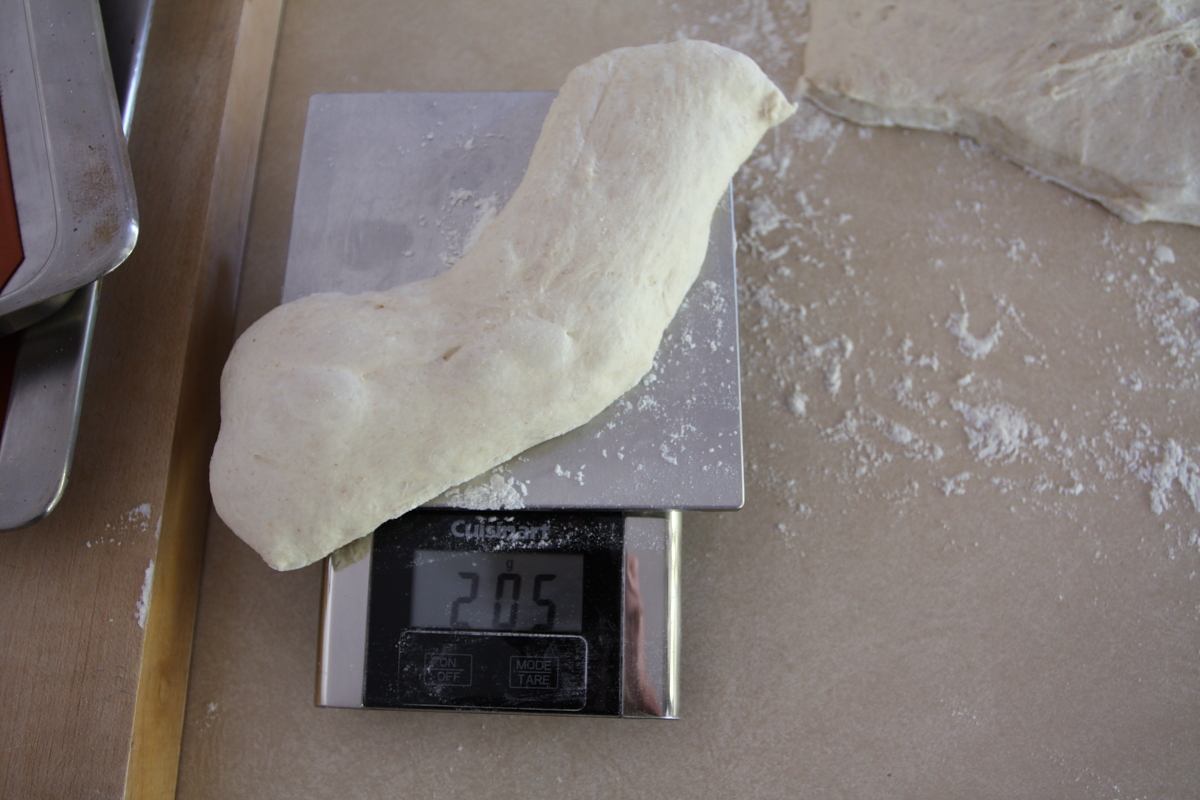
Shape. Flour your work surface and carefully turn out the dough onto it with the top side down (the top side has a nice gluten coat that you want to cut or tear as little as possible). Try not to deflate the dough as it comes out of the bowl. Yes, we’ve read many recipes that say to punch down the dough, but don’t do it. Enough deflation will happen during the shaping. Using a bowl scraper or a bench knife, cut off 200-gram rectangles of dough (about 6 inches by 2 inches), and stretch and roll up the sides, trying to keep that gluten coat intact, pinching the seam closed until you have a baguette about 16 inches long.
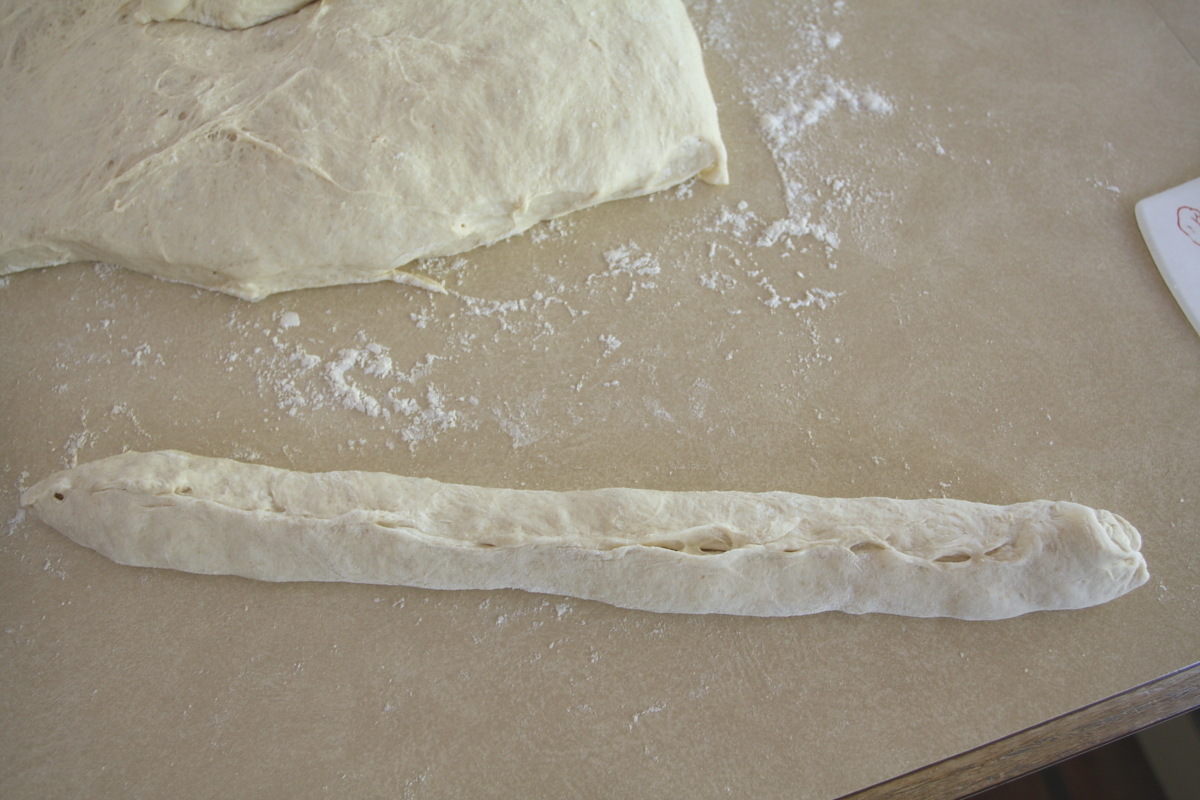
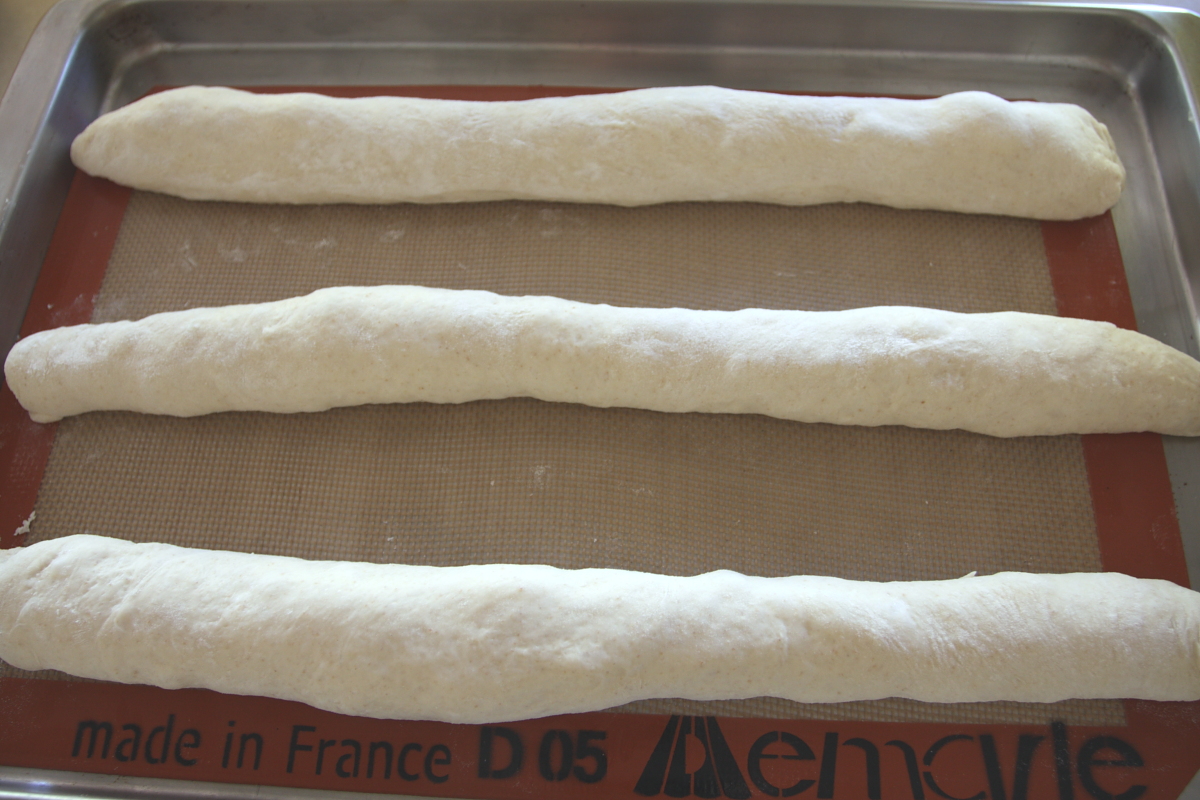
Transfer. Carefully transfer the baguette to a lined baking sheet with the seam side down. Then do the same with the remaining dough (you can make about 10 baguettes from this recipe, but, if you want to vary the shapes, feel free to experiment; tomorrow’s post will show how to make epis). You should be able to get 3 baguettes on a large baking sheet, which is important, since we want to maximize the amount of bread baking at one time.

Rise. Cover the baguettes with clean towels and let rise until doubled in size, about 45 minutes. The baguettes should be very soft at this stage, with a slight crust starting to form on the surface.
Preheat oven to 450°F. Adjust the oven racks so you can get two baking sheets of baguettes in at one time.

Slash and bake. Use a razor to cut 4 to 5 long diagonal slashes in the surface of each baguette. This will allow more steam to escape from the bread, and helps control where the bread expands as it bakes. We use a double-sided razor stuck on a coffee stirrer for slashing. Slide two baking sheets of bread into the oven and bake 22 to 25 minutes, rotating from top to bottom after 15 minutes, or until golden brown and crisp.
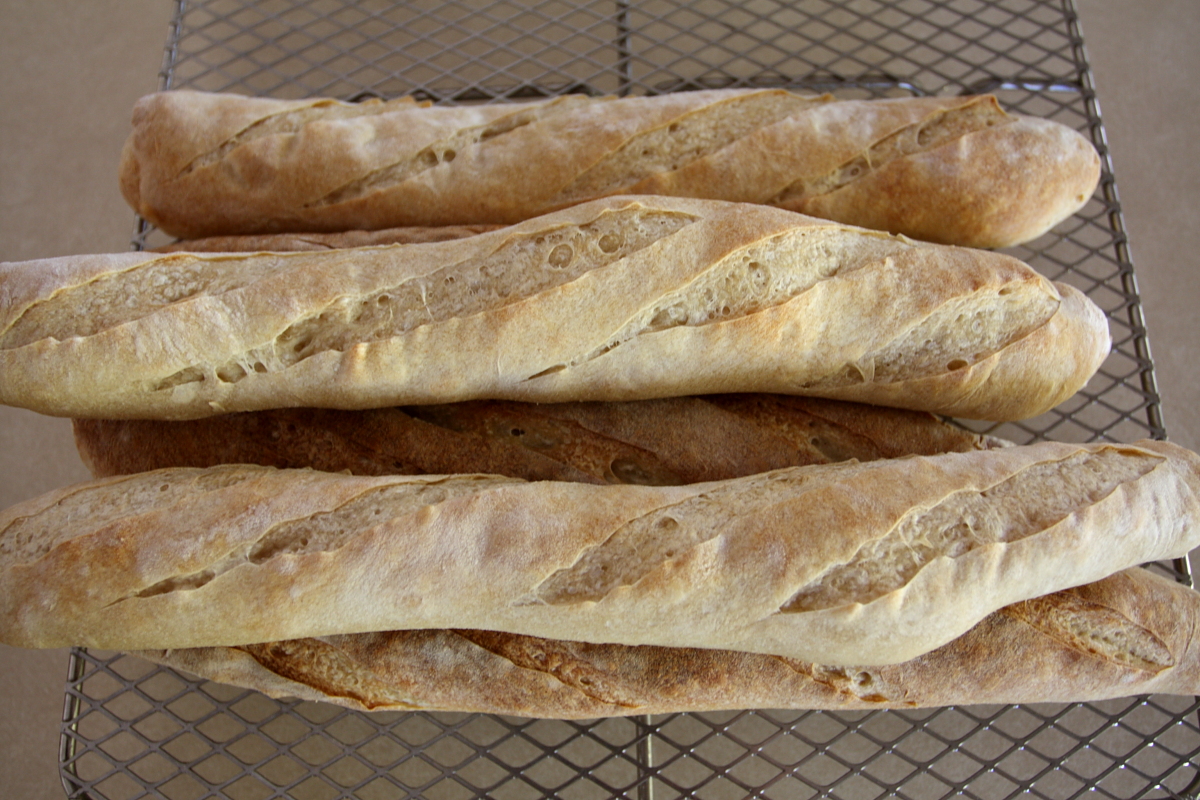
Cool. Transfer the baguettes to a baking rack and let cool completely (if you can wait that long)
We have to say, at the risk of sounding immodest, that this is better than just about every other baguette that we’ve had, regardless of the price and the fanciness of the bakery (Barrio Bread is one of the few exceptions). It’s even better than the trendy La Brea bread that you can now find across the country. It has the perfect amount of chewiness, and a nice crisp crust. The flavor is mild, but with a subtle sourness from the sourdough starter. And, while it seems like a lot of effort, it’s worth every joule of energy expended to be eating fresh, warm, homemade baguettes with a nice cheese. Five stars for sure.
