Let’s face it, everyone loves homemade bread. Just the scent of baking bread is enough to make people salivate and remember their childhoods. And it’s no wonder: as one of our oldest foods, bread is that one magical food that brings forth joy like no other. For those who have had homemade bread, our question to you is why would you ever settle for store-bought? We bet you said that homemade bread is “too difficult,” “inconsistent rising,” “crumbly,” or most likely, “takes too much time.”
Bah, humbug! We’re going to tell you how to make GREAT bread at home – easily, and it’ll taste better than anything you can get at the store in plastic wrap. This will be gourmet bread! Now, for great bread it will take time. Not too much of your time, but time for the yeast to work. Your time spent is about an hour of hands-on work, but it is well worth it. Trust us, this bread is so good, we bake three loaves at least once a week. It seems like a lot to do, but once you get the hang of it, there really isn’t that much to it.
However, there are a few special items that we strongly recommend purchasing.
One, a kitchen scale, that measures in grams and has a capacity of about 5 kilograms. Using a scale will make your bread consistent! It’ll be the same from week to week, month to month, and year to year. It took us over twenty years of baking bread off and on until we got a kitchen scale. We would never give it up!
Two, a cast iron “combo dutch oven skillet set.” This is the easiest way to get that crisp but chewy crust that everyone wants in bread. It also nearly guarantees having that “oven spring” that makes your bread go from lead-lump loaf to airy-light loaf. It is just amazing how much difference the combo cooker makes.
Now we got this recipe, starter, and some great tips when we took a class offered by Barrio Bread, and we learned about the technique of using a cast iron dutch oven from Tartine by Chad Robertson (which also shows how to make your own starter).
Basic Bread
Ingredients
- 150 grams Whole Wheat flour ~1 1/4 cup
- 850 grams Bread flour ~6 1/3 cups
- 360 grams sour dough starter ~2 cups
- 18 grams salt ~1 Tbs
- 680 grams water ~3 cups
Instructions
First, make next week's starter
- Measure 200 grams of starter (~1 cup) into a clean container that has a lid.
- Add 75 grams (scant 2/3 cup) of whole wheat flour. Add 75 grams (~1/2 cup) of bread flour. Add 150 grams (2/3 cup) of lukewarm water.
- Stir until the consistency of a thick pancake batter. Cover and let sit on the counter about 1 hour. Put back in the refrigerator, as this is your batch of starter for next week.
Feed this week’s starter
- From the original starter, remove and discard starter until you have 200 grams (~1 cup) remaining.
- Add 75 grams (scant 2/3 cup) of whole wheat flour. Add 75 grams (~1/2 cup) of bread flour. Add 150 grams (2/3 cup) of lukewarm water.
- Cover and let sit on the counter about 1-2 hours, or until it has about doubled in bulk.
Now make Bread dough
- Measure 680 grams (3 cups) tepid water.
- In another bowl measure out 150 grams (1 1/4 cups) of whole wheat flour and 850 grams (6 1/3 cups) of bread flour.
- In a small bowl measure out 18-25g (~ 1Tbs) salt.
- Once your starter is ready, add 360 grams (~ 2 cups) of the starter to the water and mix until mostly dissolved.
- Add most of the flour mixture, but keep back about 1/2 to 3/4 cup for kneading. Mix until combined.
- Sprinkle the salt on top, and cover with plastic wrap or plate. Let sit 20-30 minutes.
- Fold in the salt and scoop the dough onto a floured work surface. Knead for 5 minutes. Rest 5 minutes. Repeat the kneading resting cycle 4-5 times.
- Now that you’ve kneaded the dough, shape it into a ball and put in a clean bowl and cover with plastic wrap or plate.
- Let the dough go through a “bulk rise” lasting 4-8 hours, depending on the temperature.
- After the dough has doubled in bulk, you’ll want to divide it into three equal pieces of about 680 grams each.
- Shape each piece into a ball by pulling the dough from the sides to the bottom until you have a nice smooth ball. The dough you pulled down should be pressed together to form a rough seam.
- Place each ball on a floured board (we use a cutting board), loosely cover with plastic wrap or damp towel, and let sit for 1-2 hours.
- While waiting, line three baskets (or colanders, or something that’s a bit porous) with clean dish towels and dust with flour.
- Once the dough has doubled in size, just like the pre-shape, work the dough under and pinch it together, keeping a nice smooth surface on top.
- Place each ball smooth side down in the prepared baskets, dust lightly with flour and cover with part of the dish towel (or another towel) and put it in the refrigerator overnight.
- The next morning, take the dough from the refrigerator about 1-2 hours before you plan to bake and let it begin warming.
- About 30 minutes before you want to bake, place the dutch oven in your oven and preheat to 450°F.
- Remove the skillet lid from the oven, and place a ball of dough in the middle, so that the seam side is down.
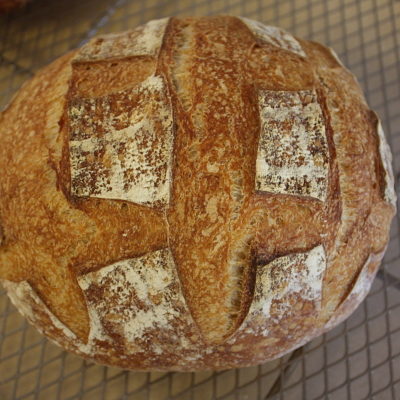
- Slash the top with a razor blade or sharp knife to form a tic-tac-toe pattern.
- Place the dutch oven on top of the skillet lid, and bake 20 minutes.
- Remove dutch oven cover and bake an additional 20 minutes.
Ingredients discussion:
Don’t skimp on the flour. This bread has only three ingredients: flour, water, and salt (and wild yeast that’s in the starter), so the choice of flour will make a difference. We heartily recommend using King Arthur flours. Yes, King Arthur is more expensive than some other brands, but it’s better. We know, we’ve tried to skimp. Besides, even at $5.00 per bag of flour, each large loaf costs about 90 cents.
With regards to the sourdough starter, if you have some, great; if not, you can substitute a poolish (see note at the end of this post), although the rising times will be shorter. Or, if you’re up for it and are willing to bake about once a week, you can try making your own. We recommend looking at the book Tartine by Chad Robertson for instructions. Or maybe you have an artisan baker in your area who makes naturally leavened bread and would be willing to supply you with a starter – that’s how we got ours.
Procedure in detail:
First off, we need to prep the starter. If you are using a poolish, you can skip these steps and go to the part about adding the starter to the water. We are going to both split and feed the starter, as this will allow us to have starter for this batch of bread and the next. With care, you can keep a starter going indefinitely.
First, make next week’s starter.
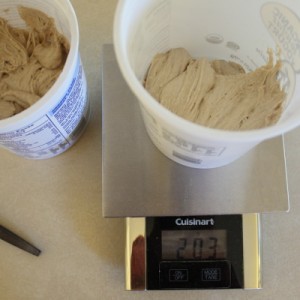
Measure 200 grams of starter (~1 cup) into a clean container that has a lid. We use a 1-quart yogurt container.
Add 75 grams (scant 2/3 cup) of whole wheat flour.
Add 75 grams (~1/2 cup) of bread flour.
Add 150 grams (2/3 cup) of lukewarm water.
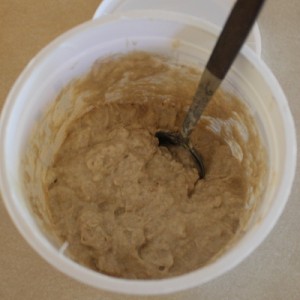
Stir. Stir until the consistency of a thick pancake batter. Cover and let sit on the counter about 1 hour. Put back in the refrigerator, as this is your batch of starter for next week.
Feed this week’s starter. From the original starter, remove and discard starter until you have 200 grams (~1 cup) remaining. In our case, we tared the scale with a similar container, so we removed and discarded starter until we were left with 200 grams total. If, like us, you hate to see the starter go to waste, make sourdough pancakes. We’ve provided the recipe.
Add 75 grams whole wheat flour. Now, just as with the starter you are saving for next week, add 75 grams of whole wheat flour (scant 2/3 cup).
Add 75 grams of bread flour (~1/2 cup).
Add 150 grams of lukewarm water (2/3 cup).
Stir. Stir until the consistency of a thick pancake batter.
Cover and let sit on the counter about 1-2 hours, or until it has about doubled in bulk. Now you have starter primed and ready for bread making. (You can also check to see if it is ready by putting a small bit in a dish of water. If it floats, you’re good to go.)
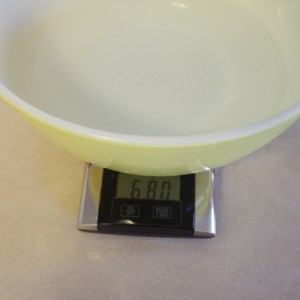
Measure 680 grams (3 cups) water. While you’re waiting on the starter, measure out 680 grams of water into a large (about 4 quart) bowl. Use cool to tepid water.
In another bowl measure out 150 grams (1 1/4 cups) of whole wheat flour.
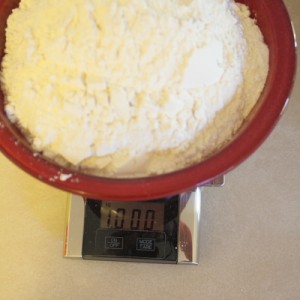
Add 850g (6 1/3 cups) of bread flour; we just add bread flour until we get 1000g (1kg) total flour.
Now, measure out 18-25g (~1 Tbs) of salt into another container. We just use the measuring cup that we used for scooping flour.
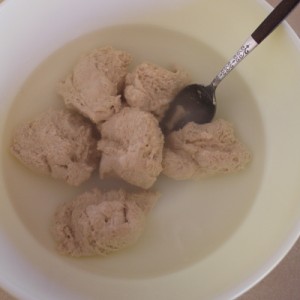
Add the starter to the water. When your starter is ready, add 360 grams (~ 2 cups) of the starter to the water. Here we use the tare function of the kitchen scale. We put the container of starter on the scale, tare it, and scoop out starter until we reach -360 grams. Discard the remaining starter (or make sourdough pancakes).
Mix the starter into the water until it is mostly dissolved.
Add most of the flour mixture, but keep back about 1/2 to 3/4 cup for kneading. Mix until combined.
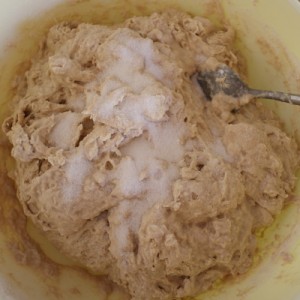
Sprinkle the salt on top, and cover with plastic wrap or plate. Let sit 20-30 minutes.
Okay, now for the hard part. Fold in the salt and scoop the dough onto a floured work surface.
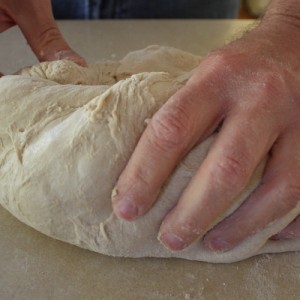
Knead the dough for about 5 minutes, incorporating more flour as necessary to prevent it from sticking to the surface. Rather than watch the time, we do 300 folds and turns. Yes, we do count them.
Shape dough into a ball and cover with plastic wrap. Let it and you rest 5 minutes.
Time’s up! So knead for another 5 minutes. Shape and cover 5 minutes. Do this 4 times until the dough becomes supple and smooth. Don’t skimp on the kneading or resting. That’s what develops the gluten to make a nice, somewhat chewy, bread texture.
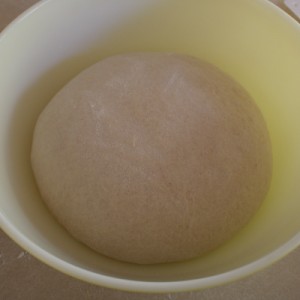
Put the dough in a bowl. Now that you’ve kneaded the dough, shape it into a ball and put in a clean bowl and cover with plastic wrap or plate.
You are going to let the dough go through a “bulk rise” lasting 4-8 hours, depending on the temperature. Here you can run errands, do laundry, etc., and pretty much ignore the dough, but if you are around you should do a “stretch and fold” every 1-2 hours – basically grab an edge, stretch the dough up and fold it over, then grab the opposite side, do the same, and then, with the sides offset by 90°, flip the dough over and dust with flour.
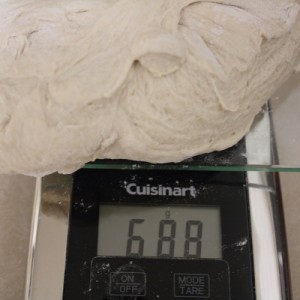
Divide the dough. After the dough has doubled in bulk, you’ll want to divide it into three equal pieces of about 680 grams each.
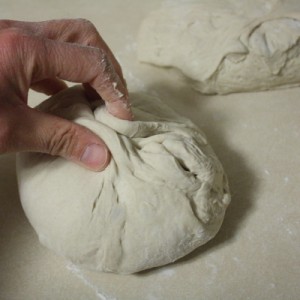
Pre-shape the dough. Shape each piece into a ball by pulling the dough from the sides to the bottom until you have a nice smooth ball. The dough you pulled down should be pressed together to form a rough seam. This is the pre-shape. (The photo shows the beginning of the pre-shape, before we’ve flipped over the ball of dough).
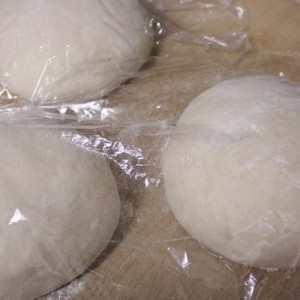
Place each ball on a floured board (we use a cutting board), loosely cover with plastic wrap or damp towel, and let sit for 1-2 hours.
Get some baskets ready. While waiting, line three baskets (or colanders, or something that’s a bit porous) with clean dish towels and dust with flour.
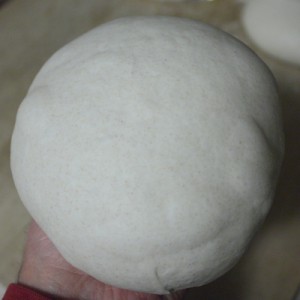
Do the final shape. Once the dough has doubled in size, you’ll note that it collapsed and spread out a bit, too, so now we’ll want to do what’s called the final shape. Basically just like the pre-shape, work the dough under and pinch it together, keeping a nice smooth surface on top.
Place each ball smooth side down in the prepared baskets, dust lightly with flour and cover with part of the dish towel (or another towel).
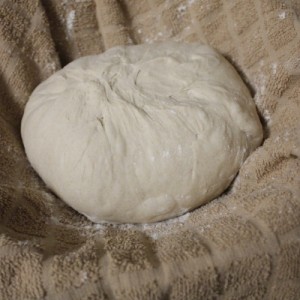
If your house is cool (say, below 70°F) you might want to leave the dough out overnight; otherwise, put it in the refrigerator overnight. The next morning, take the dough out of the refrigerator about 1-2 hours before you plan to bake and let it begin warming on your work surface. It should have risen nicely.
Preheat the oven and pans. About 30 minutes before you want to bake, place the dutch oven in your oven and preheat to 450°F. We normally let the oven cycle twice to make sure the cast iron dutch oven is hot.
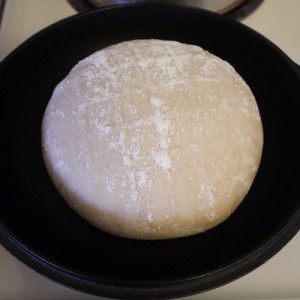
Put the bread on the pan. Remove the skillet lid from the oven, and place a ball of dough in the middle, so that the seam side is down.
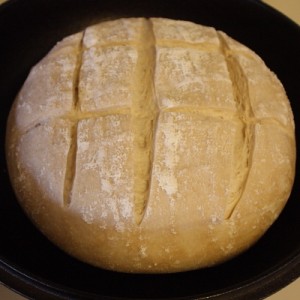
Slash the top with a razor blade or sharp knife to form a tic-tac-toe pattern. We use a double-sided razor blade attached to a coffee stirrer. A lot of people panic and try to work quickly, but don’t. You’ll get burned, and, besides, there’s no rush. You want to slash the dough so you get that oven spring. Place the dutch oven on top of the skillet lid, and place the whole thing back in the oven.
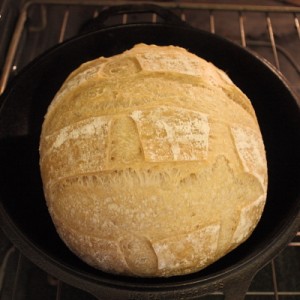
Bake 20 minutes. Note how the bread has opened up along the slashes.
Bake 20 minutes more. Remove dutch oven cover and bake an additional 20 minutes.
Remove bread and place on rack to cool. If you tap on the bottom, it should sound hollow. Repeat the same baking procedures with the remaining two loaves.
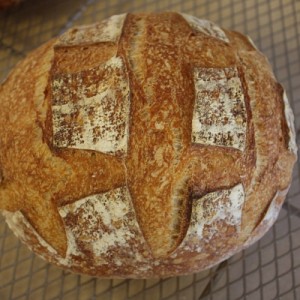
Enjoy some of the best bread you’ve had. And you scratched it yourself!
Variations:
During the summer, we generally switch to making rolls and/or pita bread and we change the bulk rising a bit. For the rising, after the kneading is complete, we put the dough back in the mixing bowl, cover it, and let it sit for about an hour. Then we do one stretch and fold, re-cover the dough and put it in the refrigerator for 24-48 hours (sometimes we bake the next day, sometimes not). We like to get the dough out of the refrigerator 1-2 hours before we’ll be shaping.
The reason for the rolls and pita bread is that they bake quickly, and, besides, they’re a bit different from the standard boules. For the rolls, we happen to have a couple of cast iron muffin pans that work wonders with this dough – if you have cast iron pans, you’re in for a treat. If not, you might try baking them on greased cookie sheets or a pizza stone. After a bit of experimentation, we found that measuring out 40 grams of dough per roll is perfect for our muffin pans, so we cut off the dough and shape small rolls and place them on a floured cutting board. Cover with a damp cloth and leave to rise for about 30-45 minutes, then remove the damp cloth so the top part of the roll will dry out a bit. Preheat the oven and cast iron muffin pans to 450°F. It should take about 30 minutes to get those cast iron pans super hot! When hot, take out the muffin pans, load each compartment with a ball of dough, and snip with a kitchen shears. Pop them back in the oven for 15 minutes. Note: with a seasoned cast iron pan, no greasing is necessary; with other pans, you might need a bit of oil to prevent sticking.
Pita breads are even easier, although you do need a pizza or baking stone. This time, measure off and shape dough balls that are about 100 grams each, place them on a floured board, and cover them with a damp cloth. Let rest 15 minutes, then pre-shape them into disks and re-cover with the damp cloth. Now, place the baking stone on the lowest rack and preheat the oven to 450°F for about 30 minutes. Once hot, take a dough disk, and roll it out until it’s about 7 inches in diameter and 1/4 inch thick. Place directly on the hot stone and quickly close the oven door. In about 3-4 minutes, it’ll puff up like a ball. Once it is fully puffed, wait 60 seconds (we count it off) and remove the pita to cool. When you get the hang of it, you can do 3-4 pitas at the same time and you’ll be finished baking in about 30 minutes.
Poolish: If you don’t have a starter, you can make a poolish (the name is a corruption of Polish; Polish bakers used this a lot) or sponge. Measure out 90 grams (3/4 cup) of whole wheat flour, 90 grams (2/3 cup) of bread flour, and 180 grams (3/4 cup) of cool water into a clean container. Add just a pinch of yeast, and stir until you have something resembling thick pancake batter. In about 2 hours, it should have doubled in size. Use this as your sourdough starter.
