Ah, ice cream. What could be better than rich, creamy, smooth vanilla ice cream? Not much, right? Well, if you happen to have an ice cream maker, you’re in luck, because today we’re going to scratch up a batch of French Vanilla Bean Ice Cream. Since we’re still learning about making ice cream, we follow a basic recipe that came with our Kitchen Aid ice cream freezer, but we do add flecks of vanilla from a vanilla bean.
Now, if you’ve never made ice cream before, you might think that it’s not worth the bother. There are dozens of ice creams, even gourmet ice creams, available at the store. But, we can tell you right now, that making ice cream at home makes a much, much creamier ice cream. Why? Because even premium ice creams don’t use as much of the high-quality ingredients that we use at home. And, if you start with better ingredients, you’ll make better ice cream.
As an aside, if you don’t have an ice cream maker, you can always enjoy Vanilla Bean Semifreddo. No churning needed.
Let’s get scratchin’ and churning.

French Vanilla Bean Ice Cream
Ingredients
- 1 1/4 cup half-and half
- 1 vanilla bean
- 4 egg yolks
- 1/2 cup sugar
- 1 1/4 cup heavy cream
- 2 tsp vanilla extract
- Pinch kosher salt
Instructions
- Place half-and-half in a medium saucepan. Split vanilla bean and scrape the insides into the half-and-half and add vanilla pod. Place over medium heat until quite hot and steamy, but not boiling. Remove pod and remove pan from heat.
- In a medium bowl, whisk together egg yolks and sugar until pale yellow, about 2 minutes.
- While whisking continuously, and, starting very slowly, then increasing in volume, add hot half-and-half to the egg yolk mixture.
- Place mixture back in saucepan over medium heat, and, whisking continuously, cook until thickened, about 5 minutes. Remove from heat.
- Pour custard into a bowl, stir in heavy cream, vanilla, and salt. Refrigerate until completely cooled, about 8 hours.
- Churn according to the instructions on your ice cream maker.
Ingredient discussion:
We’re going to surpass any commercial ice cream you’ve ever had, so make sure to get heavy cream, preferably without additives — read that ingredients list — and a high-quality half-and-half. Altogether, this should make an ice cream with about 18% butterfat by weight (even the gourmet ice creams don’t go above 16%, as it’s too expensive). Get those eggs from happy hens. You’ll taste the difference; and, of course, only 100% pure vanilla extract will do.
Procedure in detail:
Ice cream base is nothing more than a custard. Just like Pudding. Just like Pastry Cream. Just like Crème Brûlée. Custards are so widely used in cooking that, sooner or later, you’ll be making one. Why not start with ice cream?

Flavor half-and-half. Place the half-and-half in a medium saucepan. Split a vanilla bean lengthwise and scrape out the interior of the pod into the half-and-half. Add the pod, too.
Heat. Place the half-and-half mixture over medium heat and cook, whisking often, until quite hot. The half-and-half should be steaming and just starting to bubble around the edges. Do not let it boil. Once hot, remove from heat. Remove vanilla pod. Rinse pod thoroughly, dry, and save for another use.

Whisk yolks and sugar. In a medium mixing bowl, whisk together the egg yolks and the sugar until pale and creamy.
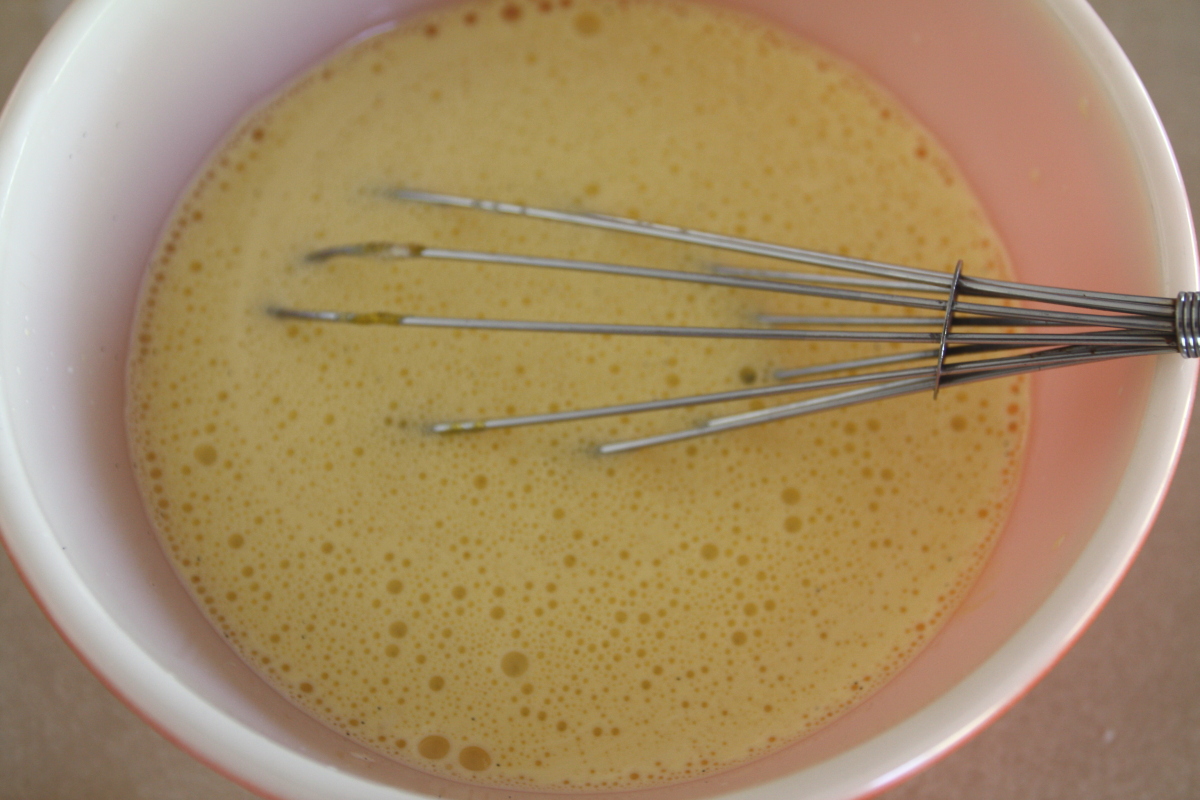
Add hot half-and-half. This is the only tricky part of making custard. You need to add the hot liquid to the yolks. If you go too fast, the yolks will cook, making a weird scrambled egg ice cream (in reality, you could strain the custard) which will not impress anyone. So, here’s what you do. Take a deep breath, relax, and start whisking the yolk and sugar mixture. Fast. Perfect. Now, slowly start pouring the hot liquid right into the center of where you’re whisking. Perfect. If it’s your first time, it’s easier if you can engage someone to pour the hot cream for you; just be explicit as to what they need to do. As you add the hot cream, you can start pouring it in faster. Ah, see, you did it, and we’re finished with the only hard part.

Cook custard. Return the egg mixture to the saucepan, place over medium heat, and cook, whisking continuously, until the custard has thickened, about 5 minutes. We like to cook it until we see the tiniest sign of boiling. Just wait until one little “blup” of a bubble appears, then remove it from the heat.
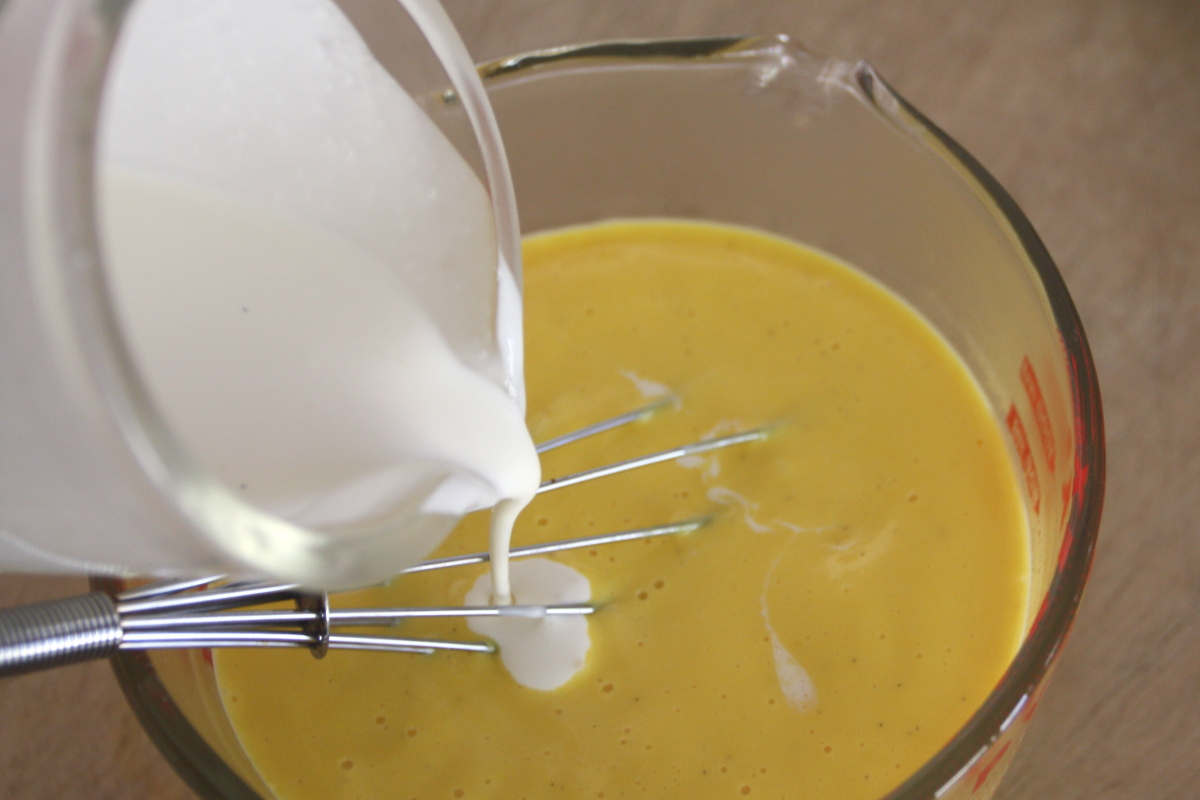
Finish custard base. Pour the custard into a bowl or something with a pour spout (it makes it easier to pour it into the ice cream maker later), and stir in the heavy cream, the vanilla extract, and the salt. Your ice cream base is finished. Yay! We’ll have ice cream in just a few hours.
Chill. Cover the custard and place in the refrigerator until completely chilled, about 8 hours. Yes, we know that seems like a long time to wait. Part of scratchin’ is learning patience; besides, homemade ice cream is worth it.
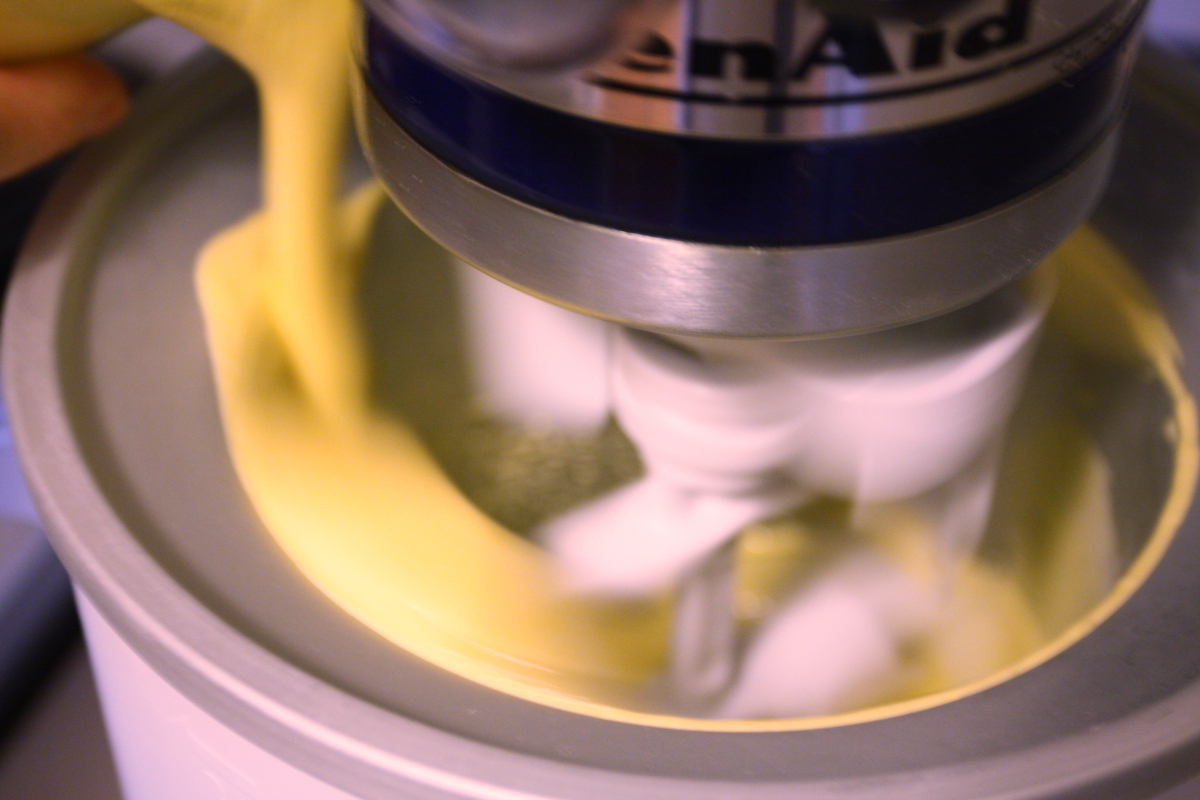
Churn. Ah, the moment has arrived. Set up your ice cream maker and churn for 7 to 12 minutes, depending on how firm you want your ice cream.
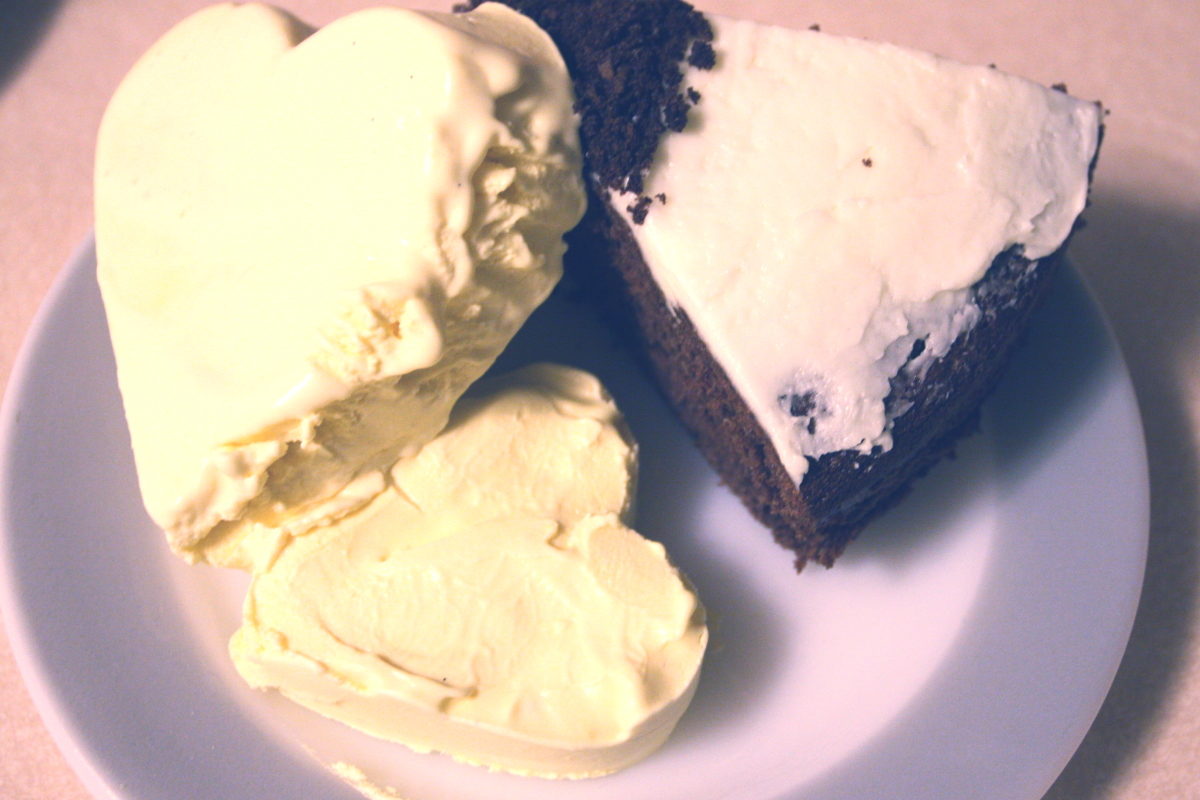
Serve and freeze. You can serve some now — it’ll be like soft-serve ice cream — or you can pack it into an air-tight container, and freeze it for later. Or you can do both.
It’s true! Homemade ice cream is better than commercial ice cream, and we think it’s among the best ice cream we’ve ever had. It’s creamier (that 18+% butterfat), richer (4 egg yolks), and more flavorful (pure vanilla) than any ice cream you can buy. And, while you have to wait for the ice cream base to chill, it’s relatively easy to make up, and such a joy to eat. Five stars.
