
Hoping for something quick, easy, and tasty? So were we just the other day, when we wanted something to bring to the volunteers at our weekly downtown walk. We volunteer there once a month, and, to try to ensure that we won’t be the only ones during our shift, we bring a little something. This week: cheese straws.
This recipe comes from The Lee Bros. Southern Cookbook, by none other than Ted and Matt Lee. (Apparently, they really are brothers.) They’ve put together a wide variety of recipes of Southern dishes, some traditional, some not so traditional, and, from the size of the book, they have nearly every recipe that you might need, and, maybe, one or two that you don’t. We’ve tried a couple of their recipes before because they all sound so good. Oh, before you get scratchin’, realize that you can’t drink through these straws.
Cheese Straws
Ingredients
- 1 1/2 cups extra-sharp Cheddar cheese grated
- 3/4 cup all-purpose flour
- 1/4-1/2 tsp red pepper
- 1/2 tsp kosher salt
- 4 Tbs unsalted butter slightly warm and cut into pieces
- 1 Tbs half-and-half or cream
Instructions
- Preheat oven to 350°F.
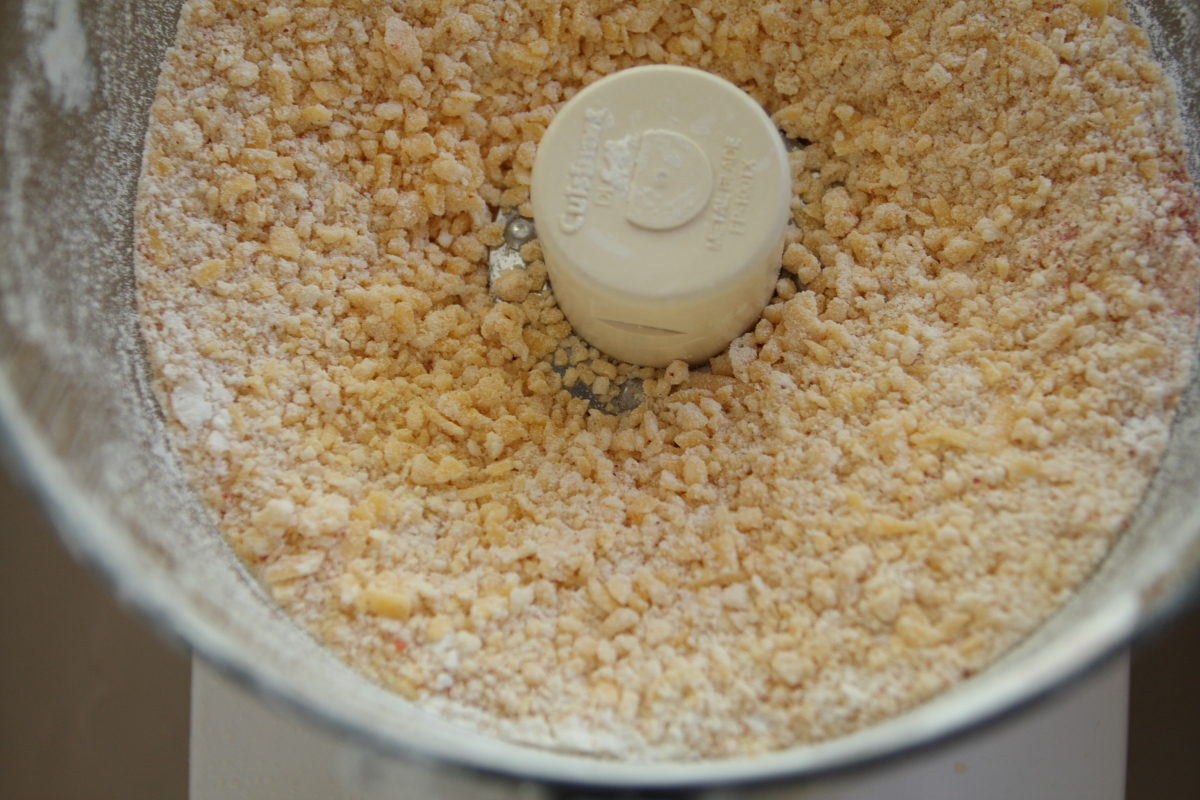
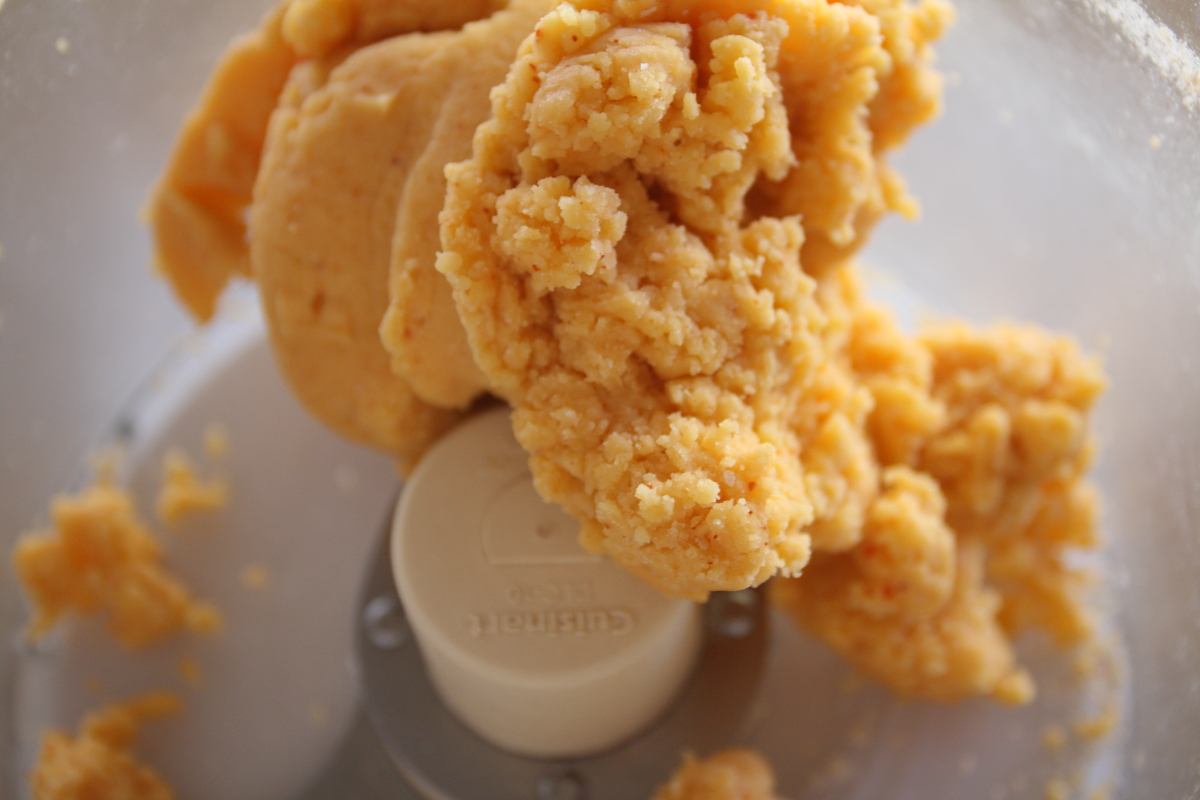
- Place all ingredients, except half-and-half or cream, in the bowl of a food processor. Pulse until it resembles coarse crumbs. With processor running, pour in half-and-half. Process until a dough forms, about 10 seconds.
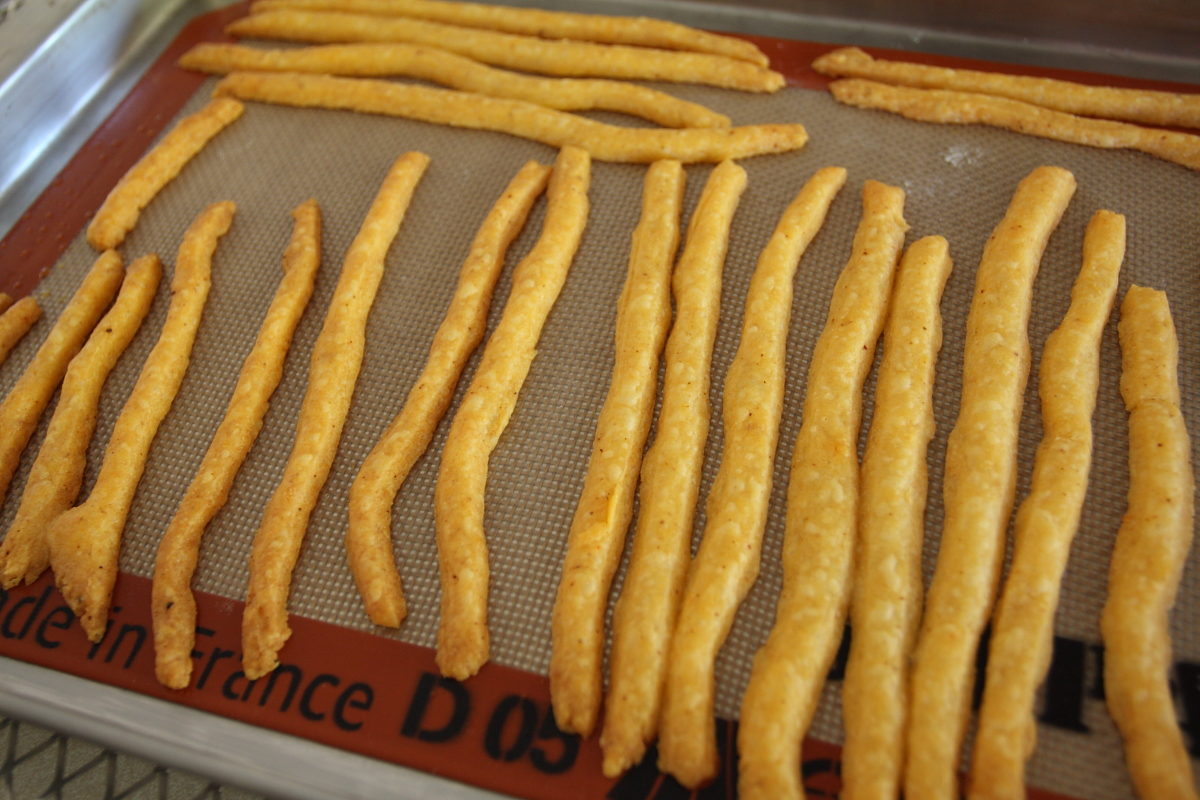
- On a lightly-floured work surface, roll out dough to 1/8 inch thick. Slice into ribbons 1/4-inch wide and transfer to a parchment-lined baking sheet.
- Bake for 12-15 minutes, or until lightly browned and crisp.
- Cool on sheet for 3 minutes, then transfer to a rack to cool completely.
Ingredient discussion:
Since you’re baking cheese, you really need to use a very sharp cheese. In the past, we’ve tried a milder cheese, and all the flavor gets washed away. They were extremely bland, but we learned our lesson and are passing it on so you don’t have to learn it, too.
Procedure in detail:
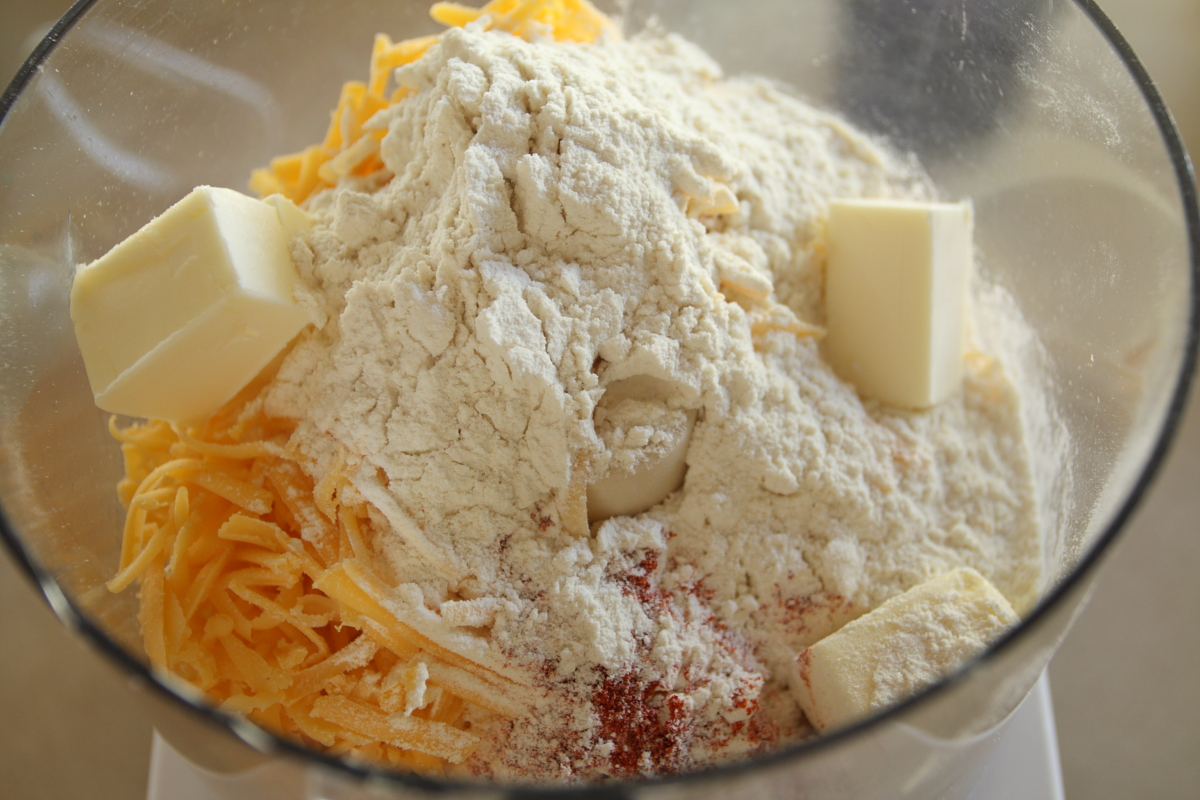
Process most everything. This is really a super-simple recipe; just place all the ingredients, other than the half-and-half, in the food processor and set it to whirring. We like to set the food processor in the sink since flour will sometimes shoot out around the edges. After a few pulses it’ll look all crumbly.
Add half-and-half. With the processor running, add the half-and-half in a steady stream. In about 10 seconds, everything will come together in a ball and ride up on the blade. Stop the processor.

Roll out. We just use our counter to roll out doughs. We lightly flour it, scrape the lump of dough onto it, and roll it out. Periodically you’ll need to add a dusting of flour. Keep rolling until it’s about 1/8 of an inch thick.
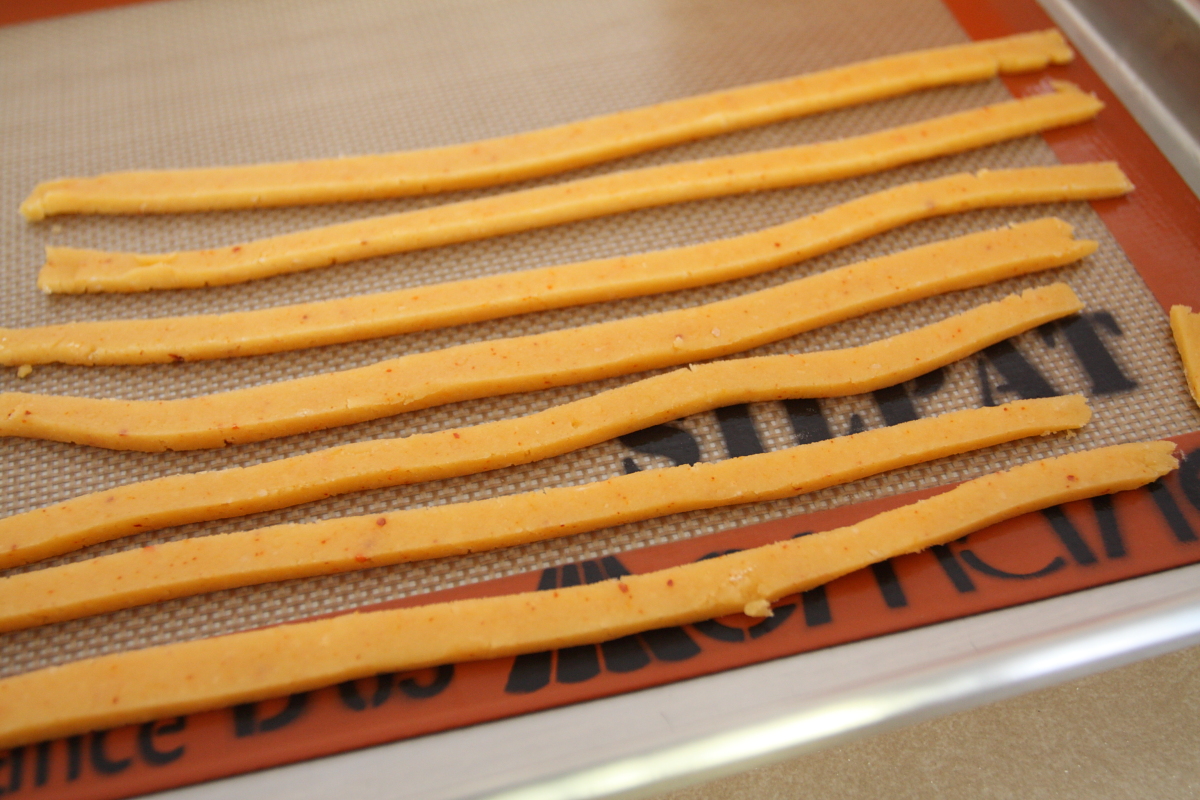
Slice. Use a sharp knife to cut the dough into narrow strips. We go about 1/3 of an inch wide. Transfer the strips to a baking sheet line with parchment, making sure there’s a little space between straws. They do spread just a tiny amount.
Bake. Slide them into the oven and bake for 12-15 minutes, or until they start to brown and look crispy. We rotate the sheet halfway through baking.
Cool. Remove the sheet, let cool for about 3 minutes, then transfer straws to a rack to cool the rest of the way.
Taste. We bet you can’t eat just one!
This recipe is so easy and fast, yet it delivers a really tasty snack (it’s actually harder to clean up afterwards, well, maybe a little harder). Perfect when you want a little something that looks a bit elegant, but with real down-home flavor. By the time our volunteering was done, so were these cheese straws. (Yeah, we helped eat them.) Four stars.

