
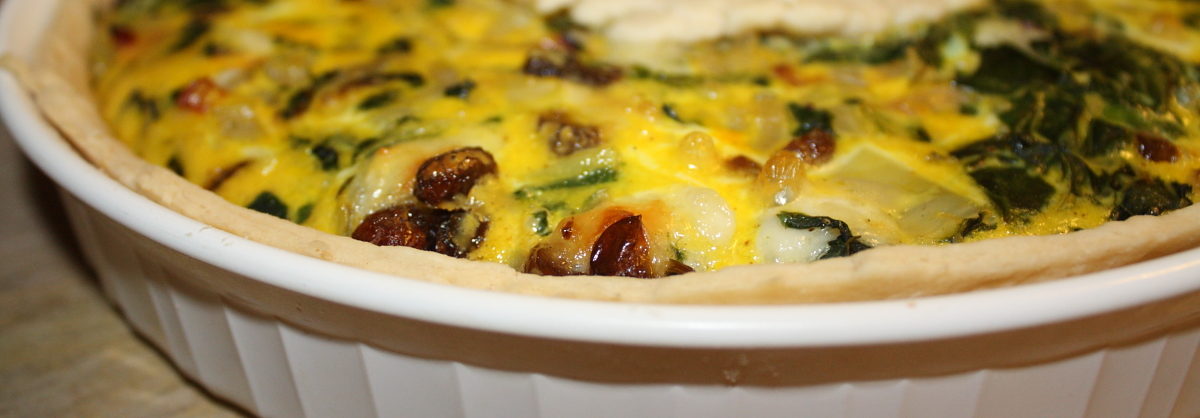
As we move into the cooler months, we start getting cool weather crops from the CSA. Things like kale, collards, mizuna, tatsoi, and chard. After five years of being with the CSA we’ve gone from “what is that? And what are we going to do with it?” to “Great to get kale again! Let’s make kale chips!” We never had the former problem with chard. It’s a lot like spinach, and a simple steaming or sauté will make it into a nice side. But sometimes it’s nice if it stands out, as it does in chard pie.
Chard Pie
Ingredients
- 1 bunch Swiss chard
- 1/2 cups walnuts chopped
- 3 Tbs raisins chopped
- 4 eggs
- 2/3 cup cream
- 1/4 tsp ground nutmeg
- 1/2 cup Cheddar cheese grated
- 1/3 cup Parmesan cheese grated
- 1 pie crust in a 9" tart/quiche/deep dish pie pan.
Instructions
- Preheat oven to 350°F.
- Wash and shred the chard. Make sure to chop the stem portions about 1/8-inch thick.
- Put the chard in a saucepan with about an inch of water and bring to a boil. Stir and cook for about 5 minutes.
- Cool and drain, squeezing out the excess water.
- Mix the cheese and chopped raisins into the chard.
- Sprinkle whatever nuts you are using on the crust.
- Spread the chard/cheese/raisin mixture on top the nuts.
- In a small bowl, whisk the eggs, the cream, and the nutmeg until well blended, then pour the mixture over the chard.
- Bake for about 45 minutes, or until golden.
Ingredient discussion:
Feel free to substitute on the nuts; hazelnuts would be nice, so would pepitas (shelled and toasted pumpkin seeds), or even pecans. Same with the cheese. We didn’t have Cheddar or Parmesan, so we went with mozzarella. No cream? Use milk; it won’t be as rich, but it’ll be good. For pie crust, make your own, of course. It’s not too difficult. If you don’t have a recipe, we’ll be posting one. Don’t omit the raisins or the nutmeg; these two items move this dish from a simple quiche to something outstanding.
Procedure in detail:
Preheat oven to 350°F.

Wash and shred the chard. Wash thoroughly. Like spinach, chard can hold dirt in the wrinkly leaves so double or triple wash if need be. For greens, we find it helps to swish them in a large bowl filled with water and a small amount of white vinegar. When you shred the chard, make sure to chop the stem portions about 1/8-inch thick. They’ll cook better that way and you won’t bite into a big chunk of stem.

Steam the chard. Put the chard in a saucepan with about an inch of water and bring to a boil. Stir and cook for about 5 minutes, or until the chard wilts and becomes tender. Cool and drain (save the broth; it’s good stock), squeezing out the excess water, so you won’t end up with a soggy, gloppy, nasty crust. We know you don’t want that.

Mix the cheese and chopped raisins into the chard. Once the chard is cool the cheese isn’t going to melt, so we just mix it all up in the draining colander. Less cleanup is a good thing.

Sprinkle the nuts. Sprinkle whatever nuts you are using on the crust. You don’t want the crust completely covered, but you want enough nuts so there’s some in each bite.

Add filling. Spread the chard/cheese/raisin mixture on top the nuts. You should end up with a layer about an inch thick.

Add eggs and cream. In a small bowl, whisk the eggs, the cream, and the nutmeg until well blended, then pour the mixture over the chard. It should come close to covering. If there is leftover crust, roll it out, cut it into a fancy shape and place it on top. We choose a nice round blob shape. It was a lot of trouble, but it’s worth it. Okay, Martha, if you want a fancier shape, go for it. But remember, it’ll get cut apart in no time and no one will say that your hand-sculpted chard leaf accent was any better than the rest of the crust.

Bake. Bake for about 45 minutes, or until golden. Then serve and enjoy.
This recipe is a bit more involved, so we don’t make it every time we get chard; on that basis, we’ll give it 4 stars.

