
Don’t you love the light, crumbly, flaky bite of a good scone? Along with the taste of nuts, and a bit of sweetness? Not too sweet, because sometimes we like to have more than one. We sure do, which is why we feel fortunate to have the best scone recipe ever. Really. It’s perfect, and it’s super flexible. We’ve used this recipe as the base for at least a half dozen different scones, and all of them tasted great. You can use the same base recipe, too.
Now, the recipe might look daunting with all those odd measurements, but it’s really not a difficult recipe, by any means. Once things are measured, the scone dough goes together in a snap, and here’s the best part. The scones are frozen before baking. Why is that the best part? That means you can bake up just one or two (or more), any time you want a nice, fresh scone. See, that’s the best part.
This recipe is based on Bouchon Cheddar Scones, which we first made long ago and have been changing up ever since.

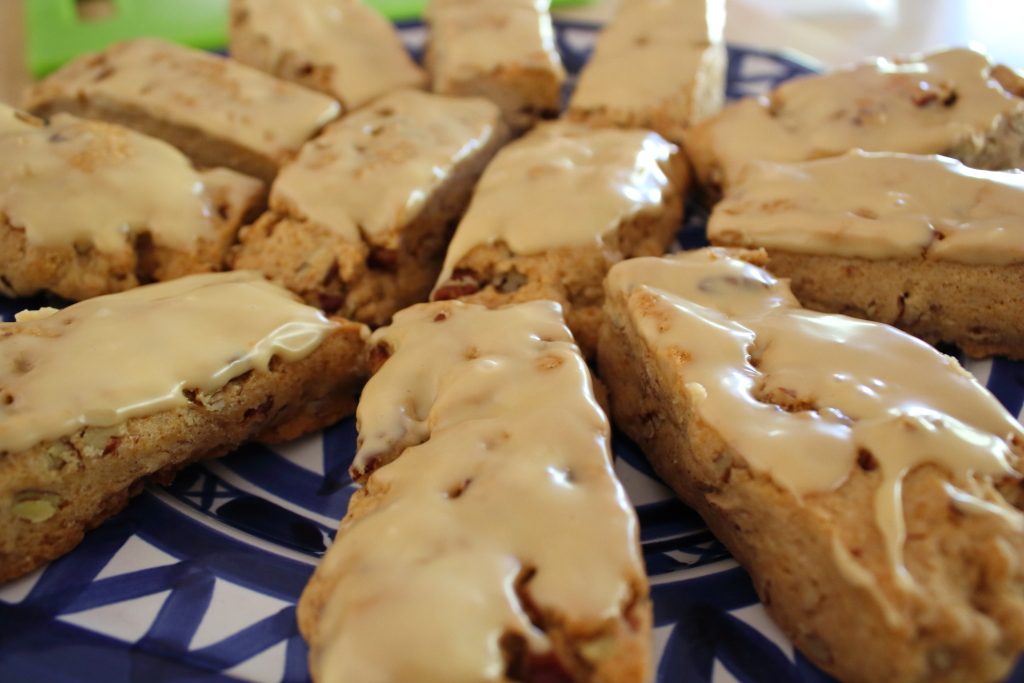
Maple-Glazed Pecan Scones
Ingredients
For the scones
- 107 g all-purpose flour (3/4 cup + 1 tsp)
- 196 g cake flour (1 1/2 cups + 1 Tbs)
- 8.1 g baking powder (1 1/2 tsp + 1/8 tsp)
- 1.6 g baking soda (3/8 tsp)
- 3 g ground cinnamon (1 tsp)
- 27 g brown sugar (packed 2 Tbs + 3/4 tsp)
- 3.6 g kosher salt (1 tsp)
- 132 g cold unsalted butter, cut into 1/4-inch cubes (9 Tbs + 1 tsp)
- 71 g heavy cream (1/4 cup + 1 Tbs)
- 69 g crème fraîche or homemade sour cream (1/4 cup + 1 Tbs) (see note)
- 90 g chopped pecans (3/4 cup)
For the glaze
- 60 g confectioners’ sugar (1/2 cup)
- 50 g maple syrup (~1/4 cup)
Instructions
For the scones
- Sift the flours, baking powder, baking soda, cinnamon, and sugar into the bowl of a stand mixer fitted with the paddle attachment. Add kosher salt and mix for about 15 seconds.
- Add butter pieces and pulse to start combining, then mix on low until butter is completely incorporated, about 3 minutes. If there are visible butter pieces remaining, break them up and mix in with your fingers.
- With mixer on low, slowly add cream and crème fraîche. Mix until all ingredients are moistened and dough forms around the paddle, about 30 seconds.
- Add pecans and pulse until mixed.
- Turn dough out onto a work surface, and, using the heel of your hand and a dough scraper, press the dough together and form a 7×9-inch rectangle. Wrap in plastic, and refrigerate for 2 hours.
- Cut dough lengthwise to form two 9×3 1/2 inch strips, then cut each strip into 6 bars, each 3 1/2 x 1 1/2 inches in size. Place on a baking sheet lined with a silicone baking mat or parchment, wrap in plastic, and freeze at least 2 hours, preferably overnight.
- (Once frozen, the scones can be placed in a plastic bag and kept frozen for a month.)
- Preheat oven to 350°F. Place a rack in the center of the oven and line a baking sheet with parchment or silicone baking mat.
- Arrange frozen scones on baking sheet, leaving about an inch of space between them.
- Bake 33 to 36 minutes, rotating front to back halfway through, or until scones are golden brown.
- Let scones cool completely on the baking sheet.
For the glaze
- Place confectioners' sugar in a small shallow dish. Add maple syrup about a tablespoon at a time, stirring after each addition, until you have a thick liquid.
- Dip the top of each scone in the glaze, and place back on the baking sheet. Let dry for about 15 minutes before serving.
Notes
Ingredient discussion:
There are two camps of people who look at the ingredient list: those with scales, who say, no problem, and those without, who say, woah, that’s crazy, who’s going to measure like that? We’re here to tell you that you want to be in the former. We originally got our scale to amp up our bread making, and, to be honest, we use it nearly every day; it’s that useful. Really, and truly. It’s the best $15 dollars we’ve spent. For example, to measure our flours, we simply place a bowl with the sifter in it on top of the scale, hit the tare button, then scoop in all-purpose flour until we have 107 g, then hit tare again to reset the scale back to zero, and scoop in 196 g of cake flour. Done with the flour, time to move to the next ingredient. That said, we still measure small amounts, such as the baking soda and baking powder, with a measuring spoon.
Procedure in detail:
Mise en Place. Want another tip to make your baking fun and easy? Measure out everything before you start. Just as they do on TV shows. They do that for a reason; partly it makes the show more interesting, but, the real reason is that it’s faster. Once everything is measured, you just flow from instruction to instruction, and before you know it, you’re finished.
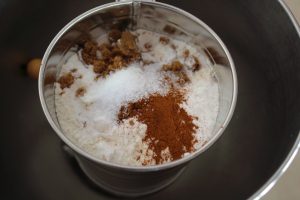
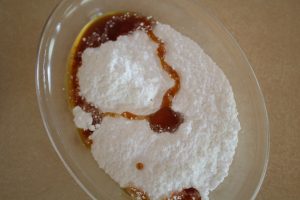
Sift dry ingredients. As part of your mise en place, sift together the all-purpose flour, cake flour, baking powder, baking soda, cinnamon, brown sugar, and, if your kosher salt is fine enough, sift that, too. Otherwise, add it to the mixer bowl, and, with the paddle attachment, mix for about 15 seconds. Note that some of the brown sugar might not sift, either, so mix that in too, if needed.
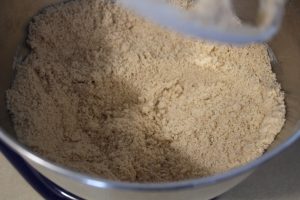
Add butter. Take the pieces of butter from the refrigerator and scrape them into the flour mixture. Quickly pulse the mixer off and on to start incorporating the butter. Pulsing in this way will make it less likely that flour will shoot over the top of the bowl and onto the counter (and the floor). Once you think the flour won’t shoot out, turn the mixer on low and let it run for about 3 minutes until all the butter is incorporated. If there are any pieces of butter still visible, break them apart and incorporate them into the flour using your fingers.
Add cream and crème fraîche. With the mixer on low, slowly pour in the cream and crème fraîche and continue to mix until all the dry ingredients have been moistened and dough forms around the paddle, about 30 seconds.
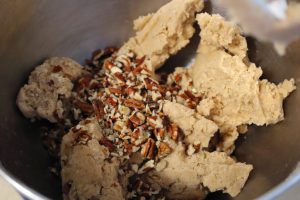
Add pecans. Add the pecans and pulse the mixer a few times to start mixing them in, then turn the mixer on low and mix until they’re completely incorporated, 15-20 seconds.
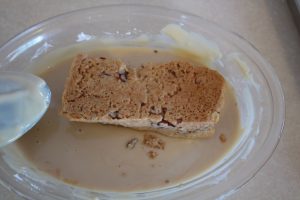
Shape. Scrape the dough out of the bowl and onto a clean work surface. Using the heel of your hand and a dough scraper, shape the dough into a rectangle roughly 7×9 inches in size.
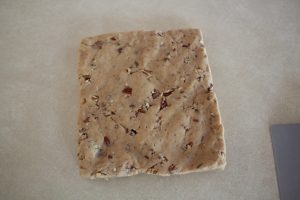
Refrigerate. Wrap the dough in plastic and place it in the refrigerator to chill for about 2 hours.
Cut. Once the dough has chilled, take it out and place it back on the work surface. Cut the dough in half length-wise to make two rectangles, each about 3 1/2 x 9 inches. Cut each rectangle cross-wise into six equal pieces about 3 1/2 by 1 1/2 inches in size. Transfer each to a baking sheet lined with parchment or a silicone baking mat, leaving space between each scone.
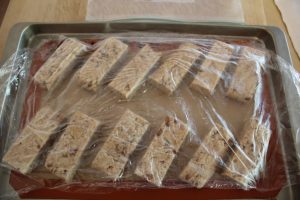
Freeze. Wrap everything in plastic and place in the freezer until solid, at least 2 hours, but, preferably, overnight. Yep, scones for breakfast! After the 2 hours are up, you can transfer the scones to a plastic bag and they’ll keep in the freezer for up to a month.
Preheat oven to 350°F. Move a rack to the center of the oven and line a baking sheet with parchment (preferred) or a silicone baking mat.
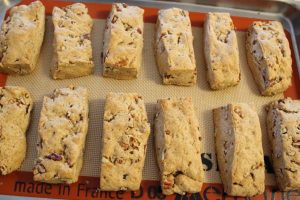
Bake. Place scones on the prepared baking sheet, leaving about an inch of space between them. Slide into the oven and bake until golden brown and puffed, about 33 to 36 minutes.
Cool. Let the scones cool completely on the baking sheet.
Make glaze. While the scones are cooling, that’s the time to make the glaze. Place the confectioners’ sugar in a shallow dish, big enough to dip the scones in, and add the maple syrup, about a tablespoon at a time, stirring completely before adding more. Continue adding until you have a thick glaze that sticks to the spoon.
Dip and dry. Dip each scone into the glaze, topside down, then place back on the baking sheet until the glaze has dried a bit, about 15 minutes, before serving.
Great! We love the pecans in the scones. They aren’t too sweet, even with the maple glaze, almost more savory with a nice taste of sweet maple. The scones themselves are nice and flaky, breaking apart crisply with each bite. A five star scone.
