
Okay, let’s all get our attention to detail in focus, because we’ll be making another recipe from Bouchon Bakery, by Thomas Keller and Sebastian Rouxel. For those of you who’ve read the recipes in their book, you know that attention to detail is what it’s all about. Many of the recipes are, in fact, pretty easy, provided you proceed step-by-step, and this one is no different.
We’ll first note that we made this recipe over two days, and we’ll let you know exactly where we stopped the first night. You could do it all in one day, but, if you don’t want to feel rushed towards the end, try it over two days. But, even if you make these all in a day, nothing in this recipe is really difficult or tricky. It takes a while because the dough is refrigerating or proofing, nothing more.
Let’s scratch ’em out.
Garlic Comté Breadsticks
Ingredients
- 28 g garlic oil (2 Tbs)
- 136 g grated Comté cheese (1 1/4 cup)
- 234 g all-purpose flour (1 2/3 cup)
- 1 tsp fine sea salt (5.5 g)
- 1 1/4 tsp instant yeast (4.5 g)
- 117 g water, room temperature (1/2 cup + 2 Tbs)
Instructions
- To make garlic oil, simmer 2 cloves of garlic in 3-4 Tbs of canola oil over low heat for 40 minutes. Remove cloves, cool, then measure out the needed oil.
- In a double boiler over barely simmering water, heat garlic oil. Add cheese and stir until melted; the oil will separate. Remove from heat, but let stand over the hot water.
- Mix together flour, salt, and yeast in the bowl of a stand mixer fitted with the dough hook attachment, running the mixer on low for about 1 minute.
- With the mixer still on low, slowly add water, followed by melted cheese.
- Mix and knead on low for 30 minutes, stopping as needed to scrape dough off the hook or the sides of the mixing bowl.
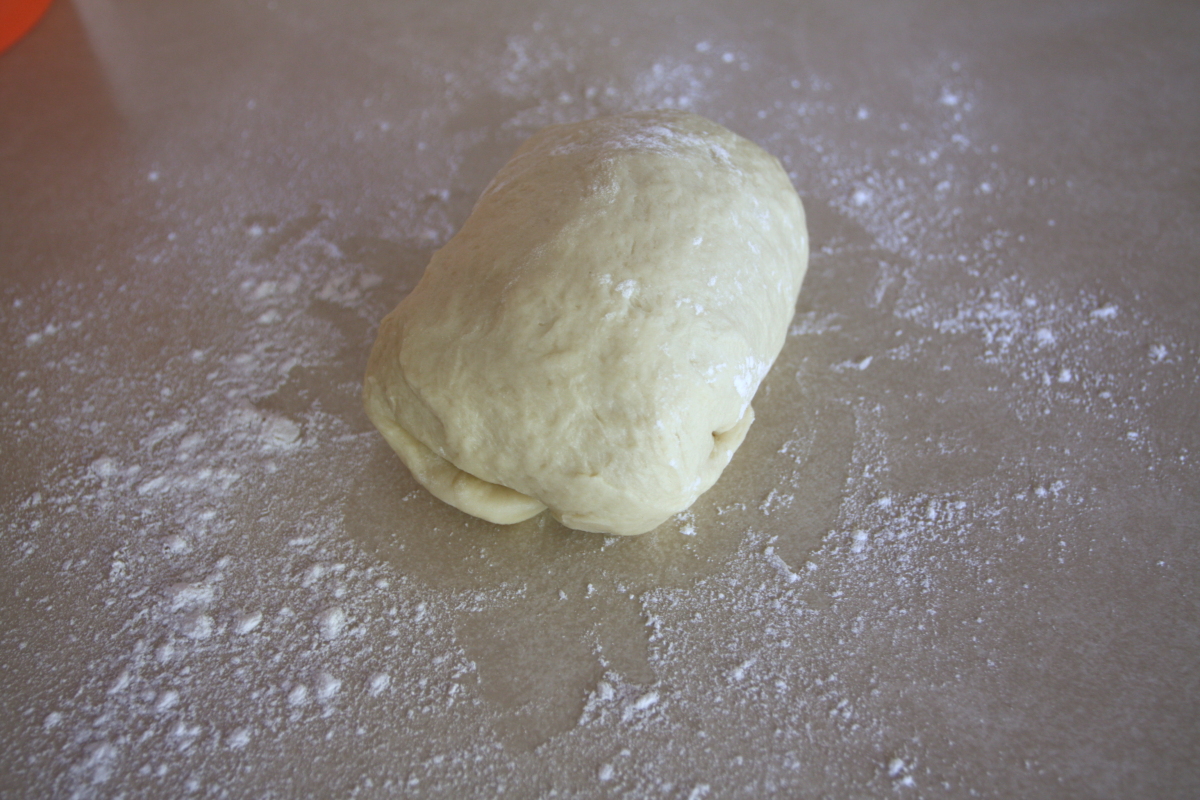
- Turn out onto a lightly-floured work surface, stretch and fold the dough over, and place in a lightly oiled bowl. Cover and let stand 15 minutes.
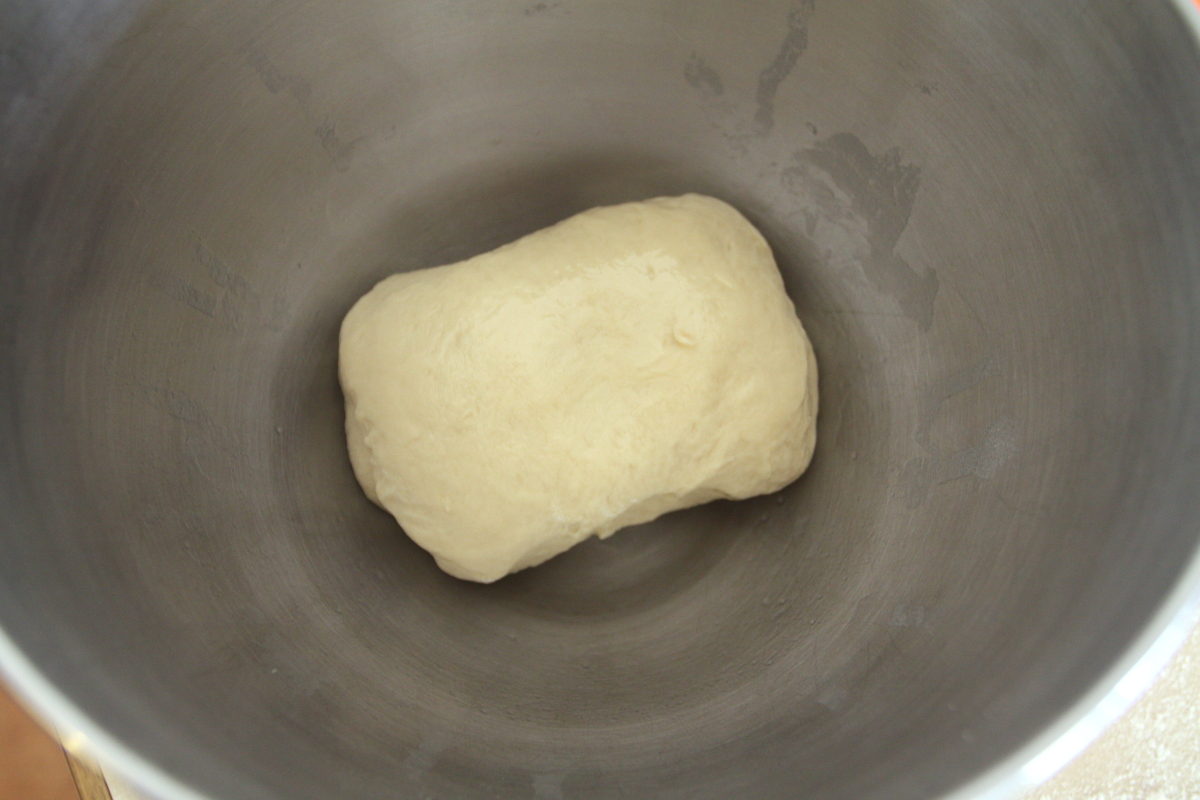
- Place the dough on a lightly-floured surface and shape into a block 4" x 5" x 1". Place on a baking sheet lined with parchment, cover, and refrigerate 3 to 4 hours, or overnight.
- Roll out dough into a rectangle 15" x 9" x 1/4" thick. Cover and return to refrigerator for 1 hour.
- Trim rectangle to 14 x 7 1/2 inches, retaining scraps to bake as a chef's snack. Cover and refrigerate for 1 hour.
- Cut dough into breadsticks 3/8 of an inch wide and place 1/4 inch apart on lined baking sheets. Cover and let proof for 60 to 90 minutes or until a depression remains when pressed lightly with a finger.
- Place a baking stone on the middle rack and preheat the oven to 325°F.
- Set one baking sheet at a time on the baking stone, and bake for 22 to 24 minutes, rotating the sheet halfway through, or until the breadsticks are a golden brown.
- Remove an let cool completely on the baking sheet.
Ingredient discussion:
Garlic oil: no, you don’t have to run to the store to buy it; we’ll show you how to make it below. You’ll need garlic cloves and a light oil, such as canola. Comté cheese is a French cheese, somewhat like Swiss or Gruyère. If you can find it, great; if not, we think a good Gruyère or Swiss will work fine. Do you need fine sea salt? Maybe not, but, again, if you have it, why not use it?
Procedure in detail:
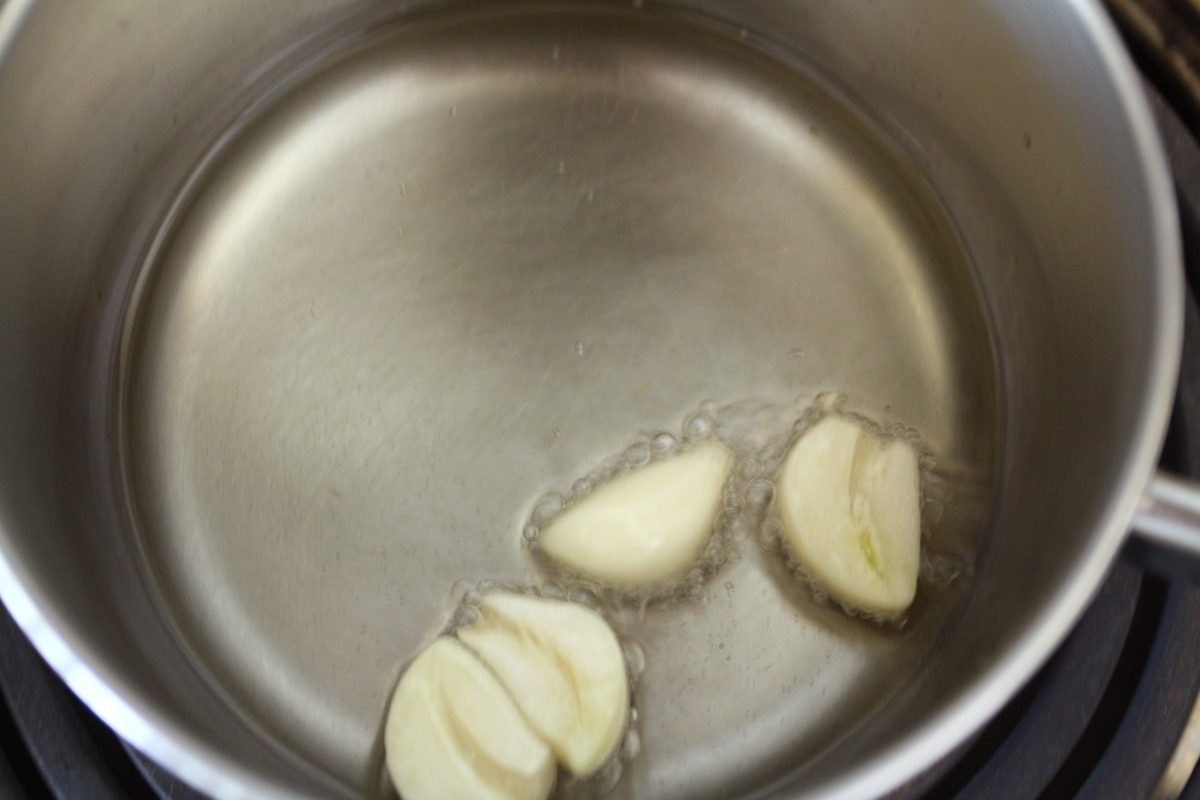
Make garlic oil. Peel and slice garlic cloves in half. if desired, remove the shoot from the middle, then place in a small saucepan with 3-4 tablespoons of a light oil, such as canola, and simmer over low heat for 40 minutes. Remove cloves and let cool. You’ll have more oil than needed for this recipe, but the remaining can be used for other dishes, or as a dipping oil for bread.
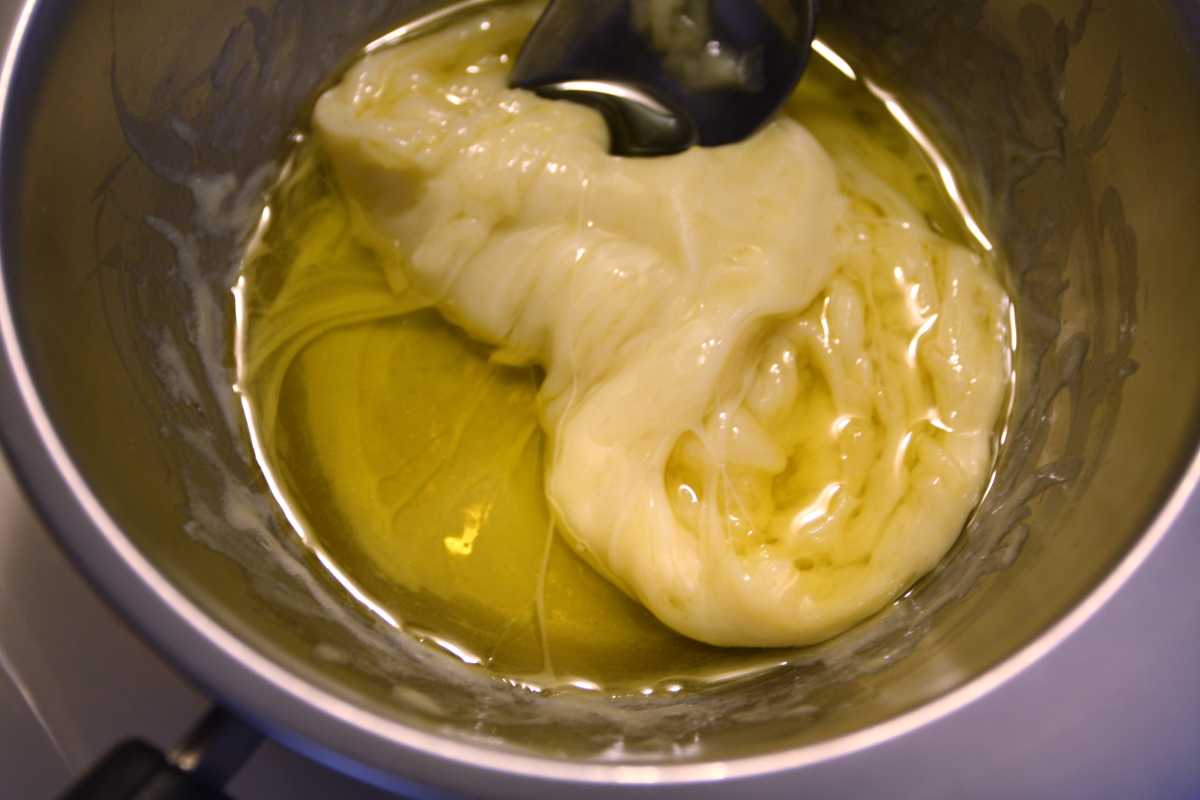
Melt cheese. Heat the 2 tablespoons of garlic oil in a double boiler over barely simmering water. When hot, add cheese and stir until melted. The cheese and oil will not combine. If anything, the cheese will release even more oil as it melts. This is normal. Once the cheese melts, turn off the heat, and let the cheese and oil sit over the hot water.
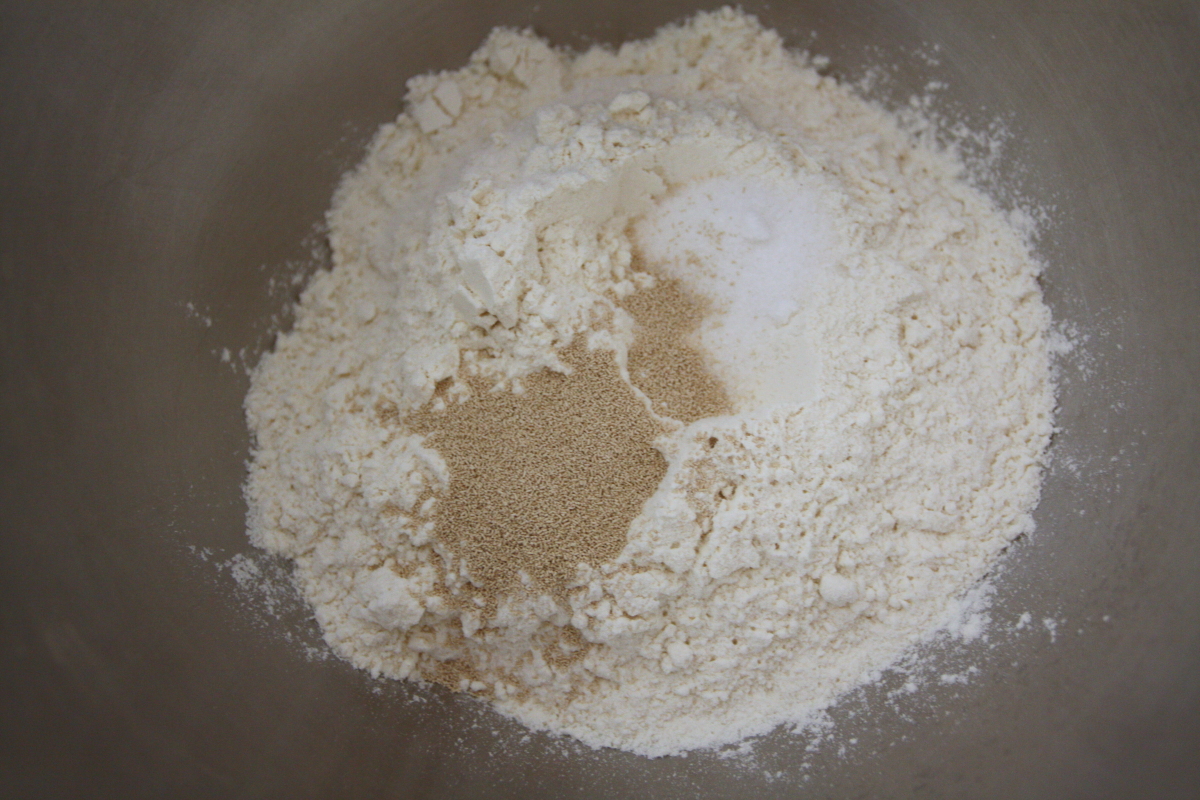
Combine drys. In the bowl of a stand mixer fitted with the dough attachment, mix together the flour, salt, and yeast. You can do this with a spoon, or, as we do, you can set the bowl on the mixer and run it on low for about a minute.
Add water and cheese. With the mixer still on low, slowly add the water, followed by the cheese and oil mixture. In a minute or two, a dough should form around the dough hook.

Knead. Let the mixer knead the dough for 30 minutes. If needed, scrape the dough off the sides of the bowl and off the hook to ensure that everything is mixed thoroughly and no cheese lumps remain.
Shape. Turn the dough out onto a lightly- floured surface, pull one corner out and up and over the top of the dough (yeah, we know, there really isn’t a corner, but do your best). Repeat with the other four corners.
Rest. Lightly oil the mixing bowl and place the dough in the bottom, seam side down. Cover (we use a plate), and let the dough rest for 15 minutes.
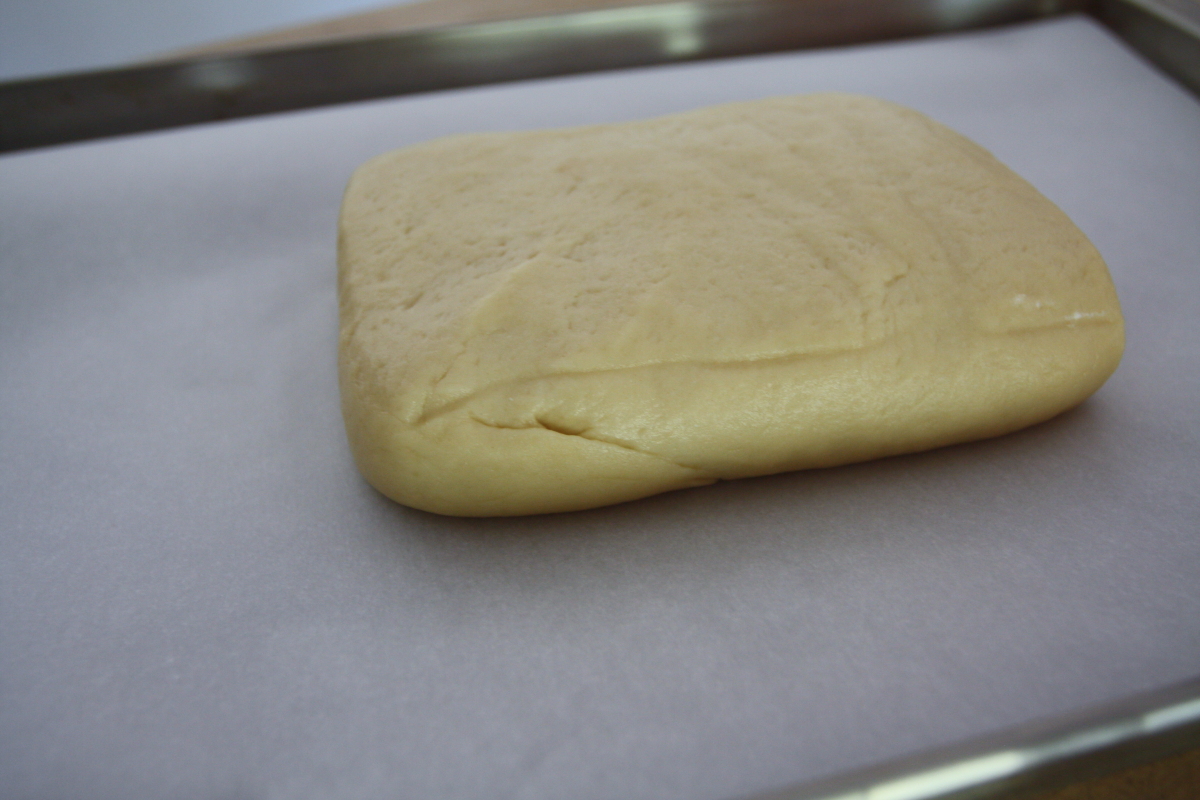
Shape. Turn the dough out onto your floured surface, and use a dough scraper and your hands to shape into a block roughly 5 x 4 inches in size and about 1 inch thick.
Rest. Place the block of dough on a baking sheet lined with parchment, cover, and refrigerate for about 3 to 4 hours. If you want, this is a great place to stop for the day. Once covered, you can let the dough sit in the refrigerator overnight and start up fresh the next day. That’s what we did and everything was fine.
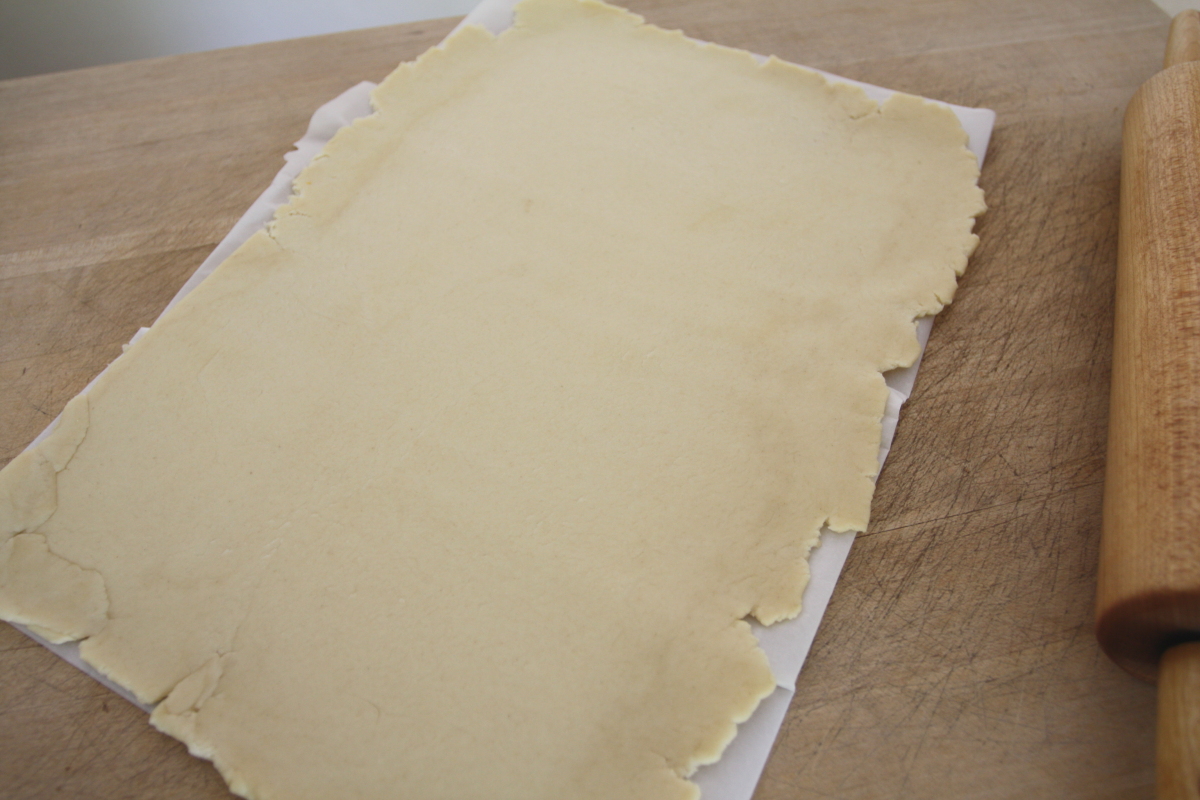
Roll out. Ah, the next day. Take the dough out of the refrigerator and off the baking sheet (but still on the parchment), and roll the dough out into a rectangle 15 x 9 inches and about 1/4 inch thick. Don’t worry if the edges are ragged; we’ll be trimming those off in a bit.
Rest. Return the dough to the baking sheet, cover with plastic wrap, and refrigerate for 1 hour.
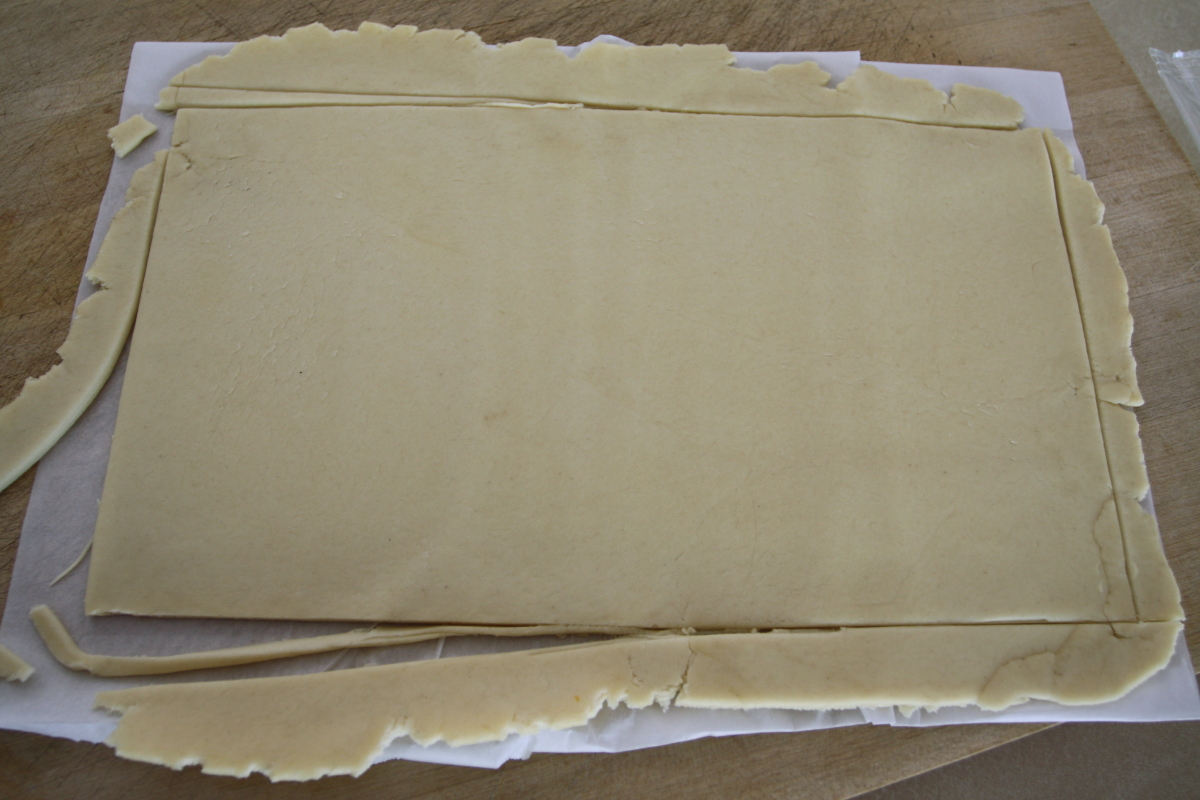
Trim. Take out the dough and trim away the edges, leaving a rectangle 14 x 7 1/2 inches in size. Keep those trimmings to bake up as a chef’s snack. We baked these pieces first; that way, we knew the oven would be completely hot when we put in the nicely-shaped sticks.
Rest. Yep, cover the dough once again, and put it back into the refrigerator for, you guessed it, 1 hour.
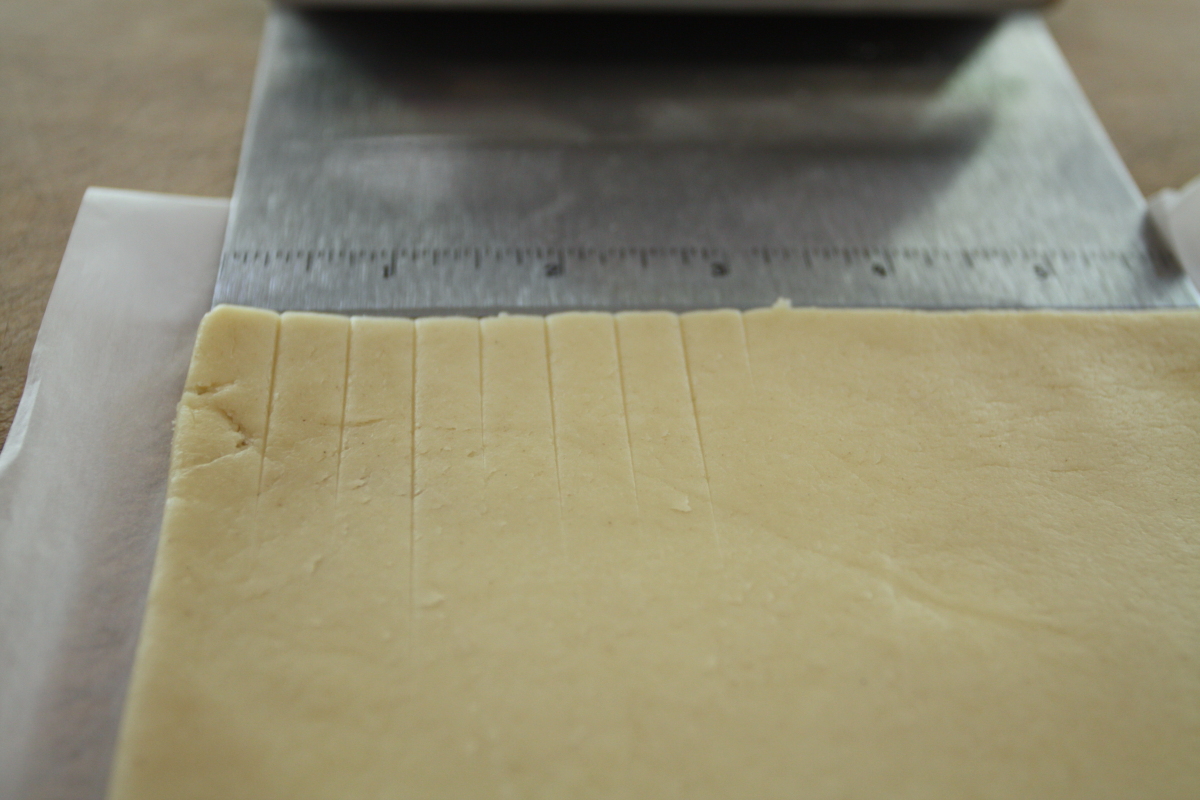
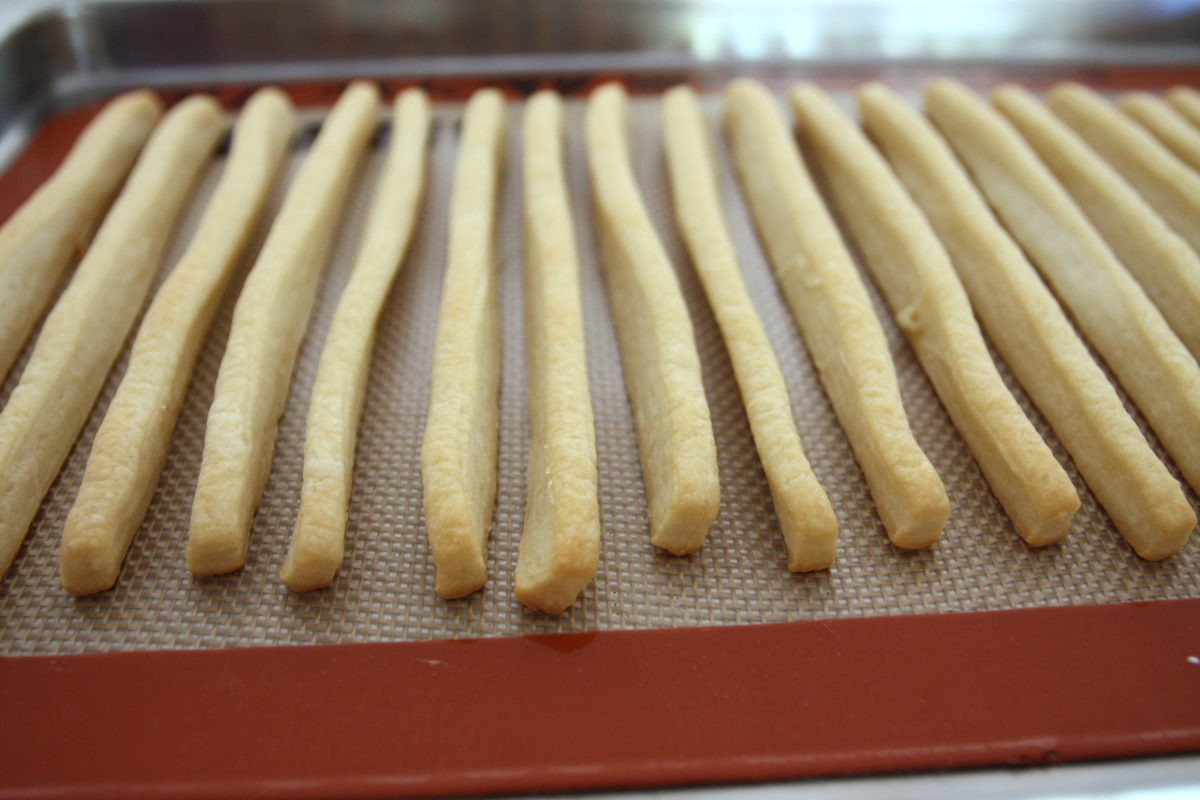
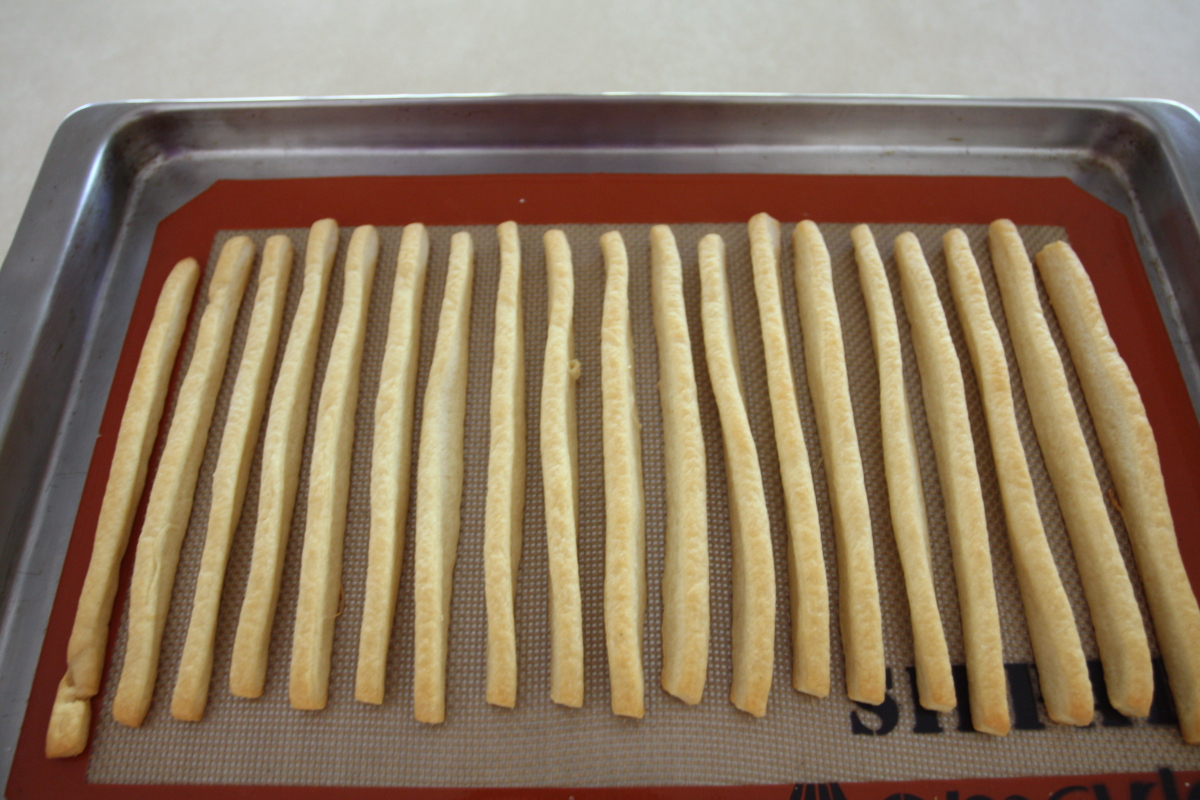
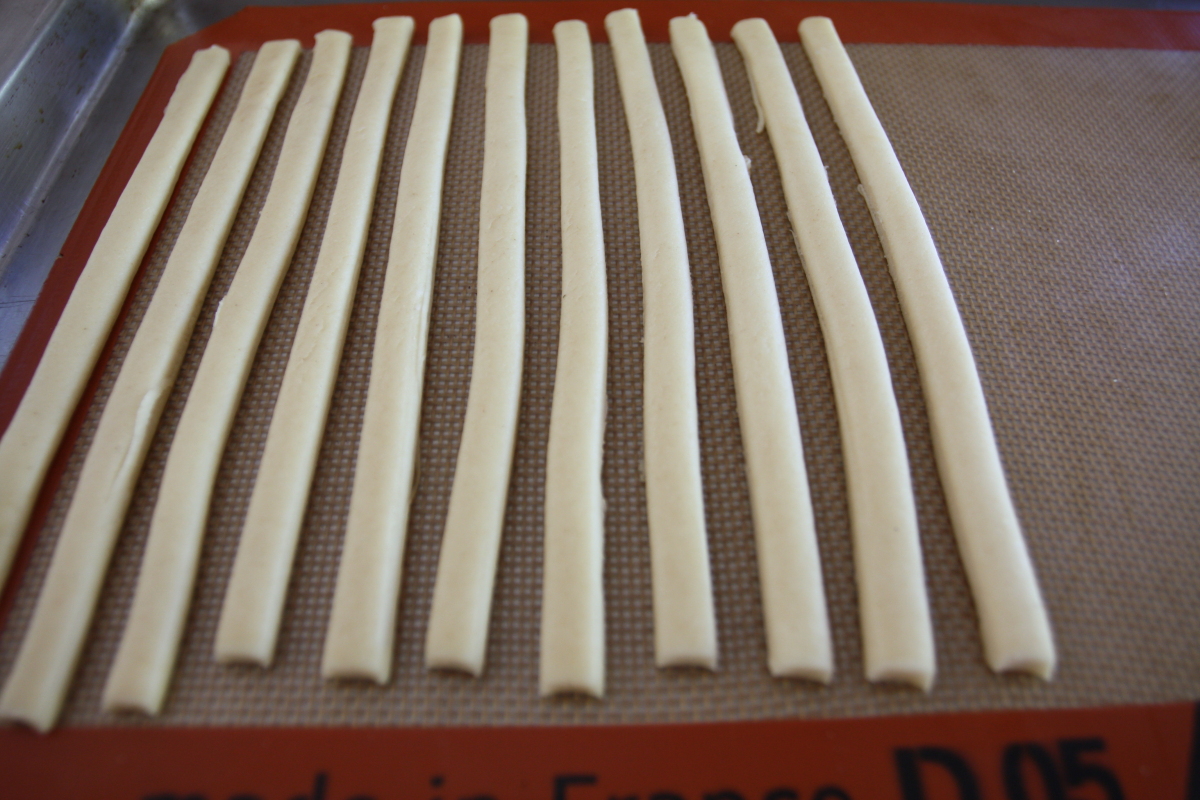
Cut. It’s detail time! Carefully measure and mark the dough along the long sides in 3/8 inch increments. We found it easiest to mark off a 3-inch length, place a mark in the middle, dividing that length in two equal (1 1/2 inch) pieces, then mark the middle again, dividing each of those segments (making four), and finally, dividing those four segments in half again, making eight marks 3/8-inch apart. Now, using the marks as guides, cut the dough into strips 3/8 inch wide by 7 1/2 inch long and transfer to a baking sheet lined with silicone baking mats or parchment. Place the bread sticks about 1/4 inch apart. You should end up with two sheets of about 18 sticks each.
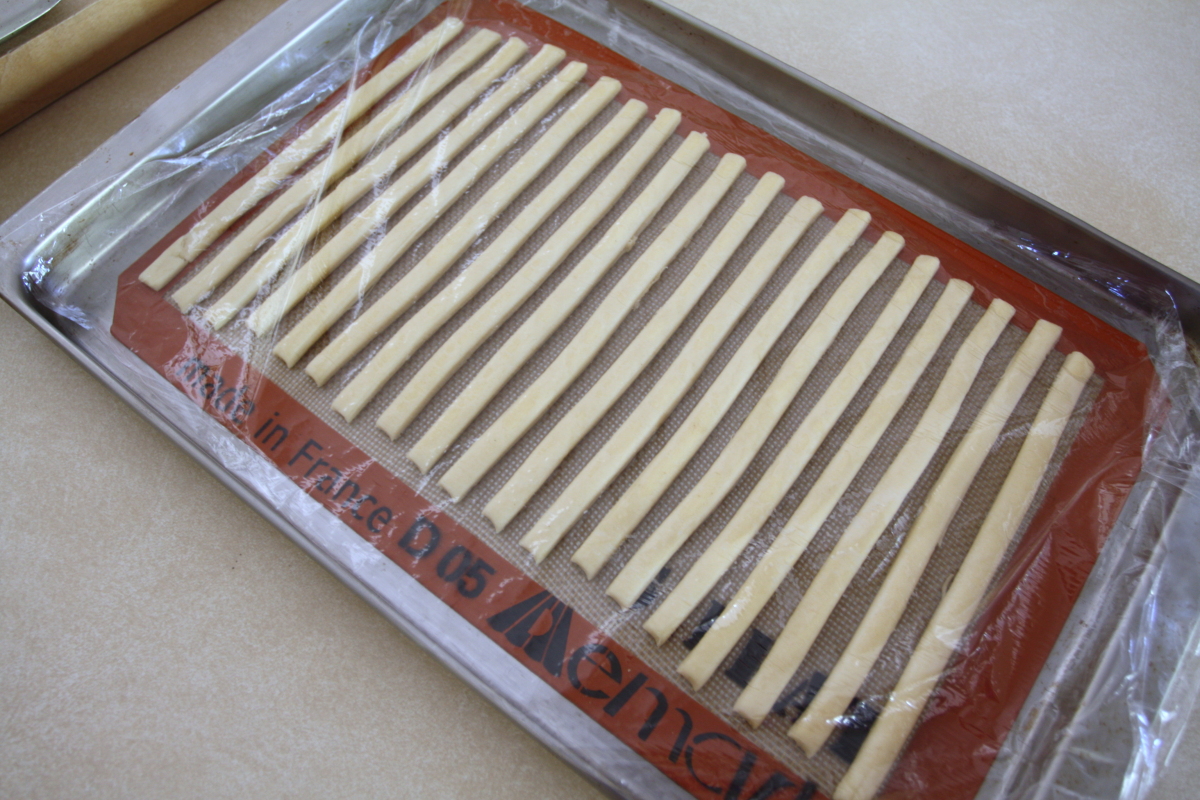
Proof. Cover the sheets with plastic and let the sticks rise in a warm draft-free place for 60 to 90 minutes, or until a depression remains in the dough if pressed lightly.
Preheat oven to 325°F. Move a rack to the middle of the oven, and, if you have one, place a baking stone on the rack and preheat both the oven and stone for 20 to 30 minutes.

Bake. Place one of the baking sheets directly on the stone and bake for 22 to 24 minutes, rotating the sheet halfway through, or until the breadsticks are golden brown.
Cool. Let the breadsticks cool completely on the pan before storing them in an airtight container or eating them.
We always like making a recipe from Thomas Keller’s books. They give us the opportunity to work as carefully as we can, without worrying too much about whether the recipe will turn out (it always does). So, we just focus on doing each step, taking the time to measure our breadsticks, laying them out just so on the baking sheet, and watching them in the oven in anticipation because we know that they’ll be great.
And they were. We didn’t see it in the ingredient list, but these must have been laced with crack, as we just couldn’t stop eating them. We ate all our chef’s snacks, then, even though we’d made these for other people, we started eating the nice ones, too, justifying it with, “oh, this one’s not perfect, so we’d better eat it.” We were glad when we finally dropped them off or we would have eaten every single crack-laced bread stick. We won’t even dignify our gluttony by calling out our rating.
