
Pain d’epi, or epi for short, is a nice way to shape your bread to encourage sharing — yes, home scratched is really good, and you want to hog it all for yourself, but, humor us; sharing is good, too. It looks really fancy, but is actually really simple. After all, professional bakers wouldn’t make huge numbers of epis if it were difficult, right? And, even if you’re not a professional, after this little tutorial, you’ll be making these loaves, too.
Yesterday, we showed how to make baguettes with a recipe that made about ten baguettes; however, if you looked at the pictures closely, you would have seen only six. That’s because we made some epis, too. It’s always nice to have different shapes, and perhaps surprisingly, different shapes can taste different and will have different textures. It’s true that different shapes bake differently. The most obvious example is pita bread, which seems so different from ordinary loaves, but we make them both with the same bread dough recipe.
We’ll assume you’ve already made the bread dough and that it’s risen and ready to shape, so let’s get scratchin’ and shape some epis!
Cut dough. We find that 400 grams of dough is enough to make a good-sized epi. It’ll fit on our baking sheets and in our oven, and, while it’s smaller than the ones professional bakers make, it’s nice to make these at home. So, cut off a chunk of dough that’s about 400 grams in weight. A few grams either way won’t really matter. You’ll note that this is twice the amount used for a baguette, so, from a batch of basic French bread dough, we get six baguettes and two epis.

Shape. Shape the dough as if you were forming a large baguette. Take the cut seams and fold them up and around the bottom, sealing it up by pinching the dough together. While shaping, stretch out the dough so that it’s about 16 to 18 inches long, trying for a nice point at each end.
Rise. Place the (future) epi on a piece of parchment (we’ll be cutting through the dough later; that’s why we use parchment and not a silicone baking mat) with the seam side down, cover with a cloth, and let rise until doubled in size, about 45 minutes, if you’re using the basic French bread recipe posted yesterday.
Preheat oven to 450°F. Arrange the oven racks so you can bake two sheets at the same time.
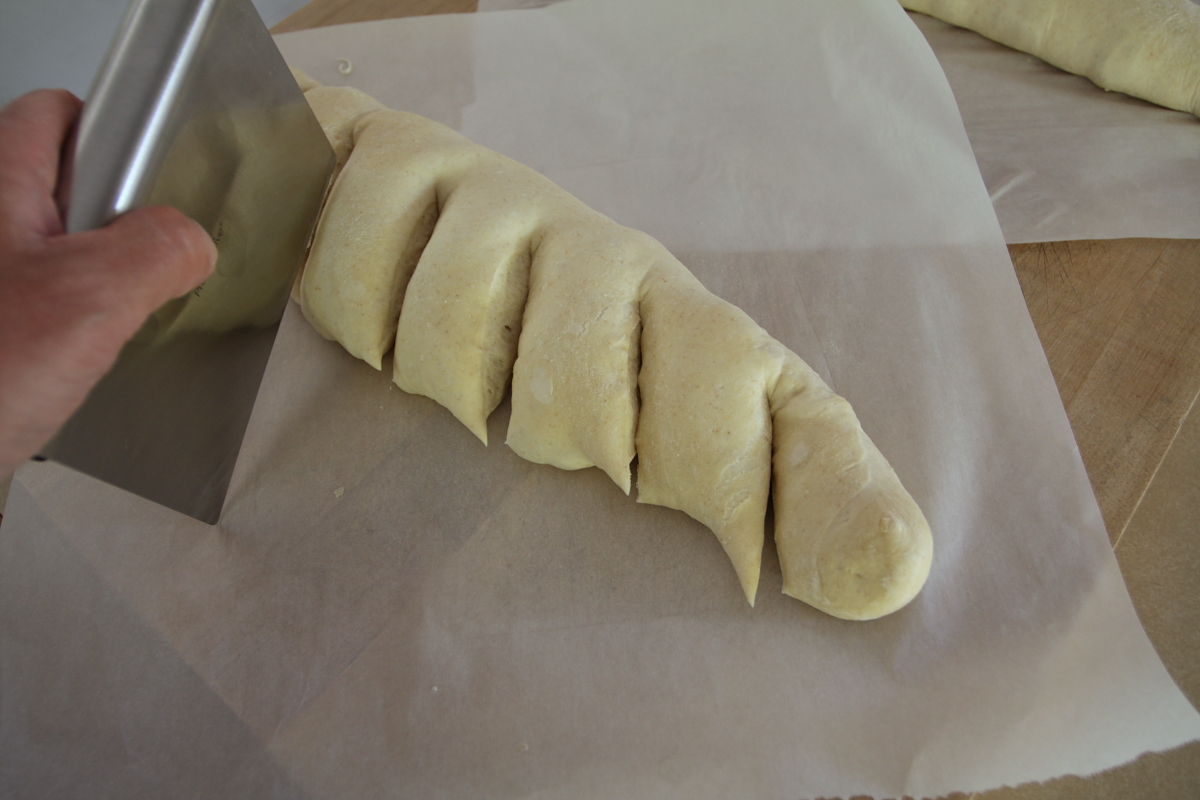
Cut. Once the dough has doubled and is quite puffy, cut partly through the dough at a 45° angle from top to bottom, leaving about an inch of dough uncut. The cuts should be about 2 inches apart. We find that a bench knife works well for cutting.
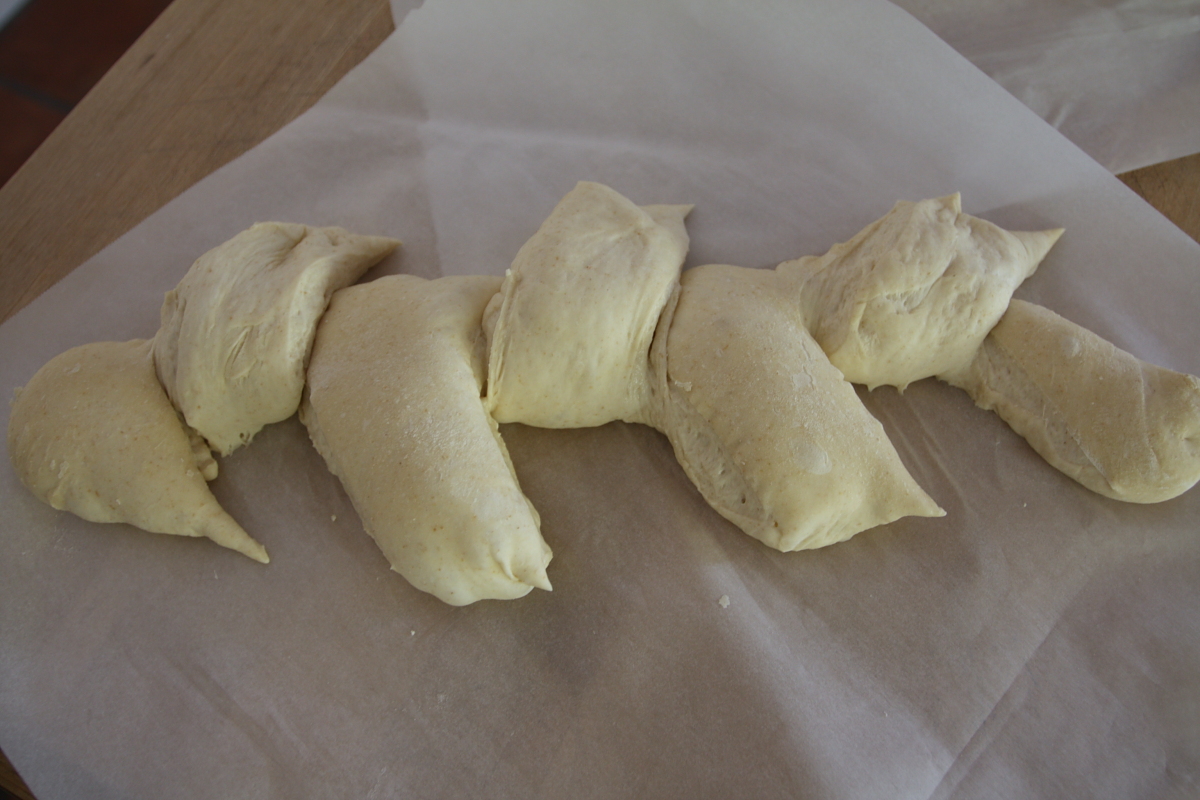
Fold and transfer. Now, fold over every other “leaf”. Done! You’ve shaped an epi. Leave the epi on the parchment and transfer to a baking sheet (you might have to angle it to get it to fit).
Bake. Slide the epis (the more you can bake at the same time, the better) into the oven and bake for 26 minutes, or until golden brown and hollow-sounding when tapped with the finger tips.
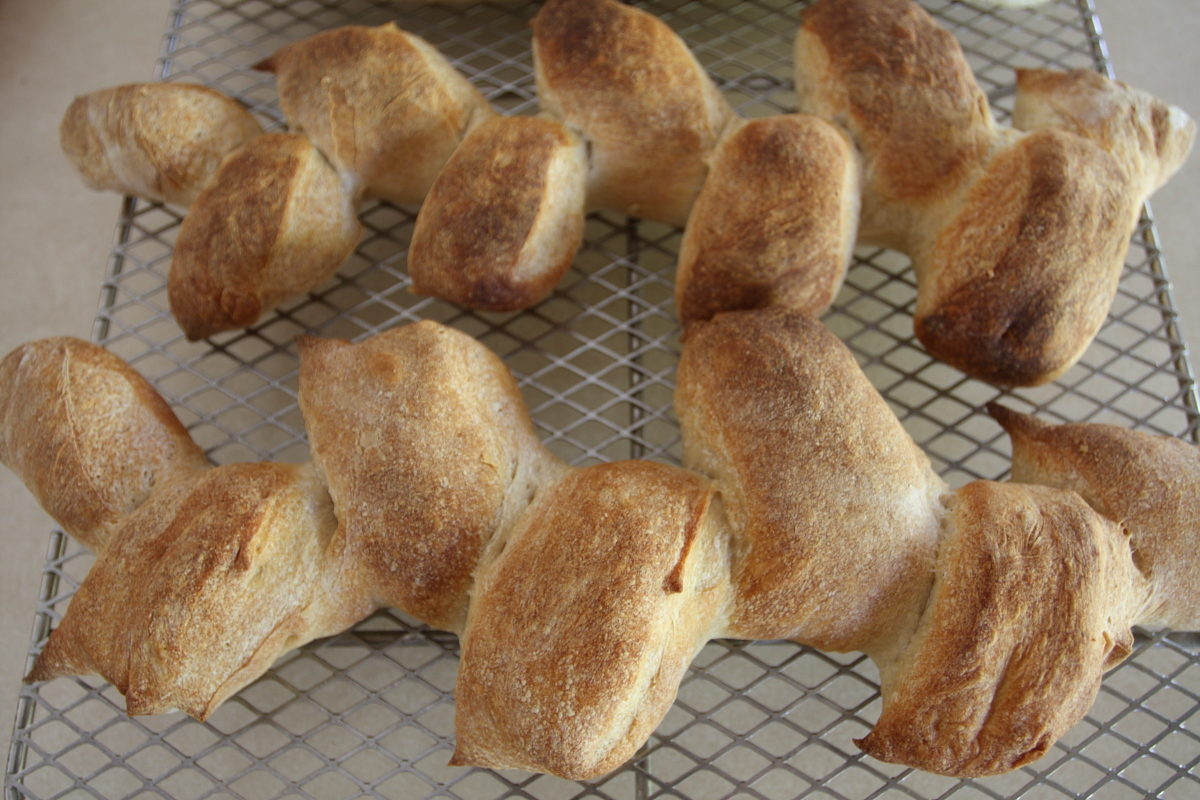
Cool. Let cool completely, and take a picture of your beautiful epi to show off.
Epis are great for eating with dinner. Everyone can tear an ear off, and immediately have a personal-sized loaf of bread. And, they look like a professional made your bread, so people will ask “who’s you baker?” Just say, “I made these because I thought they’d be fun.” The only downside is that it’s so easy to tear off the ears, in no time at all, your epis are gone.